I did it. I have succumbed to the craziness and stoopidity in these parts that surrounds a forecast of the potential of wet things falling from the sky. I usually scoff and run the other way, and never ever ever (EVER) go anywhere near a grocery store. Gotta stay out of the way of all those people stocking up on milk, bread and TP. What, they didn't shop over the weekend? And how is it they are ALWAYS out of those three things?! No one buys lunch meat? Or soda? Or ... anything else?
But after my 6-hour commute home last week, I've found a new respect for this area's inability to keep up with the plowing when the stuff falls mid-day. Also, this impending storm is being touted as the worst in like - forever! I think they've closed Oklahoma and Illinois already, in addition to several sections of I-70.
So on the way home I ... stopped at the grocery. I did. There was still parking, so I was encouraged. And since I don't drink milk or keep bread in the house (I only buy the good stuff at the bakery, and then I eat it ALL THE TIME), and I already have TP, so I got things like soup and lunch meat and crackers and cheese. Yep, I'm set.
As I was checking out, though, there were about eleventy billion people in line, fortunately behind me, so I just made it. Phew.
So when I got home I felt a little irreverence rising to the surface, and ... I'll admit it, a bit of shame. I am stronger than this, people! But unless kitty was going to share her kibble, I needed to get food anyway.
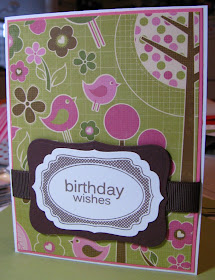
Irreverence - that's my game! I broke out a new stamp I got this weekend and made this:
Oh, yeah. I love this woman. She gets to say the snarkiest things! I also love that I'm making a serious dent in these papers. I have just a few remnants left, and once I tackle them, it will be history. I made three of these tonight, so I'm getting there. Did you notice I went above and beyond in my attempt to use as much of it as possible? Every part of this card is made from that DSP (Porcelain, if I recall) except the Vanilla for the stamped images and the card base. Did you also notice I haven't put away my corner rounder yet? I may be in a rut. I like it here, though, so it's okay by me.
I hope that wherever you are you are not socked in by this storm that's roaring its way across our fair land. Our predictions are for ice to fall from the sky starting at midnight, and we'll wake up to an ice rink. Then it's supposed to do it again tomorrow. I sure hope the weather peeps are wrong. Seriously.
Thanks for stopping by!
Pages
▼
Monday, January 31, 2011
Sunday, January 30, 2011
Stampy Sunday
Happy Sunday, everyone! I attempted to get sketchy today, but my output was not what I'd hoped. Also, I found another stack of "do this sketch some day" print-outs, so I'm not even close to being done. I am, however, making a dent in the UFO pile and the Heaplet, so there's that.
Today I headed to VA to pick up some items at Angela's they were holding for me. I seriously thought about just having them ship it to me so I didn't have to go into the store and come under the influence of whatever it is they pipe into their air system. But nooo, I went there, and as a good consumer, I purchased. I am weak. But I did break into some of the new stuff this afternoon, so even though I don't do "new loot reveals" en masse, I do tell you when I've broken into something new, so just pay attention and you'll see it. (*waves* Hi, Karin!)
So here's the only official sketch I managed to use this afternoon - FTL (Fall-to layout) #124 from Clean & Simple:
And here's mine:
*Note: This is LARGELY INFLUENCED by the card used in the above post. I also admit that post is what made me order the dress form die from PTI.
**Note2: It is now obvious to me I know not what a dress form looks like in real life, since I failed to trim the top of the poppy DSP to reveal the top of the post. Or maybe I was just not thinking clearly. Yeah, that's it.
***Note3: I straightened the ribbon after I took the photo. I DID!
The stamped image is from the Lovely Labels GinaK set (Nestie-friendly!) stamped in Basic Grey on white and cut with a Nestie Labels 4. The sentiment is from another GinaK set: Labeled with Love. The scallop at the bottom is one of my new MFT dies from my shopping trip today. My LSS has a wall of MFT in the house - stamps & dies. It was so, so cruel. Several of us were muttering under our breaths. I've decided that the Fondle Factor is a real influence. Things I've not added to my online cart were touched and added to my basket in the store. Sigh. I did NOT, however, get the tree die, even though I did touch it. Twice.
In this next version of that card, there is only one minor difference:
The cute flower with a pearl in the center hides an unfortunate ink schmear. Lesson #1 in stamping: There are no mistakes in stamping; only opportunities for embellishment. I rest my case.
Next up, I started to do a sketch, but then I realized I didn't have enough layers, and also this is my own, personal go-to layout for just about anything. So it's not a sketch. But it IS a birthday card and it does use new stuff:
The patterned paper is from my new pack of Basic Grey Hopscotch. LOVE IT! This is for a 20-something young man, so I chose this one from the pack - kinda looks like books at first glance.
The sentiment and frame are another MFT purchase from today. The stamp set came with the die - TOO EASY! NOT FAIR! WE ARE WEAK! At first I was afraid I couldn't cut the card stock first, then line up the stamp, but it was crazy-easy. I used Dotto (temporary adhesive) to hold the die-cut card stock in place, inked up the stamps (I put them both on the block together and inked & stamped once), and since they are clear, it was easy to line it up. I love these things! Looooove!
I snuck in some ribbon and a layer of Sage Shadow card stock that was sitting next to the paper cutter. I think it came out quite manly, don't you agree? :)
And last(ly), since the stamps were already out, and since I had a piece of this paper still out and two extra Basic Gray layers sitting next to it, I made two of these:
Again, too easy. And again, I had an opportunity to embellish one of them:
An unfortunate schmear. Love the little baby Primas I finally opened and used. (yay, me)
(That red 'x' is supposed to inform you that little scrap of whatever is not part of this card. There is just a lot of sticky stuff all over my 6x6 work space, and it stuck. It happens. It will not be sold with the card.)
So that's it for today - I'm all stamped out. But I have lots of new paper packs and new stamps to play with (with which to play), plus I have nothing even started for my February Stamp Camps, so there should be more crafty stuff to share with you this week.
Thanks for stopping by!
Saturday, January 29, 2011
Sketchy Saturday
This afternoon I decided to cull the Heaplet and UFO piles and do some of the sketches I've been printing out and not doing.
First, MFT Weekly Sketch 3:
And my take on it:
Don't you just love that image? I usually don't go for the skinny peeps, but this set from MFT was just too cute. I'd intended to make 4 of these, but, well, I made one and used the parts for the other three for other sketches.
The DSP is from the UFO pile.
The next sketch in my pile was Card Positioning Systems 201:
And my take:
Same papers as before. I am very proud that I used a piece of the white velvet scallop ribbon in my stash as the scallop element. Very proud.
I had parts for two more cards, so I made this up all by myself (I DID!):
I made two of this one. AND, I disappeared a good part of that paper, too. (yay, me.)
The next sketch was FTL123 from Clean & Simple:
And mine:
More DSP from the UFO pile - you KNOW how old this SU paper is, right? At least 2 years. BUT, I used one of my MFT Die-namics for the scallop, my new (to me) PTI flower dies and some felt I've had for some time, and another sentiment from my PTI Daily Designs Sentiments set.
Last(ly), I used this sketch from MFT:
and made this:
This paper is REALLY old. Sage Shadow is the whole reason I even found out about SU lo these many years ago, and they had the nerve to retire it! But that's okay. I hoarded it.
The doily thingie is my new MFT Die-namics die. The center circle was cut using one of my new PTI dies, and I stamped a script background stamp (I had put it away and couldn't find it!) on it with Sage Shadow ink. The bird was stamped with Sage Shadow on Very Vanilla and punched out with the SU bird punch, and the branch is from the same punch - it's the reverse side of that striped paper. Cool, huh?
I opted for no sentiment, partly because I couldn't figure out where to put one, and partly because people like to buy cards that aren't for any particular occasion, so this is a win-win for me. :)
That's it! I call it quits for tonight and shall perhaps go back in for more tomorrow.
Thanks for stopping by!
Six Cards and a Bed
Last night, after I'd made my cards for this week's Jingle Belle's challenge (a fabby sketch!), I went back into the Captain's Quarters to see what else I could do. I usually start in my Heaplet or the UFO pile, and I spied a pretty piece of 12x12 paper in the "yet to put away" pile.
Doing the math, one can get 6 card fronts from 1 piece of 12x12 paper. I've long since given up on mass-production of the exact same thing - booooring. But with a nod to Lauren who did a great post on "modular mass production", I've decided I can make variations on a theme and keep from going stark-raving mad with the repetition.
Here is the first one to give you an idea:
I was very proud of this card for many reasons: (1) It uses pink. And not just any pink - Pixie Pink, which is GAH PINK! But it was the closest match to this really pretty paper from Kaisercrafts; (2) I broke open a set of Labels 4 Nestie-friendly Waltzingmouse stamps and introduced one to ink; (3) I used a sentiment from my PTI Daily Design Sentiments set; And (4) I snuck in some ribbon! :)
I also learned something about the Nestie-friendly stamps: they fit inside the dies, of course, but they leave a big enough border that it is very easy for someone to stamp multiple images and get them too close together to actually die cut them all. (ask me how I know)
Since I needed to save myself and stamp some more images to die cut, I went ahead an opened another set of Waltzingmouse Nestie-friendly stamps (Labels 1 this time), one of which I used here:
You can see each card is a little different because this paper is so fun. I placed the die cuts differently on each card to show off as much of the paper as I could. Here are the other 4 cards:
I like! Maybe because of all that green. Yeah, that's probably it.
In other news, I put my Captain's bed together today. Lookie:
The best part about this bed are the following features:
There are 6 drawers on each side - you can see 3 of them there on the right. The top 3 are covered by the quilt, but they may not be once I get a full-size mattress on there. Right now it's just a twin air mattress. Also, see that door at the foot of the bed? It opens to a huge space between the drawer units and runs the whole length of the bed. I live for storage. I have no idea why I've waited so long to get one of these beds.
Next up: I need to go through all my overflow and see what can go into the drawers. Then I'll get crafty some more. I have a stack of sketch challenges I've been saving and a Heaplet that needs to die.
Thanks for stopping by!
Friday, January 28, 2011
Jingle Belles Rock - Week 5
I have been suffering from stampy withdrawal this week, and I just had a quick fix. I guess you'd call it a stampy quickie. :)
Anywho, it's time for another edition of Jingle Belles Rock, and we are in week 5 already! Wow! This week was a sketch, and I made this card first:
The paper is from SU's Deck the Halls DSP pack of which I have a bazillion pieces, having bought 3 packs in a Good Demo moment, then forgetting I'd already been good, I bought 3 more. :/ This particular piece is more for scrapbooking since it has a border and printed designs, but for this card I used part of the "open" area of the paper.
The flower element is made from 4 images of the flower from Vintage Vogue stamped with Cherry Cobbler on Very Vanilla and cut out. (I'm only doing one of these. Trust me.) I curled the petals with my finger nail and stacked them on a Build-a-Brad, the center of which is punched from the back of the same piece of paper. Given that I have issues with white space, I wanted something at the top, and since The Belles said we could embellish, I added a ribbon (yummy Crumb Cake Seam Binding) and sentiment (from Bells & Boughs).
I had another chunk of that piece of paper, though, and it screamed to be used. So I flipped the sketch and made this one:
TOTALLY cheating. TOTALLY. This was printed on the paper, and I decided it met the sketch element. I embellished the top of this one the same way as the first one.
And sorry about the bad pics (worse than usual). My photo studio is a shambles at the moment, having 1 1/2 houses of furniture and boxes in here, and the lights are behind a lot of it and inaccessible. Please take pity on me.
That's it! Thanks for stopping by!
Thursday, January 27, 2011
This 'N' That (whinefest)
Once AGAIN, rumors of my death have been greatly exaggerated. It has been one week since my last blog post, and I have stamped nothing new. LIFE, however, has given me much about which to talk, so please grab your beverage of choice, and let the blathering begin.
It all started when my Dad decided to move from his 3 bedroom house to a smaller place. My Brother was left with the task of dealing with the house and all the content therein that my Dad didn't take with him. Let's just say there was more left behind than not.
We've already established I live in a teeny tiny condo, and don't have room for the crap I already have, much less room to take in more. So I agreed to take what would fit in my car. (The Forester, not the Miata. That just wouldn't be right.)
Then my brother sent us pics of everything in the house, and I started to get weepy and sentimental. I needed the furniture. This meant I needed to get rid of my current stuff to make room for the new old stuff. That was taken care of last week.
To get the new old stuff here from Ohio, I needed transportation with lots of room, so I rented a cargo van. Now, as a crafter, I must tell you that the ability to drive one's vehicle in reverse without the use of the back window since your car is packed to the gills with craft show stuff is a well-honed skill, and one I do not possess. I cannot drive my car in reverse. I cannot. People take pity on me and back it up for me. Truth.
So let's take a look at this cargo van:
There she is, right next to my Miata, just for comparison purposes. Let's try another angle:
I am convinced that Miata would fit INSIDE that van. Seriously.
So there I was Saturday morning (when I took these pics, just in case I never returned), and I backed that baby out of my parking space in 8 graceful motions and headed West to Ohio. It took me 9 hours to get there instead of 7-8 hours, largely because I spent all sorts of time at McDonalds and Burger Kings looking for parking spaces I could pull INTO and not have to BACK OUT OF. Sigh.
On the last leg of my trip to OH, this was sunset:
It was actually way more dramatic than that, but *I* was the photographer and I was driving, people!
Sunday I spent the entire day with my Brother at the house packing boxes and packing the van. To the gills. NOTHING was going to move on the trip back. I had an 8-foot couch, and in a last-minute emotional moment, I agreed to take the dining room table, 6 chairs and the buffet. I also filled 12 boxes with books and photo albums and all sorts of other stuff I NEEDED. What part of "packed to the gills" was not clear to you?
Oh, and my brother commented, "I thought you were getting a BIG van. This is just a REGULAR van." Shaddup.
After that packing adventure, I laid down on the now-empty dining room floor about 4 pm to stretch my back and I couldn't get up. My brother laughed at me as I rolled over and attempted to crawl to my knees. He LAUGHED.
Monday I left at o'dark thirty to drive the van back to Maryland - another 9 hours. Then a friend stopped over and we unloaded the van into my teeny tiny condo. Then I moved furniture and boxes until I could actually sit on the new old couch. Then I fell into the couch and couldn't get up.
The next adventure this week was Wednesday. Snow was predicted for the DC area. Most of the time the forecast of snow will close the schools before anything has fallen from the sky. Having lived in the Midwest for the first half of my life, I find this not just comical, but ridiculous. As of 3 pm, people were downright panicked and nothing. had. fallen. from. the. sky. However, by 4 pm, it was really nasty out. The rain that fell diluted the preventative salt treatment on the roads so that when the temps fell and froze the rain, it turned to ice. Then the snow fell on top of that at the rate of 2" per hour. Then I left for home.
I left at 4:30 pm, and got home at ... wait for it ... 10:45 pm. It took me 3+ hours to drive about 4 miles just to get TO the beltway. By the time I got close to my exit much later that night, my left foot was numb from being in 1st gear for 6 hours. When I got to my street and my beloved reserved parking space, I noted it had 6-8" of snow in it, plus there was a barrier of heavy, wet, icy plowed stuff in front of it. By that point, nothing was going to stop me from parking my car, so I gunned it and got stuck in my own parking space. I back-and-forthed it enough to get it out of the street and called it good enough. Then I stepped out of the car and into the 6-8" of wet snow. Whatever.
Please note that 10:45 pm is waaaaay past my bed time if I'd had a relaxing evening. I didn't start shaking until I got into the house, and then I just about fell apart. I drew a hot bath, poured a few fingers of tequila into a glass, and sat in the steamy bath until I started to relax. I got to bed about 12:30 and decided to wake up when I woke up, and turned off the alarm.
This morning I was a mess. Plus I still needed to dig out my car and shovel a path so I could get into it without stepping in the 6-8" of wet snow again. I know this looks like NOTHING now, but OMG, last night ...
You can see my footprints from where I escaped from my vehicle last night. You can also see the poor, buried Miata to the right. The Forester is clean because I was driving it the whole time it was snowing, and the heat of the engine melted it all. Yes, I am grateful for the little things.
Here is the bush next to my front door that has been weighed down by the heavy, wet snow:
Poor thing.
So that is my tale of woe. Here it is - Thursday night, and I've done nothing crafty ALL WEEK. I've missed Tiff's sketch challenge 3 & bonus sketch challenge 4, and all sorts of other stuff I've wanted to do. Sigh. So today I did laundry, disassembled my old dining room table, assembled my new old dining room table, did some paper work, and hopefully tomorrow will be a more normal day. I need to get CRAFTY!
Thanks for stopping by.
It all started when my Dad decided to move from his 3 bedroom house to a smaller place. My Brother was left with the task of dealing with the house and all the content therein that my Dad didn't take with him. Let's just say there was more left behind than not.
We've already established I live in a teeny tiny condo, and don't have room for the crap I already have, much less room to take in more. So I agreed to take what would fit in my car. (The Forester, not the Miata. That just wouldn't be right.)
Then my brother sent us pics of everything in the house, and I started to get weepy and sentimental. I needed the furniture. This meant I needed to get rid of my current stuff to make room for the new old stuff. That was taken care of last week.
To get the new old stuff here from Ohio, I needed transportation with lots of room, so I rented a cargo van. Now, as a crafter, I must tell you that the ability to drive one's vehicle in reverse without the use of the back window since your car is packed to the gills with craft show stuff is a well-honed skill, and one I do not possess. I cannot drive my car in reverse. I cannot. People take pity on me and back it up for me. Truth.
So let's take a look at this cargo van:
There she is, right next to my Miata, just for comparison purposes. Let's try another angle:
I am convinced that Miata would fit INSIDE that van. Seriously.
So there I was Saturday morning (when I took these pics, just in case I never returned), and I backed that baby out of my parking space in 8 graceful motions and headed West to Ohio. It took me 9 hours to get there instead of 7-8 hours, largely because I spent all sorts of time at McDonalds and Burger Kings looking for parking spaces I could pull INTO and not have to BACK OUT OF. Sigh.
On the last leg of my trip to OH, this was sunset:
It was actually way more dramatic than that, but *I* was the photographer and I was driving, people!
Sunday I spent the entire day with my Brother at the house packing boxes and packing the van. To the gills. NOTHING was going to move on the trip back. I had an 8-foot couch, and in a last-minute emotional moment, I agreed to take the dining room table, 6 chairs and the buffet. I also filled 12 boxes with books and photo albums and all sorts of other stuff I NEEDED. What part of "packed to the gills" was not clear to you?
Oh, and my brother commented, "I thought you were getting a BIG van. This is just a REGULAR van." Shaddup.
After that packing adventure, I laid down on the now-empty dining room floor about 4 pm to stretch my back and I couldn't get up. My brother laughed at me as I rolled over and attempted to crawl to my knees. He LAUGHED.
Monday I left at o'dark thirty to drive the van back to Maryland - another 9 hours. Then a friend stopped over and we unloaded the van into my teeny tiny condo. Then I moved furniture and boxes until I could actually sit on the new old couch. Then I fell into the couch and couldn't get up.
The next adventure this week was Wednesday. Snow was predicted for the DC area. Most of the time the forecast of snow will close the schools before anything has fallen from the sky. Having lived in the Midwest for the first half of my life, I find this not just comical, but ridiculous. As of 3 pm, people were downright panicked and nothing. had. fallen. from. the. sky. However, by 4 pm, it was really nasty out. The rain that fell diluted the preventative salt treatment on the roads so that when the temps fell and froze the rain, it turned to ice. Then the snow fell on top of that at the rate of 2" per hour. Then I left for home.
I left at 4:30 pm, and got home at ... wait for it ... 10:45 pm. It took me 3+ hours to drive about 4 miles just to get TO the beltway. By the time I got close to my exit much later that night, my left foot was numb from being in 1st gear for 6 hours. When I got to my street and my beloved reserved parking space, I noted it had 6-8" of snow in it, plus there was a barrier of heavy, wet, icy plowed stuff in front of it. By that point, nothing was going to stop me from parking my car, so I gunned it and got stuck in my own parking space. I back-and-forthed it enough to get it out of the street and called it good enough. Then I stepped out of the car and into the 6-8" of wet snow. Whatever.
Please note that 10:45 pm is waaaaay past my bed time if I'd had a relaxing evening. I didn't start shaking until I got into the house, and then I just about fell apart. I drew a hot bath, poured a few fingers of tequila into a glass, and sat in the steamy bath until I started to relax. I got to bed about 12:30 and decided to wake up when I woke up, and turned off the alarm.
This morning I was a mess. Plus I still needed to dig out my car and shovel a path so I could get into it without stepping in the 6-8" of wet snow again. I know this looks like NOTHING now, but OMG, last night ...
You can see my footprints from where I escaped from my vehicle last night. You can also see the poor, buried Miata to the right. The Forester is clean because I was driving it the whole time it was snowing, and the heat of the engine melted it all. Yes, I am grateful for the little things.
Here is the bush next to my front door that has been weighed down by the heavy, wet snow:
Poor thing.
So that is my tale of woe. Here it is - Thursday night, and I've done nothing crafty ALL WEEK. I've missed Tiff's sketch challenge 3 & bonus sketch challenge 4, and all sorts of other stuff I've wanted to do. Sigh. So today I did laundry, disassembled my old dining room table, assembled my new old dining room table, did some paper work, and hopefully tomorrow will be a more normal day. I need to get CRAFTY!
Thanks for stopping by.
PS: Did you see the Jingle Belles chose my Week 4 card as one of their faves for this past week? Seriously. I still don't like that card, but everyone else seems to. Hmph.
Tuesday, January 25, 2011
Jingle Belles Rock - Week 4
I almost broke up with Blogger tonight, but I toughed it out and finally managed to upload this card:
Ihate intensely dislike this card. I was so very challenged with this week's Jingle Belles challenge to use not one, but TWO pinks - light and dark, and not just any green (which might have saved me) ... nooooooo, they want us to use LIME green. GAH!!!! Two pinks + lime green! A fate worse than death in my world!
Fortunately for me, I was driving to Ohio and back this weekend, so I had a LOT of time to ponder my options, which included not doing the challenge at all. But the whole point of a challenge is to be, well, challenging, right? So I came up with not one, but TWO ideas.
This evening, as I rummaged through my Heaplet for the paper I had in mind to use, this is all I found of it:
That's it. See that tree up at the top? This was not enough paper to make that tree. Then I realized the green in the paper was too dark, anyway, so I told myself to calm down and come up with another plan. That's when I found a few small pieces of that BRIGHT pink striped paper and used it instead. But wouldn't it have been fun to have a Christmas tree made out of bunny paper? :)
Since I've blathered on so and you've undoubtedly lost your place, and maybe even forgotten the subject of this post, let's look at that card again:
NOT my best work. Soooooo not. I used a piece of bright green speckled paper I've had for-EVER and stamped a script background on it using Pink Passion ink. I was trying to make it look like it belonged with that GAH PINK! The green layer under it is not the same green, but it passes (shhhh, don't tell the Belles). The trunk of the tree is made from a 1" piece of green ribbon with pink polka dots (score!). Using up the stash is all about baby steps, people. The handsome green ornaments are from a pack of bright brads I have also had for-EVER. I cut their legs off and filled their innards with glue dots until they stuck to the tree.
That star at the top was punched from a remnant of shimmer white and colored with a glitter pen so you can see it. I added that green brad because I'd already amputated it's legs and it was so sad.
So there you have it. Tomorrow I shall bore you with the tale of my road trip this past weekend. Let me just say: I need to move.
Thanks for stopping by!
I
Fortunately for me, I was driving to Ohio and back this weekend, so I had a LOT of time to ponder my options, which included not doing the challenge at all. But the whole point of a challenge is to be, well, challenging, right? So I came up with not one, but TWO ideas.
This evening, as I rummaged through my Heaplet for the paper I had in mind to use, this is all I found of it:
That's it. See that tree up at the top? This was not enough paper to make that tree. Then I realized the green in the paper was too dark, anyway, so I told myself to calm down and come up with another plan. That's when I found a few small pieces of that BRIGHT pink striped paper and used it instead. But wouldn't it have been fun to have a Christmas tree made out of bunny paper? :)
Since I've blathered on so and you've undoubtedly lost your place, and maybe even forgotten the subject of this post, let's look at that card again:
NOT my best work. Soooooo not. I used a piece of bright green speckled paper I've had for-EVER and stamped a script background on it using Pink Passion ink. I was trying to make it look like it belonged with that GAH PINK! The green layer under it is not the same green, but it passes (shhhh, don't tell the Belles). The trunk of the tree is made from a 1" piece of green ribbon with pink polka dots (score!). Using up the stash is all about baby steps, people. The handsome green ornaments are from a pack of bright brads I have also had for-EVER. I cut their legs off and filled their innards with glue dots until they stuck to the tree.
That star at the top was punched from a remnant of shimmer white and colored with a glitter pen so you can see it. I added that green brad because I'd already amputated it's legs and it was so sad.
So there you have it. Tomorrow I shall bore you with the tale of my road trip this past weekend. Let me just say: I need to move.
Thanks for stopping by!
Thursday, January 20, 2011
I Don't Know When to Quit (Monkey Alert)*
Let me begin this evening by saying I know my purpose in life. That purpose is to be an example to the rest of you that stamping ain't all fun and games. Nope. It can be DIFFICULT and FRUSTRATING and MADDENING and ... and ... gggrrrrrrrrrrrrrrrrrrrrrrrrrrrrrrrrrr. Even *I* have my limits.
This evening I decided it might be a good idea to start thinking about my February Stamp Camp cards. Hey, I have some ideas, so why not? I went through my bookmarked items in Google Reader to {this one} [dang - I'll link you when I can find it again!], which I remembered being pretty simple, yet pretty and easy to make work for any occasion. These types of cards work well with The Ladies, as they can switch up sentiments and make the card their own.
Darn their luck they have ME as their Demo. Geez, what a night! Allow me to share my pain with you.
First, I did two lines of sponging for the ground and the sky, and considering I did it with a piece of printer paper instead of a huge Post-It (which I have yet to purchase), I think it turned out well:
I stamped the tress from Lovely As A Tree** with SU Basic Black. Yep - missed a spot. My first thought was I should stamp the trees first, then when I mess up (and I just KNEW I'd mess up again), I wouldn't waste time and wrist with the sponging. But I use the sponged areas to get the trees straight, so I was doomed either way. I took the liberty of pointing out the boo-boo. Missed a spot with ink or pressure or something. Pthfhft. So I tried again:
Missed a different spot. Tried again:
Sigh. And again:
Close. Close. But it was bugging me. I was bored, but I wanted to succeed, so I switched it up a little and made this version:
Let me tell you a story. I have the misfortune of commuting to work in the 2nd-worst traffic area (depending on which report you read) in the USofA. We have a 5-minute traffic report 6 times per hour, I kid you not. But what gets me is "the sun factor". Yes, the sun - that yellow-orange thing IN THE SKY? Apparently people don't wear sun glasses or use their optional-equipment sun visors ... oh, sorry, that was becoming a rant, and that's another blog. My bad.
ANYway, *I* look up and see a bright orange ball behind nekkid trees and it is beautiful, so that's what I was going for.
After all that, I am unsure if I will subject The Ladies to this. If I cannot master it in 5 attempts, I would not ask them to try. And they don't get 5 attempts - they just get one. I'm mean like that.
After that mess, I used the monkey stamps I had out, because I needed to get my snark on. So using DSP from the Heaplet, I made this:
Oh, man, can you feel the love? I can't keep this one in stock at my markets. People guffaw out loud (can you even guffaw quietly to yourself?) and ask how many I have. Seriously, it's almost too easy.
In other news, it's dumping snow in the Midwest in the feets, not inches, and I'm supposed to pick up a cargo van tomorrow after work and head West on Saturday, into the snow, to visit with my Dad. Hmmm. Please pray for me.
Thanks for stopping by!
*Monkey Alert. This is necessary since at least one of my readers has an aversion to monkeys. True.
** Lovely As A Tree. The most beloved set of any SU Demo, and it may be the oldest one still in the catalog. Every May/June there is a very serious discussion involving the meaning of life and how sad sad sad it would be for this set to retire. A great collective sigh of relief is expelled when the SU Retiring List is published, but we know it's only a matter of time. So if you do not own this set, GET IT while you can. It's the best go-to set I have ever owned.
Tuesday, January 18, 2011
Punchy Birthday
As I sat at The Captain's Table earlier this afternoon, I started putting things away (I KNOW) in an attempt to reduce the clutter on the table and reclaim some elbow room. I think I only lost one stamp along the way, too! ;/
For my next trick, and since it was still out, I decided I wanted to use the scalloped square and owl shaped stamps from the SAB Punch Bunch set. Colors. I needed a color challenge. I immediately went to my old friend Splitcoaststampers, and since today is Tuesday, it's Color Challenge Day! YAYAYAYAY!
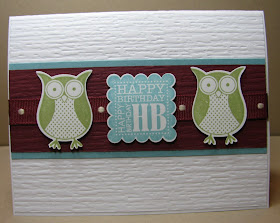
This week's colors are Bravo Burgundy, Pear Pizzazz and Baja Breeze. Mmm-hmmm. I had to look at them for a while, but then I went to work and made these:
I ran the top strip and a white layer through the Big Shot with a Sizzix texture plate so it wasn't so plain, and I added ribbon the same color as the top strip since I didn't want it to scream "look at me", but, well, it HAS to have ribbon!
In other news, all my furniture was picked up today - donated to the Salvation Army. I have no couch, chair, TV, bed or headboard. I did find about 3452 cat toys that kitteh thinks are new. I also had to put a stool next to her perch since the couch was no longer available as a step. Right now she is sleeping on top of the mound of folded blankets in the bedroom. Poor thing.
Also today I had my new Captain's bed delivered. It is in parts in 4 boxes in my Dining Room. Tonight I suspect I'll be sleeping on an air mattress, and okay, for many nights to come. And as bad as sitting curled up on the couch was for my back? Sitting at the Dining Room table isn't so much better. Ow.
I might need to go stamp some more. Thanks for stopping by!
A Girly Card
This is not a typical card for me. Normally, when I make it "pretty", I add a bit of snark. Not today! Today this card is girly, through and through!
(GAH! You can cut that sweet with a butter knife.) At one of my November craft shows, one of the other paper artists had used B&W hounds-tooth paper with pink and it was GOR-JUS. Since then I've had this idea in my head, but I've not executed it until now. The pink is SU Blushing Bride, which I like because it's kinda muted, which helps pink-challenged peeps such as myself. The sentiment I had to mount to use, and is a single SU stamp, but I don't think it's still available.
Because I thought the top pink part was boooooooring, I scored it (mostly evenly) every 1/2". Oh, and I've since straightened that ribbon.
In other news, I am home today to take delivery of my new Captain's Bed and have the old bed picked up (donated), along with my couch & chair & headboard & TV. This means I can craft in between events, and it also means I can go craft something snarky to make up for all this sugary stuff.
Thanks for stopping by!
Monday, January 17, 2011
Sketchy Sunday TG002
This weekend my Creative Avoidance was in high gear. I cranked out all SORTS of stuff. I did finally figure out my state sales taxes, too, and to celebrate, I played this week's Sketchy Sunday over at Tiff's blog.
Here's the sketch:
I went into the Captain's Quarters with not a clue in my head. I thought I'd look through some papers on the Heaplet that never got put away, and found a sheet of owls. It looked like it would go with Kraft card stock, and whoa! I had two already-cut pieces of Kraft card stock ready to go. It was kismet. I made this:
*Note: The card base is Kraft. That green stuff you see behind it is a piece of wrinkled paper I grabbed so the card didn't disappear into the Kraft "photo studio".
I flipped the sketch and used a circle instead of an oval because ... I don't know why. I wanted to. And I have a circle punch but not an oval that large. And I was too lazy to get out the Nesties, though I did think about it for about 2.1 seconds.
It's missing something, isn't it? The triangle of Kraft is too big. And it's nekkid. I cut out two more of the owls (the tiny ones) to put on the Kraft triangle, but it was worse, so I left it alone and did something different with the second one:
I embossed it! Whoot! (oh, no pun intended there ... sorry). Not sure when anyone would send a card like this. I have about 10 owl cards that say "you're a hoot" and they don't sell. Whatever, *I* think they are cute. And it's close to the sketch, even. Sort of.
*Note: See those flowers stamped amongst the owls? Pssst ... I schmeared something on the card and needed to disguise it. Shhhh ... don't tell anyone. K?
Even if you missed last week's sketch, you can still play! And make sure to do this week's, too. What else do you have to do? Shovel snow? Pthfhtf.
Thanks for stopping by!
Sunday, January 16, 2011
Mashup # 27
It's official: Creative Avoidance has set in, BIG time! I need (NEED) to pay my state sales taxes before the 20th, so I spent some time this morning organizing the bazillion new blogs I've added to my Google Reader, and now that everything is easier to find, I've found some new challenge blogs, and I did one. What part of Creative Avoidance has not been clear to you? :/
I found this challenge on Paige's blog:
Since I already looooove Navy and Red and any Neutral, this was not such a big stretch for me. Well, except that I also challenged myself to use some of my new SU stash at the same time. Here's what came out:
Eh? Maybe not my best work, but I DID use the new embossing frame and I also mounted the Punch Bunch stamp set and used one of them. That, alone, is a miracle.
So it's kinda blah, but it is done. Now where are those taxes .... oh, shiny!
Thanks for stopping by!
Rainbow Bridge
Most people have heard of the Rainbow Bridge. It's a wonderful poem for people who've lost a pet. One of the requests I get at my markets is for sympathy cards for someone who's lost a pet, so naturally I thought of the Rainbow Bridge idea.
I think these Lawn Fawn stamps (tree, dog, cat, ball) from the Critters in the 'Burbs set are perfect for this card:
One thing I haven't learned, though, is how not to futz. True, I made 6 of these - 3 dog and 3 cat, but geez ... the cutting! WHAT was I thinking?!
Some of the layering is because I was lazy and also a doofus. My arm is still sore, so the thought of sponging clouds on 6 cards made me think of alternatives. Of course, this was easy - I went to my HA clouds background stamp. But this is a vertical card and the stamp is horizontal, so I ended up with a big white space at the bottom of the panel that needed to be covered. Green. I made it green. The grass is from a MFT Die-namincs die, and I used both parts of it on each card. The front one is popped up on a long row of Dimensional edging.
I love all that dimension!
Here is the cat version:
... and up close:
Yeah, yeah, still with the baker's twine. Did I tell you I bought it in every color? Yep? You'll be seeing a LOT of it this year! :)
In other news, today I get to do my Maryland Sales Taxes for Jul-Dec 2010. Don't you wish you were me? Didn't think so. I've also re-organized my Google Reader and found a few more challenge blogs along the way. You'll be seeing those later this week. Maybe even today, if that Creative Avoidance thing doesn't quit popping up.
Thanks for stopping by!