It's Tuesday, and time for a new challenge at Shopping Our Stash. This week's title is FREE is Good! and we'd like you to use something you got for free.
Note: This is a two-week challenge since we span the US Thanksgiving holiday!
I chose to use my collection of free ribbon pieces I got in my Ellen Hutson orders. Here's what I made:
I only used four of the pieces, but Ellen is quite generous with it, and I had enough to weave ... let's call it a 3" square.
The first thing I did was cut a square of card stock and run some adhesive across the top and down one side. I lined up the ribbon vertically (top to bottom) across the top, making sure to stick it to the adhesive. This provides the "ribs" for your weaving, and the adhesive keeps you from slitting your wrists as your work continues to move across your craft table as if it each piece had a life of its own. Then I started weaving horizontally, and after each piece was woven, I pushed it up close to the previous strip and made sure to stick one end into the adhesive.
I continued until the square was full, then turned it over and folded all the ribbon pieces to the back and taped them down.
Next I cut a (mostly centered) heart out of a 4 x 5 1/4" panel, and played with the woven piece until I was happy with what showed through the opening. Let's just say it's not sitting square on the back, shall we?
I made marks onto the back of the white panel along the edges of the woven square piece to note its placement, and took it off so I could stamp the sentiment on the front while the panel was still flat.
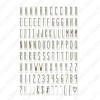
About that sentiment: I'm sure I have a LOVE YOU somewhere, but I needed to initiate my Milo's ABCs set, so I used it instead. And so I didn't need to be exact about lining it up, I left a space for a heart. I die-cut some hearts using my Lawn Fawn Hearts dies, colored the top one red, and stuck them together for later.
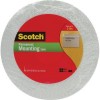
Next I applied some adhesive to the back of the white panel around the heart opening, then used the lines I'd drawn as a guide to put the woven panel back in place. I then lined the edges of the panel with foam tape (that ribbon panel is poufy), and prepared to stick it to the card front.
But wait! White-on-white is boring, so I broke out some new ... wait for it ... WASHI TAPE, and put it all around the edges of the card base, then I put the white panel down. I stuck on the red heart stack, and there was only one thing left to do: add a gold ribbon bow I'd made with a piece of left-over ribbon.
Then I saw The Schmear. It wasn't bad, but I could see it and it bothered me. Enter: embellishments! I covered a remnant of card stock with the gold washi tape and die-cut part of the Heart of Hearts so I got a bunch of tiny gold hearts. I stuck them to the front. I also put one in the center of the red heart, because I could. Oh, and I tossed the gold bow. The end.
This is totally a more-is-more card, but it looks innocent enough, doesn't it? And I've used four pieces of FREE ribbon!
So, got stash of free stuff you haven't used yet? I think you should play along with SOS this fortnight!
Thanks for stopping by!
Stuff I used: free ribbon, and the following:






ooooooooooooh! it's WASHI around the edges? yowza! that is verrrrrrrrrrry cool indeed, as is the woven ribbon heart. i'm still having flashbacks from my last bout of weaving and my aunt has specifically requested another. ah well. that is LOVE for you, weaving a 2nd heart when the first is still feeling traumatic, lol! ♥
ReplyDeleteFab use of the ribbon and I love the washi border!!
ReplyDeleteBeautiful! And what a good use of the ribbon. Love the sparkly little hearts, too.
ReplyDeleteBrilliant use of free ribbon! Love the woven heart and the Washi tape border!
ReplyDeleteOh yes, the schmear. Cue the blue air! The weaving is gorgeous - so much texture & shine from the satin!
ReplyDeleteOh look at you, so smart to do your ribbon weaving on a separate piece of paper rather than try to weave behind the hole.... not that anyone would take that route of madness (I had no idea there was another way). Now that you've told me an easier way to do it I just might have to try it again some time. This might be a more is more card but it looks deceptively not.
ReplyDelete