My card for today is an example of the card evolution process. If you are a stamper reading this, you already know this stuff, so you will probably be bored to tears. If you are not a stamper and you are reading this, first let me say THANK YOU, and you will hopefully see that this whole card creation thing is a labor of love. (Actually, THANK YOU to everyone who is reading this. Really!)
One of the take-away, partially-finished cards I made at Sunday's get-together was this piece of very pretty paper on which I had stuck a scrap of brown textured card stock.
 The paper is very "artsy" and old-looking, and poorly photographed, and I saw a lot of potential with the green and blue and brown dots. I just KNEW I had card stock and ribbon at home that would match it and make it complete.
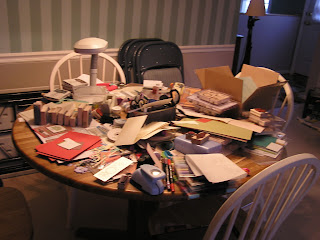
 I started with my Papertrey box o'stuff that is still out and needing to be used up. These were actually the two colors I had in mind when I thought I had something to match.
I took out the Moss and Aqua satin ribbons, put them on the paper, and did one of those hmmmmm things where you tilt your head to see if it looks any different (it never does, it just looks crooked.) I opted for the Moss, though the Aqua does have potential. I thought the Moss looked better with the brown.
 Next decision: Satin or Grosgrain? Since the look was "old", and the brown scrap had a rough texture, I went with the grosgrain.
I know some people would not have these dilemmas, as they would either have only one of the colors, or only one of the textures, but nooooo, not moi. I had to get them all. Sometimes I think if I had less stuff this would be a whole lot easier. .... .... Nah, don't think so. :-)

Put it all together and you have .... a half-finished card. This is where I usually get stuck in the creation process. The papers and ribbon look great together, then what? Then, my dear readers, I do one of two things. Sometimes I set it aside and look at it for a few days, or else, as I did today, I head on over to StampingCritique.com. No, this is not a commercial, but I do love that site. Most of us do get stuck at some point and just need some constructive suggestions for all those questions rolling around in our heads: Wrong colors? Should I have gone with the Aqua? Too busy? Not busy enough? Ribbon too wide? Needs brads? Needs another layer? Speck of dirt in this photo? Whatever - you will get lots of great feedback there.
End of Part 1. Once I get some feedback, or stare at it for a few days, or maybe get a good night's sleep, I'll think on it some more and finish the card and post the final result. There will probably be some in-between versions, too, so stay tuned. Oooh, did I just create a cliff-hanger? Yeah, like you were hanging on my every word...
To kill time and use more bytes, I thought I'd share something I learned today. I now bring you: Blogger trick du jour. One of the things that makes me crazy about Blogger is the time it takes to edit the durn thing! Yeah, I know, it's free, so you get what you pay for. One of the more irritating things is uploading an image after you have already typed some text. The image always appears at the top of the post, then you drag it to where you want it. This is fine by me! But once you do that, you get a lot of extra mystery space between paragraphs, and you might even end up with so much blank space that you think your next sentence rolled off the face of the earth! This is where I spend a lot of time - reformatting a post to eliminate that unwanted space.
Today on SCS I learned how to fix that! Once you do your initial post creation, and it looks pretty good, go into "Edit HTML" mode and type an open div tag as the first line in your post and then type the close div tag as the last line of your post. For those not conversant in the ways of the Web, here it is in writing:
The first line (which I cannot actually type in the context of the blog or it will mangle the whole post) is the "open div tag", and the last line is the "close div tag". Enough techno-babble.
These two tags effectively wrap your whole post in a snug blankie so any more editing you do will not skew your previous content beyond recognition. I love learning these sorts of tricks!
I also learned that if you run the washer so you have clean clothes for tomorrow so you can go to work, you need to remember to put the stuff in the dryer. Sigh...gotta go be domestic now. Hopefully I will figure out how to finish that card in the next few days and I'll show you how it ends up!


