Most of you stampers know about this morphing phenomenon, where you start out to make one thing and something completely different comes out. I thought since this card took me a week to make, and rose from the ashes of several failed projects, it might be fun to show you the process. Caution: no one knows how my mind works, and it's probably best we leave it that way.
Let us begin. First, the finished card, so you'll know where we're going:
It all started when I watched this video by Claudine Hellmuth, wherein she shows us how to use her paints to color an embossed image on sticky-back canvas. I thought I could do this. I was wrong. But along the way, all sorts of things came out.
I began by rescuing a long-neglected package of SU canvas tags. I know, I know, they aren't sticky-back canvas, but I thought I'd try them anyway. And since they were just collecting dust, I had nothing to lose, right? I stamped the Hero Arts Antique Brocade image in Versamark onto the canvas pieces and heat-embossed them with clear EP. I then put some paint onto my craft mat and used pieces of cut & dry foam to gently apply the paint to the embossed image. Blech. Look:
I was too heavy-handed. I think these will end up as background pieces, or maybe pretty trash.
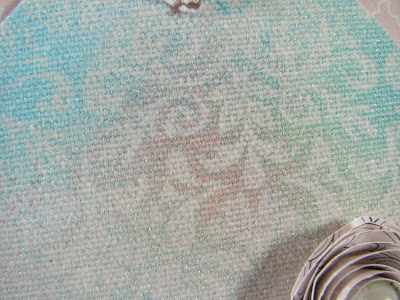
I then moved on to the good stuff: sticky-back canvas. I embossed the same image over it, but this time, instead of using paint I went to my trusty pearlized sprays I made a while back with my Distress reinkers and Perfect Pearls. I spritzed the piece of embossed canvas and this is what came out:
It's purty and shimmery. It sat on my desk all week.
Today I was determined to use it and get it off my desk. I looked to my right and saw an old sketch from Deconstructed Sketches. I print these out and stack them on the side of my desk, and they are easy to grab when I need a piece of scrap paper to use for applying embossing powder or to smooth over a background stamp. This one got used a lot:
I finally looked at it as a sketch (ahem) and decided to use it. Here's the actual sketch:
and I turned it sideways:
And the trimming began. I cut the sticky-back canvas piece into a tag shape, and decided it needed to be dressed up. I started to harvest things off my desk and the finished tag ended up like this:
I added a piece of lace to the bottom, but it was pretty wide, so I cut off the top edge of it. I added a piece of the failed painted canvas from above, because I could. Then I wrapped some pink (gah, I know) twine around it in an attempt to make it look artsy-fartsy. I then took the trimmed-off piece of lace and threaded it through a hole in the top of the tag. That rolled flower came later.
I next decided to use a mystery piece of Bermuda Bay card stock and cut it into strips for the sketch:
These started out at 3/4" wide, and there were three of them. At one point I embossed a background stamp onto the strips, then opted for plain card stock instead. They finally ended up at 1/2", or maybe 3/8", and I was running out of pieces, so one became 1/8". I hope it looks like I meant to do that.
It was about this time that I felt I needed a round element, and that's when the rolled flower came to be. I really like it, too! :)
Last: a sentiment. I decided this was too shimmery and froo-froo for a snarky sentiment, though sometimes that's the best time to use one. :) Instead, I went to my almost-never-used MFT Pearls of Wisdom set and selected this one:
I'm not much into sappy sentiments, but this one is passable, and I think it works with the rest of the card.
Once again, the finished product:
Thanks for sticking around through that tome. It just took me so... long ... to make this that I felt the burning need to share.
I'm going back in for more. Let's hope it takes me less than a week to make the next one. :)
Thanks for stopping by!


It turned out really well, even if it did take forever. I like the subtle pattern on the tag.
ReplyDelete