Tuesday, January 31, 2012

Carving homework - Bracket Stamp

Last night I carved the next stamp in our lesson series - a square bracket:

We had the option of cutting down the outer part to just outside the image, but I know me pretty well, and although it was part of our lesson, I took the other option and left it intact. There's one in every class, right?

Here's the card I made using my new stamp:

Yes, the original image was symmetrical. No, I didn't trace it very well (it was 10 pm, people). Yes, I'm calling it "rustic". 

I followed the current Sweet Sunday sketch:

Now I need to tell you about the parts-is-parts I used. That sentiment is stamped on a banner I cut out of a piece of craft wood. I got this idea when looking at links tweeted from the floor of CHA*, and they showed packages of wooden banners with sentiments on them. HELLO! MFT die + wood + stamp + ink = FREE! Hmph.

The papers are from my still-out Memory Box valise pack. The flower has been on my desk for weeks, just waiting for the right project. Oh, about the stamped image... I stamped it on vanilla and cut it out by hand (it's rustic, after all) then stamped a not-yet-cleaned mesh background stamp over it (had a little red on it), then stamped over it again with River Rock - SOMEONE STOLE MY CRUMB CAKE INK PAD! Grrr, Can't find it anywhere. (See what all you neat people miss out on?)

So there you have it! Now I need to go upload my homework so Teach can critique my work.

Thanks for stopping by!

*CHA = Craft & Hobby Association. All the stamp and paper and embellishment companies get together and show off their new stuff. As of now I need most of it. This one doesn't allow the public in. Some of them do, and OMG, I am so not going, ever. Can you say "enablement"? I don't need help with that.

SOS #37 - People or Bugaboo

Peeeeeeeople. People who need peeeeeeople ... Sorry, it popped into my noggin. Welcome to this week's challenge over at Shopping Our Stash: People. You need to have a person, or personS, on your card. Alternatively, you can use a Bugaboo image, since they are our sponsor this week. AND, because this is a sponsored challenge, you could WIN something!  :)

People. I've got people. In fact, I've got Bugaboo people, so yeah, I'm over-achieving a bit here. HOWEVER, there is a lot of stash used, so let's see that card, then I'll go into the spiel. Here she is:

The papers are new - from my now-opened Basic Grey indie bloom. I'm using up the (gah) pink papers first. The rest of them are quite lovely. :D The stamp images are from an old-but-never-used stamp set, and yes, I'm very proud. More new stuff: I used a few of my new Copic colors: YR27 on the pearls, and BG90 on the background, which you might be able to see if I could take a decent photo. For more old stuff: the SU photo corner punch retired years ago, and the yellow buttons are from an old SU box of Fresh Favorites. Yeah, they are that old. They might be Apricot.

This card is loosely based on this week's Taylored Expressions sketch:

I said "loosely".

Now it's your turn! Go into your stash and find something either "people" or Bugaboo, make a card, then come back and link us up over at Shopping Our Stash so we can see what you've made!

Thanks for stopping by!

Sunday, January 29, 2012

Belated Birthday

For my last project tonight, I pulled out this sketch from Card Positioning Systems:

and opened my new pack of Cosmo Cricket Clementine papers (which is just so yummy!) and this came out:

The small panel with the sentiment is from the pack, too (the panel is, not the sentiment); I trimmed it down a little. I like the little green hill and flowers on that panel - it looks so right. The sentiment is from Paper Smooches.

My Happy Accident of the moment was when I went looking for a button and saw the package of unopened Cosmo Cricket Material Girl buttons hanging from the hook on my lamp that is my accessory overflow. Okay, one of the overflows. See:

Since the button package was not re-sealable, the contents have been put into an old SU embellishment container and have been stowed ... somewhere else. At least it's one less thing hanging there. Baby steps.

Alrighty, then. I think I'll go do more laundry so I can go to work tomorrow.

Thanks for stopping by!

A Tri-Shutter Card

One of my tweepy and bloggy pals, Cindy (aka: The Crafty Frugalista) makes these a-ma-zing tri-fold cards, and I've been wanting to try one for a long time. Since I'm still in my jammies, and haven't done much but stamp today, I used this as an excuse to give it a try. She makes it really easy by giving you detailed directions with measurements and pictures and everything.

This is not just a tri-FOLD card, although it is cut and scored exactly like the one I made earlier today if you fold it that way. But no, hers is unique in how she cuts and folds the center section, making it a tri-SHUTTER card. Here's what I just made so you can see what I'm talking about:

You probably want to go to her blog and see some of hers - like this one, or this one, or these. Here's the view of mine from the top:

 Please pardon all the s-crap laying around. My ghetto photo studio now doubles as a stamp-carving station. I told you this place was small.

Part of my problem was I had two pieces of patterned paper in the "WTH was I thinking" pile, and I decided to use them both; they were of the same family, but they didn't go with each other. Here is the card I made with the other one (not quite finished):

I lacked a coordinating patterned paper for the center panels, so I made do with white scallop squares for the sides and a rectangle for the center. I believe this one may also be a birthday card.

One of the reasons I don't scrapbook is the huge pallet. Um, I see a card with three - THREE - panels that must be addressed, and my head hurts. I do believe I shall only make these for special occasions, but I'm glad I tried it! I think YOU should, too!  :)

Thanks for stopping by!

Sketchy Sympathy

Sometimes I let my crafty supplies drive my card-making decisions. I spied the now-retired SU Notebook Edge punch (or whatever it was called - I'm too lazy to go look it up in an old catalog) and decided I needed to use it on a card. I love the old thumb-style punches.  Sigh.

I pulled out this week's Freshly Made Sketch:


... for the border options, then I just needed to decide on the main image. For those of you who put everything away after each card you make, this will not make any sense at all. For the rest of you - and I do believe you are in the majority - I saw this ink pad still out on my desk:

and decided it needed to be used. I dragged it across a piece of white, then decided it looked like earth and sky, and therefore needed a silhouette stamped on top of it. This is what eventually came out:

I love the Pool Party seam binding, but I'm not loving it wrapped around the black. It loses most of its appeal. I colored some pearls with my B05 Copic, and stuck in a sentiment. I like this ink so much, I might go for a do-over with a different border approach. We'll see. I might be distracted before that, but something will happen, besides more laundry, of course.

Thanks for stopping by!

Scrappy Guy Card

So I realized yesterday that my younger son's birthday is this week, and I needed to make him a card. You know how that goes, right? I might have a bazillion birthday cards laying around, but they aren't "special" ... made just for him. I'm convinced this is why I don't send more cards; they all have to be special, and I simply run out of time!

I just made this:

 The card is 100% from the stash, including the card base, and yes, I am very proud.  The base has been languishing on my crafty desk for weeks. It's part of an old kit from which I used the parts, but not the bases, both of which were folded textured cream card stock. I've used one of them for sentiments - cut it up without a care, and this one I wanted to use intact.

That's a belly band holding it closed. Here it is open:

The DSP was in The Heaplet, and it is now mostly gone. (yay) It's two-sided, so I took advantage of that and just used pieces from both sides. I mitered those inside corners myself. (yes, proud, again)   The stars are on purpose, mostly because I totally botched that one corner. I think it looks like I meant to do that. Afterwards, I decided it would have needed something, anyway, so there you go! :D  Since I had the stars on the inside, the belly band decoration was an easy decision.

Okay, I'm going back in for some more!  Thanks for stopping by!

Saturday, January 28, 2012

MFT Sketchy Birthday

I've been a stamping fool today, but most of the cards have been for the Feb & Mar VSN challenges, so I can't reveal them until their appointed times. Oh, the humanity! :(

I made one that is based on this week's MFT sketch:

and I made a second one (different, but based on the same sketch) so I could POST SOMETHING already. And here it is:

Naturally I can't leave well enough alone, so I turned it. No, not to be different, but because the size of the remnant of that poppy paper was less than 5.5 inches, so it would only fit in this direction. Sometimes you just have to make do and let your supplies dictate your path.

Recipe: SU Domestic Goddess DSP and Poppy Parade card stock; Misc white card stock die-cut with the small MFT Open Scallop Doily; Circle DSP cut with a Nestability; Sentiment by Paper Smooches; Brad by SU.

BONUS Happy Accident: The SU brad PERFECTLY matches the DSP. I was looking for a button, and was ready to MAKE a button out of the DSP, when I spied this brad (from a SAB set). Sweet.

In other news, it is 8:00 pm and I'm still in my jammies. HOWEVER, I have accomplished a lot today, including bagging up all the cards I've made the past week or so, posting seven of them in my Etsy store, and I'll take the rest to Chloe's tomorrow and do inventory. Then I'll come home and stamp some more. There's challenges piled up in there! :)

Thanks for stopping by!

Friday, January 27, 2012

Carving Homework #4

[If you're looking for the Hambo Blog Hop, click here. Don't forget to comment on the blogs for a chance to win!]

Stamp Carving 101
I watched the Stamp Carving class #4 last night, and we made a chevron set. Here's mine:

I'm once again embracing the rustic thing I have going on here. I carved all of these in about an hour, so they aren't close to the level of what some of the other students have submitted, but I'm okay with that. I'm not going for perfection - I'm learning and playing and having some fun!

During the lesson, she showed us how to cut the sections at different angles, but I wanted to make them all the same so I had the option of nesting them. I even made several of them the same size to I could just alter the design and mix and match.

Here's the first card I made using them:


That green banner one on the left is just poorly stamped. You'll see on the next card that edge really is there ... We were supposed to do different designs, and I just knew I wanted to make one checkered - that would be the mis-stamped green banner on the left. You can see there are three smaller pieces - all the same size, and the two larger ones are the same size. The blue one with the curvy lines was made using a circle Nestie as a template for the lines. I was a little tired of all the straight-ish lines on the other pieces.

I made this next card to use the other two stamps I carved:

Here I've used the same checkered banner plus one I gave a checkered border and left solid in the center. The chevron on either side of the sentiment was made with my last piece. There, now you've seen them all.

Or have you?  heh heh

One of the stamps Julie made during class was a partial flower, and I just had to try it!  Here is the stamp:

And here is what you can do with it (in theory):

I need to work on the size ... or the math ... or something. If you line up the edges, there is space for 4 1/2 images. Not right. But IN THEORY ... it's just something with which to play.

I'm pretty excited with what we've done in just two short weeks! Three more to go!

In other news, I have a masso stack of challenges on deck for the weekend, so stay tuned! I'll be back!

Thanks for stopping by!

Green Eggs and ... Hambo!

Welcome to "Green Eggs and ......Hambo" sponsored by Hambo Stamps! Today Hambo customers and the Bacon Bits Design Team are bringing you fun creations based on book titles! It could be our favorite book, or just one that was fun to design.

If you've arrived here from Sherry's blog you are in the right place! If not, you might want to start back at the beginning at the Hambo blog to make sure you are eligible for the hopper prize! Yes, YOU can win a prize!!!

A prize will be awarded to one participant whose book-themed creation tickles the Bacon Bits’ fancy in a hammin’ jammin’ way! Another prize will be awarded randomly to a hopper (that's YOU!) who comments on all the blogs along the way. The winners will be announced on the Hoedown blog, as well as on the Hambo company blog, Talk to the Ham, on Wednesday, February 1.

For my card I decided to use the book A Connecticut Yankee in King Arthur's Court by Mark Twain. Why did I decide on this book? Partly because it's a great read, and partly because I have the King digi that was perfect! My apologies to any historians out there who will tell me this is the wrong attire for the period, but, as my bloggy pal Lydia would say, "It's ART!"  So here's my card:

The DSP is from SU's Mocha Morning Specialty Papers pack that was languishing on The Heaplet. I've used glitter pens, a black glaze pen, Copics, bling, blue flock, white Liquid Applique, a Nestie to cut it out, and my Dymo labeler for the sentiment.  Phew!

Now dance on over to Judy's blog for another great book!

Thanks for stopping by!

Leslie (You are here)

Thursday, January 26, 2012

Hero Arts CASE

When I saw this card on the Hero Arts blog, I just KNEW I wanted to CASE it. so the other night I made this:

(The card base is actually vanilla - it was photographed on a Kraft background.) Since I didn't go back and look at the bookmarked card before I made mine, I'm just saying I was inspired by it. I remembered I wanted to do the Kraft envelope with the hearts.

The Poppy layer was an afterthought. I wanted to leave it out, but I think it looks fine. The hearts were punched with the SU Heart to Heart punch and the Small Heart punch. The envelope was punched with the Petal Card Double punch. The sentiment was stamped in Pure Poppy on a scrap of textured vanilla card stock, and I added the Linen Thread instead of twine to balance out the Kraft envelope. Whoa - a 100% SU card. Whoot! :)

The next day ... (name that song) ... I got my light tent. I also added a heart to the envelope. Here are the "with" and "without"  photos:

In the light tent (filtered light):

I think it looks dark, but the detail is quite clear.

Now with just the lights and the card on white card stock (no tent):

Blech - washed out and ... blechy. I need to play with the camera settings some more. One of these days, when you least expect it ... (name that TV show) ... I'll have a decent photo for you. In the mean time, I thank you for hangin' in there!

Thanks for stopping by!

Wednesday, January 25, 2012

WOTT & WOYWW - 01/24/2012

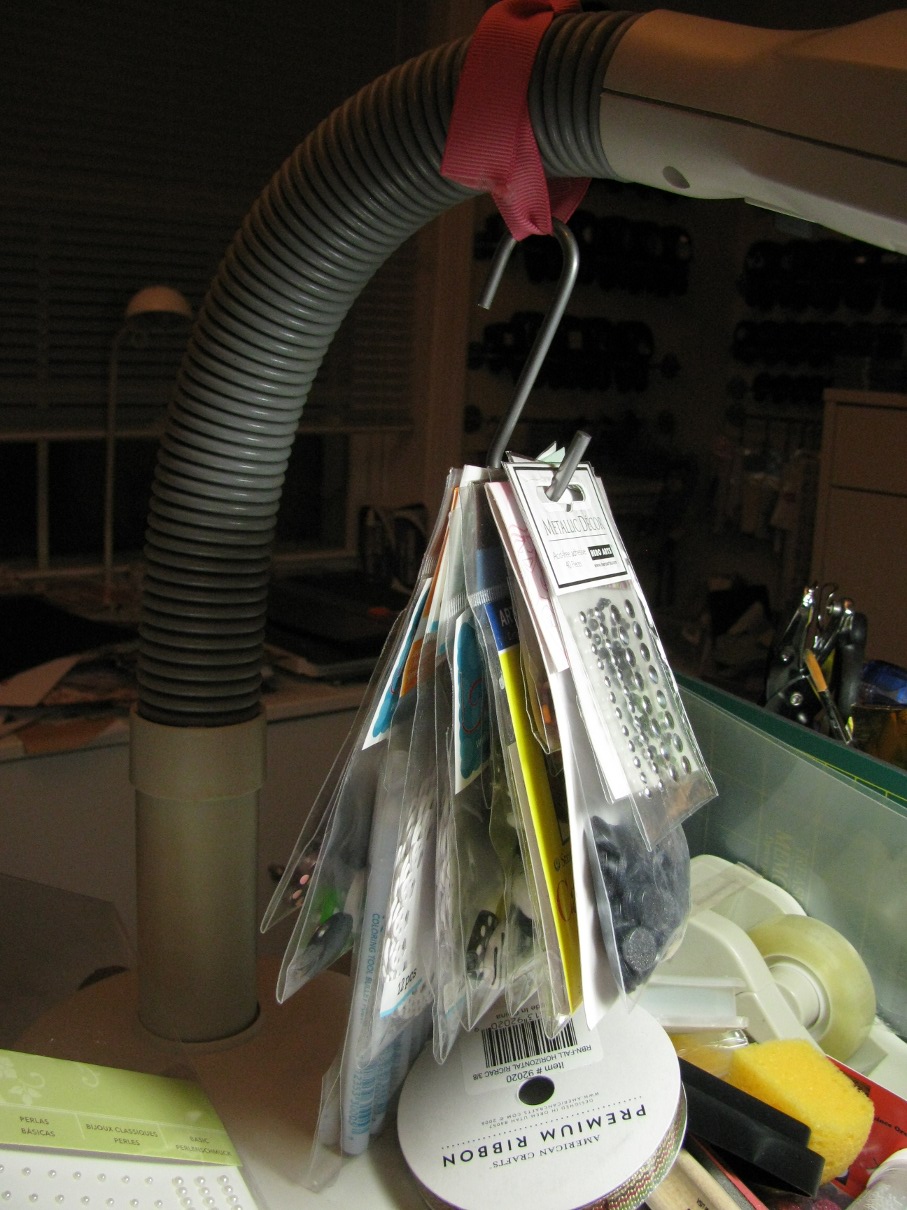
Yes, kids, it's time for another reveal of the state of my crafty desk. It's not pretty, but I'm always willing to take one for the team.

Here she is (taken Tuesday night):

 Compared to other posts I've done, there really is a HUGE crafty space there. Let's do those numbers!

(From left to right)
1. Some panels I've embossed using a new set of embossing folders. I embossed 4, 3 are left.
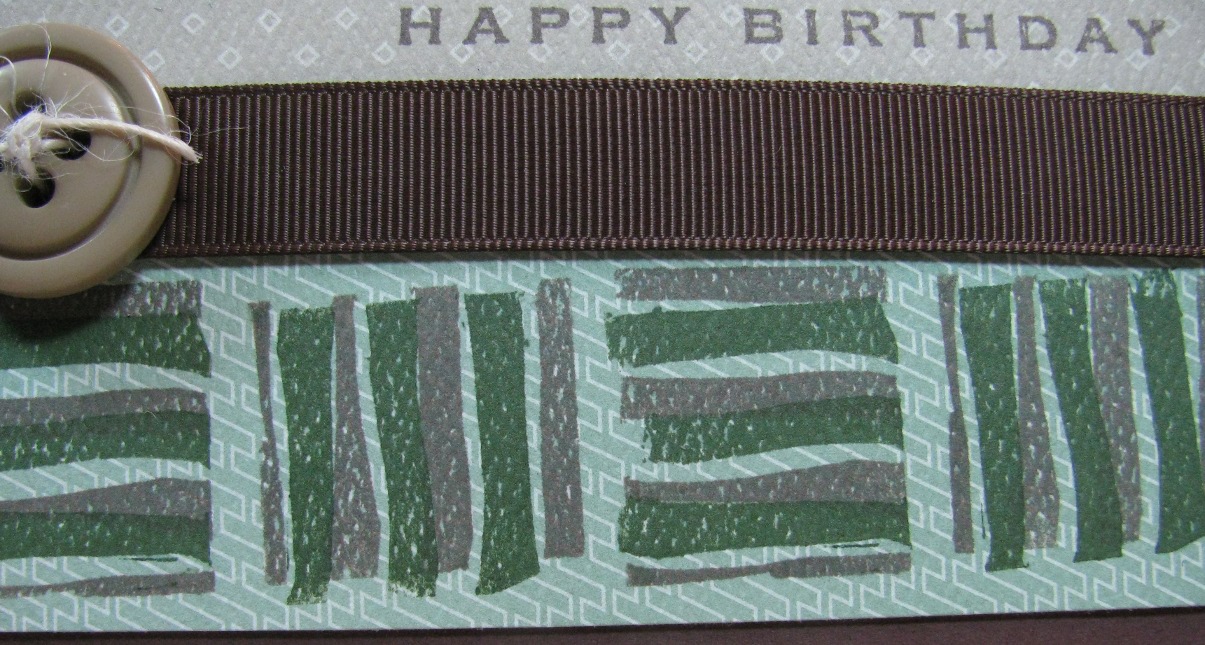
2. Ribbon. Yes, it's still out. I used a piece on Monday's card.
3. A spool of unopened ribbon that I can't bear to part with. I just KNOW I'll use it. Also, a few paper flowers that I KNOW I'll find the right card to use them on. Also some wire I'm playing with.
4. The bandanna is still out. Don't even ask me how many months it's been there. It's a great home for miscellaneous brads and bling I find.
5. A Post-it-note holder I made a while ago. It just sits there, mocking me. I have no idea what to do with it.
6. A balloon punch I used on #10.
7. Ink, adhesives, etc. This stuff lives here.
8. Blue flock. I used it on a card I'll post on Friday.
9. An almost-empty spool of PTI twine. Once it's gone I'll break out my 200 yards of twine I bought to use once the PTI stuff was gone. A well-stocked pantry is very important.
10. A card I made that I can't decide if I hate or not, so you haven't seen it yet.
11. A piece of a kit I bought ... ooooh ... when did Rubber Chicken close? 5 years ago? Anyway, it's a double tri-fold thingie, and I haven't used it yet. It's there to remind me it's there.
12. A card part that I also think I detest. I'm too stubborn to toss it and move on.
13. A whole package of quilling papers. I'm playing. Some of my handiwork is on #12.
14. My quilling tool and a glue pen. And other stuff, I'm sure.
15. Parts left of this card when I realized all of the pieces wouldn't fit.
16. Parts from a second one of these that hasn't been made yet. And may never be.

Well, I hope I've made you feel better about YOUR workspace. I know some of you look upon this desk in horror, but I find it quite inspiring. I am never at a loss of something on which to work, which is how I like it. :)

Thanks for stopping by!

PS: I'm linking this to WOTT and WOYWW.

Tuesday, January 24, 2012

Carving Class #3 Homework

In the first lesson this week for my stamp carving class, we learned how to make a chevron stamp. Here's mine:

 The rubber is pink. It's inked with a permanent ink (I used blue StazOn) so we can test stamp it, then go back and clean it up. The ink helps to reveal the parts that need to be fixed. It's pretty neat!

Tonight I made my homework card:


(Yes, it's still washed out. No, my light tent hasn't arrived. Yes, I am still sorry.)
I stamped the chevron with Ranger Distress Antique Linen onto SU River Rock card stock. Taking a cue from my Clean & Simple class, I just left it tone-on-tone, layered it on a River Rock base, and added a sentiment. This is another one of my new irreverent sentiments from Too Much Fun stamps. I think this stamp company and I are going to become very good friends. :)

Okay, I'm off to upload this to my class gallery so the teacher can yell at me some more*. I think I've pretty much nailed this whole "rustic" thing. :D

Thanks for stopping by!


*Teacher isn't really yelling at me. She SAYS she embraces my rustic approach. :)

SOS Challenge 36 - Blue

This week's challenge at Shopping Our Stash is Winter blues and we ask you to shop your stash and pull out items that are blue. You can have other colors, just be sure to use any shade of BLUE as the primary focus.

I went into my remnant box and pulled out a bunch of blue card stock to make this:

I was inspired by a card I saw while blurfing (can't find it now) for the layout. I cut 5 strips of different blues 1" each and lined them up. Then I punched 1" circles out of the same colors and lined them up below. At the last minute I decided I needed to stamp on the strips so they weren't so boring. The stamp is from a Hero Arts set sent to me by Stef of IngeniousInkling and JingleBelles fame. (Thanks, Stef!)

Then while I was typing this post I got the notion I should add bling, so I ended up with this:

I like it better now. :)

Now it's your turn! Go into your stash and pull out a bunch of BLUE stuff, make something with it, then come over to Shopping Our Stash and link us up so we can see what you've made!

Thanks for stopping by!

Monday, January 23, 2012

Simon Says Sketch

Tonight I played in The Captain's Quarters and made a card based on the current Simon Says Stamp challenge, which is this sketch:

 I was a little bit out of control. I started with a new 2-pack of embossing folders (by Lifestyle Crafts) I picked up at the LSS yesterday and then I started adding pieces, and more pieces, until this happened:

Totally not me, but isn't that embossing folder fabulous?!!? (Sorry about the glare - my photo tent arrives tomorrow.) I tried inking it up first, but it was too much with all the other schtuff on there, so I went with plain.

The paper flowers and (gah) pink bling are from the Blossom Builders Printed Kit in the SU Occasions mini (p 18). The brads and skinny ribbon are from one of the SAB selections that you can start earning TOMORROW! The piece of vellum is from my stash, and the doily was cut with an MFT die out of ... you guessed it: the SU Everyday Enchantment SAB papers. The sketch had an image there, but I didn't want to cover up that pretty paper. Please notice I curled the top corners of the vellum and also the flower petals. Thank you.

Finally, the sentiment is from Paper Smooches, and is stamped in SU Peach Parfait on a scrap of textured card stock.

Now if you'll excuse me, I need to watch my next stamp carving class. I think we'll be making something larger than 1" square. Whoot! I'll be sure to show you how that goes. :)

Thanks for stopping by!

Sunday, January 22, 2012

I Am Doomed

Just when I thought it was safe to go back to the LSS ...

You see, I only go there once every few months. Then they have time to order and receive everything I NEED, and I reduce the number of opportunities I have to wander around and buy other stuff I DON'T need. So after I went last weekend to pick up some stuff, I got two - TWO - calls this past week. A 6x6 pad of paper I asked for had arrived, and then, my ALL THE NEW COLORS OF COPICS arrived. So I just had to go again this weekend. I HAD TO.

Having just been there a week ago, I decided to go to the counter, pick up my stuff, pay for it, then run right back out the door, not looking left or right. While paying, I muttered something about how I was safe anyway, since I was just there last weekend, to which she replied (in a very enabling way, I might add), "Oh, no, we had our open house last week, so we've got all sorts of new stuff." Crap.

One of the new companies they carry is Too Much Fun. (toomuchfunrubberstamps.com). There were shelves of irreverence, so what was I to do? I got them all! BWAHAHAHAHA! Okay, one I had in my hand and put back was a stamp to make a fold-over T-shirt. It was $24, and I figured I could do something on the Silhouette instead and not pay that much for one stamp I might only use once or twice. See, I have my moments of clarity. But I did buy a ton of other stamps, so there's that.

ANYWAY, here's a card I just made using one of the stamps:

(Okay, my pictures are getting worse. I promise to buy a light box this week.) All papers are from the Memory Box "valise" 6x6 pack, and I loooove that they are all Kraft-backed. The sketch is from Clean & Simple Stamping FTL174:


Now if you'll excuse me, I need to mentally prepare myself for tomorrow being Mo ... Mon ... Mond ... I can't say it. Sigh.

Thanks for stopping by!

Friday, January 20, 2012

I Made More Stamps! (Lesson 2)


Stamp Carving 101
I finally got around to watching Lesson 2 from my stamp carving class! These are the stamps I just made:

Everywhere you see black specs not on the main stripes is a boo-boo. :(  I didn't clean them up well enough. We made two stamps because they nest/intertwine. In theory, we were supposed to cut out alternating stripes so that when we stamp them in 2 different colors, they look like they were meant to go together. Mine? Not so much.

Here's the card I made using them (we are supposed to make tags, but pffth - I am such a rebel.):

Like I said: IN THEORY these are supposed to fit nicely together. ;/ 

Here is a close-up so you can see all my boo-boos:

 Yep, another "rustic" version of the assignment. I'll not be surprised if the teacher keeps me after class next time to have a few words with me.

Oh, and this card is, again, all remnants. I am so very proud. :D

Thanks for stopping by!

PS: The card uses the sketch from Skipping Stones Designs.

Wednesday, January 18, 2012

Alcohol vs Milk

I don't know about you, but I love Twitter. I get my news there, usually before it hits the news sites. I follow people in different walks of life, so I learn stuff I normally wouldn't even think to look up or discuss. Then there's the people who say the darnedest things. Like today, one of my tweeps, @keeponrunning, who is a ... runner, who I met through someone else that I met through someone else, said something that needed to be put on a card. He said he saw this and it made him laugh: "Alcohol doesn't solve any problems; then again, neither does milk." So. true.

So tonight I grabbed one of my stack o'sketches for the week - this one from Freshly Made Sketches:

... and I grabbed some paper from a pack of retired SU DSP that was stored at my feet (you just never know when you'll need it!) and I made this:

 Yeah, it's a little plain, but I love that button! Probably a good thing since I got so many of them. ;/

Here's that sentiment up close:

I printed it on a remnant. Yes, I'm very proud.

Okay, this scratches my crafty itch for the evening. Thanks for stopping by!

Tuesday, January 17, 2012

I Made A Stamp!

I'm taking an online "how to carve stamps" class:

Stamp Carving 101

and tonight I had my first pass at my homework. The first lesson was how to use the tools without drawing blood, and the first project was to carve a heart. Now you might wonder why a heart? Because it has both inside and outside points and curves, that's why! :)

Here is my first stamp:

It's not great ... too many rough edges. I like to think of it as "rustic". Yeah, that's working for me. ;/  I'll try again later in the week.

I did make a card using it though:

All from stuff on top of my desk. :D

And now that it's 8:45, I think I'll have some crackers and call it dinner. :) Thanks for stopping by!

SOS Challenge #35 - Across The Border

It's time for another challenge at Shopping Our Stash! This week we have Across The Border, where we ask you to use any border punch or create your own border out of what you have on hand. Now how easy is that?!

I chose to use one of my MS border punches and made this card:

This is not the card I started to make. Nope. I have had a rough night. I started with a green border already punched - from my UFO drawer. I ran a scra ... remnant of ribbon through it, cut the pretty paper, then applied adhesive to the wrong side of the patterned paper. Did you know ATG adhesive is darn near permanent? I managed to peel it part-way off, then everything tore and I tossed it into the trash. Gone.

Let's just say: by the time I was done, I had used that whole piece of 12x12 paper. Not the best way to shop one's stash, eh? Sigh.

Everything here is from the stash - paper was cut into already, and now it's gone. The black pieces are actually the reverse of the paper. The green used to punch the new border was a remnant. The white was from a remnant. I also discovered I had no black buttons, so I made one from ... a remnant.

In case this sketch looks familiar, it's from Create With Connie and Mary from a week or so ago:


... and now it's out of my pile of sketches I probably won't get to. :)

Now it's your turn! Pull out some neglected (or favorite) border punches, or if you don't have any border punches you can make a border out of stuff you DO have, make a card with it, then come over to Shopping Our Stash and link us up so we can see what you've made!

Thanks for stopping by!