So this was a pretty rainy weekend, and I mostly hunkered down and stamped. I actually had A Plan, of sorts, too. I have been working my way through stuff in the Stash Room, and I am pretty proud of me.
First up we have one of my puppy cards:

The base is made from PTI's White Card Stock, which is way heavier than I usually like to use, but I got it to try it, and now I know. I took advantage of my new Scor-Pal and used it to score the folds - works like a champ!
I stamped the SU Linen bg with Sahara Sand ink on the outside fold, and put a piece of yummy card stock on the right side, cut just a little wider than the exposed part of the base so it was "tucked under" the outside fold. The card stock is from a package of paper I got that turned out to be not paper, but textured, patterned card stock. You will see a lot of this as I work my way through it! I love the stuff!
The Thank You is from a pack of rub-ons I've had for way too long, and I just stuck the puppy on the front panel so he hangs over. When the card is opened, there is a plenty-big white space for someone to write in. I added the black gingham ribbon in a last-minute fit of "this is naked"ness.
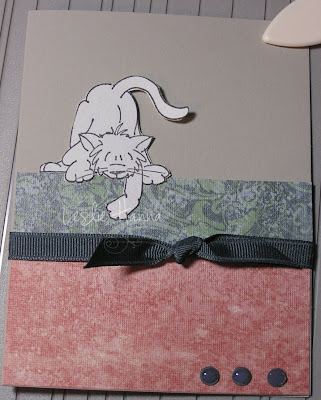
 In a strangely-weird moment, I decided to try and put two pieces of unrelated paper together to see what might happen, and I like them together! I tied them together with a piece of charcoal grosgrain ribbon from my "I think I have them all, now" ribbon stash.
 Then...what to do for an image? I remembered this cat stamp I have that I've used maybe once, and he was perfect! I cut him out and popped up his butt with a dimensional, because, well, that's how cats play! I later went back and colored his ears with Blush Blossom, but I left the rest of him white.
The secret with this card is I used yet another item from my stash - stickers! I had three of these stickers in the Stash, and I decided to use them inside the card as a bookmark.
 Making the bookmark is just too easy...all you do is use your perforating blade and run it once (only once!) across the card stock, and later this baby can be removed from the card and used as a bookmark. I have made bookmark cards in the past, and people love getting a card with a built-in, usable gift!
 By the way: this whole bookmark thing was not my idea. The guy who runs the company where I got my Carl Cutter gave me the idea during one of my "I need help" customer service calls. Too bad they do not sell the Carl Cutters any more; they only sell the Ott lights now. ;-(
Moving on, here is another piece of card stock from that pack I got:

And this photo I just had to share with you. This guy and his human Mom are regular visitors to our Saturday market, so I asked (and got) permission to take his picture yesterday.

And lastly, I managed to mostly redeem myself after my Decor Elements Flourish Frame Massacre of last week. I called SU and told them of my plight with my attempt to put up the frame, and they explained where I had gone so very wrong with my application attempt, and they also sent me another frame!
I followed their instructions to the best of my ability, which we all know is questionable, at best, and look-y what I did:

Good grief, it is only 8:00 am! Durn internal body clock! Sigh ... I will spend the rest of today making up five projects for next week's workshops. I think I'll use retiring sets one last time. Wish me luck!
Oh, and don't forget my milestone challenge! Enter to win a collection of stuff from my stash! Rules are posted here, which is where you'll also need to post your entry! Come and play!

i keep meaning to try a bookmark card, it's an awesome idea
ReplyDeletei love your frame and how you improvised, it looks awesome
as soon as i get off my booty and take pictures, i'll be entering your milestone challenge...congrats
First, I LOVE these cards! Great work!
ReplyDeleteSecond, that dog is SO funny. My little dog would have a cow if I put her in there (it would be an ITTY BITTY cow.)
Third, Whoa with the piecing together and punching dots and OH MY...looks pretty though! :)