
 ... which I have dubbed "Project 3" for next weekend's Stamp Camps. Yeah, I know, you've seen this before. But WAIT! This is a new and improved card! My brain, always thinking about how to woo my customers into needing everything in the new SU catalog, had me take the original design and change the colors of the hearts to be all new colors! They are a combination of new standard colors and new In Colors. Yes, I am a genius, I know.
But we'll get back to this card in a sec, including all the measurements for how to place the hearts.
But first, I had to show you this:
 An almost clean work space! I KNOW! Does that stuff on the right look weird to you? Here's a close-up:
 Pig parts! Yep! I die-cut 25 pigs, and these are their parts. As soon as I get my paws on some Naturals White card stock, I'll do the assembly. The pigs will all be pink. I used Core'Dinations card stock, and in order to get enough of the pink, I had to use pages out of different collections, but the fronts are all the same color pink.
Then, in an attempt to save myself and this previous project:
 ... I realized I could use legal buttons if I cut them out of Artichoke card stock using my SU Buttons die:
 Sweet! Here's the re-done card with the card stock button:
 Poifect! And it will be much flatter than the real button.
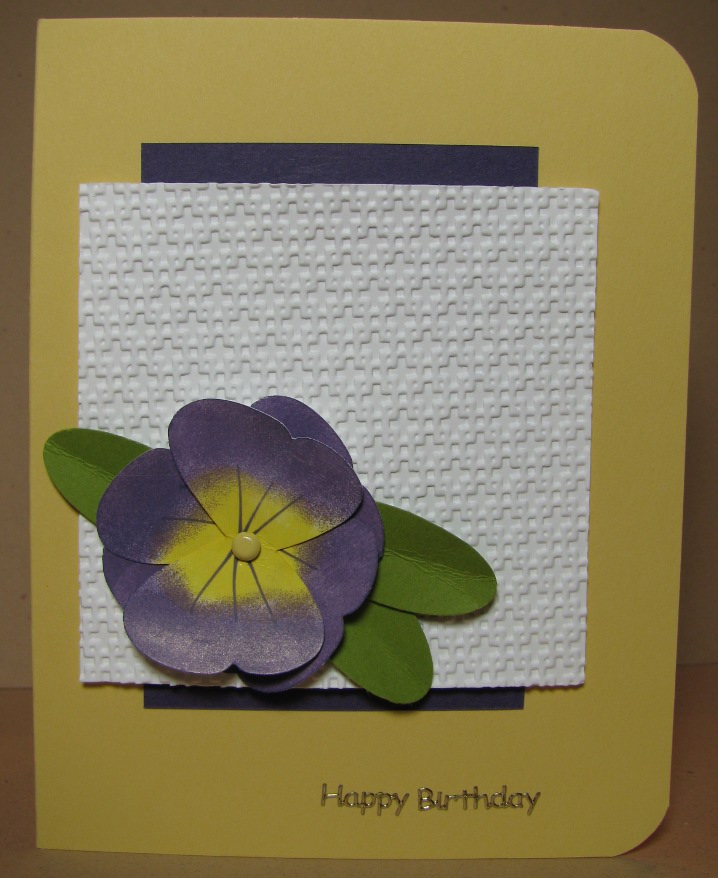
Then, instead of moving on, I got distracted by a pile of dry-embossed papers in my UFO pile. The original intent had been to make more of the Pansy card we made at last month's Stamp Camps. So I did. I made eight pansy cards, and to mix it up a little, I put some of the Class-A-Peel sentiments on a few of them, like this:
 Now all that card stock is gone from the UFO pile, AND I have eight cards to sell. Some will get added to my etsy store, some for the market, and one for Chloe's Coffee Shop.
THEN, I got the idea to remake my heart card using the new colors. This would let The Ladies touch & feel a bunch of the new colors in a pretty simple design. But there is some math involved. Not complicated math, though. Really. Here's how I did it in a few easy steps. (Please ignore that funky corner - I'll explain that momentarily).
Step 1: Line up your card stock with the center line of the Grid Paper.
Step 2: Place a ruler across the card stock at the height you want your hearts to be centered.
Step 3: Make a dot with a pencil at the center point.
Step 4: Make two more dots on each side 3/4" apart.
 Step 5: Put a mini glue dot on the back of a black heart and stick it on the center dot:
 Step 6: Place the rest of the hearts for the first row:
 Step 7: Align a heart for where you want the second row:
 Step 8: Measure center-to-center of the hearts. Mine turned out to be 3/4".
Step 9: Make a dot at 3/4" below the center of the top heart.
Step 10: Align a ruler and mark 3/4" like you did for the first row of hearts:
 Step 11: Add the second row of hearts:
 Step 12: (no pic) Add the colored hearts a little offset on the black.
Then things got nasty. The reason I had that corner punched with the Pinking Hearts corner punch is I desperately wanted to use that corner punch this month, and what better place than on a heart-themed card? I spent a good hour futzing with this card. I actually messed up so many times, and was so determined to make it work, I think I made 3 or 4 versions with new rows of hearts each time. I was getting stabby. This is what I ended up with as my first finished piece:
 Should I burn it? I did gag a little bit. So I started over again and made this:
 MUCH better. But I went back and added ribbon (of course) and a sentiment:I had to mount the rest of that set, too. But now it is done. Oh, look, even though I practiced on my grid paper first, I still managed to stamp the sentiment crooked. Ahhh, haven't lost my touch. ;) The Ladies will have the option of leaving off the ribbon and/or the sentiment. I like to give them choices, though most of them don't like to have to think when they are here.
So today is a holiday here in the USofA. We get the Monday off when Independence Day falls on a Sunday. So far, I've washed six windows, inside and out, and edited all the pics for this blog post. And made coffee. Not bad, not bad.
Next I plan to purge some clothing from a few dresser drawers. Just because it still fits doesn't mean I need it, right? If I haven't worn it in years, I'm giving it away. When you live in a teeny tiny condo, you need to reclaim all the space you can. With as much schtuff as I have, this is a constant battle, too.
I also have a plan for Project #4 for next weekend's Stamp Camps. The jury is still out on if I'll do the Shoe Box Swap on Saturday or not. I guess it depends on how things go this week, and if I get a clue for a project. We'll see.
Have a good Monday, and thanks for stopping by!
The rainbow hearts arE ADORABLE!!! Love the lace border especially.
ReplyDeleteI LOVE the flowers! You are so creative...makes me want to re-look at doing cards!
ReplyDeleteI'm exhausted just reading how much you have done today...I need to go and lie down. And look at all that work space, you're letting the side down now.
ReplyDeleteHope you enjoyed your holiday Lesley and all you US gals.
xxxxxx
I too love the lace heart border. You need to embrace your froufy side! LOL
ReplyDeleteMB
WOW you've been busy. All of these are FABULOUS!!
ReplyDelete