
Note: I'm probably not the first person to figure this out, but I haven't personally seen another blog or video with it, so ... here you go.
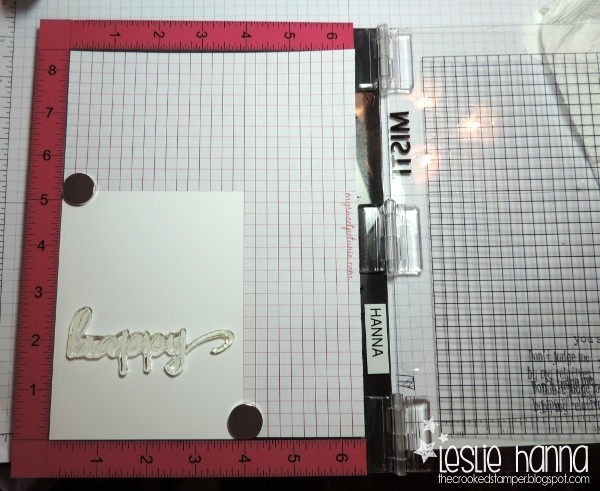
Step 1: Align your image on the card stock
Step 2: Close the lid to pick up your image with the cover, and ink it with your lightest color of ink

Sorry about the glare. Small desk + light + shiny plastic = glare. I put a piece of yellow card stock under the image so you can see it. Also, a handsome red arrow to direct your gaze.
I inked up the whole image with the lightest color, because we're going to over-stamp the same image with darker colors, and I didn't want to fuss with it.
Step 3: Stamp the image onto the card stock

At this point, if you are making multiple cards, just ink up the stamp again with the lightest color and stamp more panels. Your positioning is spot on.
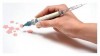
Step 4: Ink up the bottom two thirds of the image with the second darkest ink

Again with the yellow card stock under the lid for contrast. I didn't even bother cleaning the stamp before I added the second color. I might be lazy, but it really doesn't matter since the stamp is perfectly aligned.
You can touch up the top edge of this second color with a towel if you want to so you don't have a straight line. I don't do anything straight, but I did dab at it a little with a paper towel.
Step 5: Stamp the second color
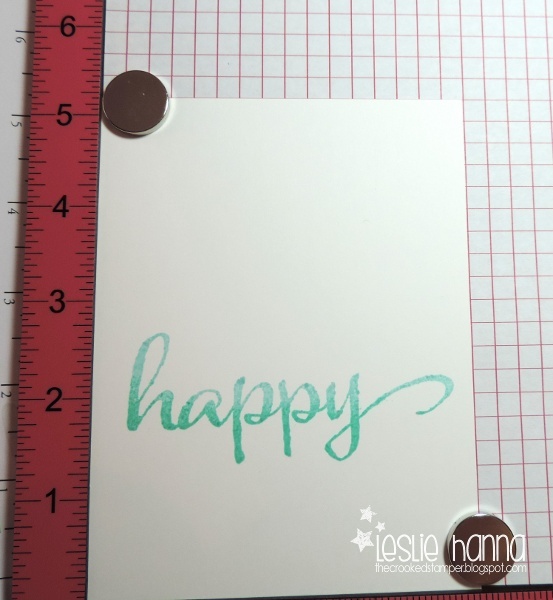
It's subtle, but that's what I wanted.
If you are making multiple cards, just ink up the stamp again and stamp the other panels. Your positioning is still spot on.
Step 6: Ink up the bottom third of the image with your darkest color and stamp

Ta da:

I bring you ombre. The cool thing about doing this yourself is you can do more than three colors, and colors of your choosing.
If you are making multiple cards, just repeat this step on the other panels. Your positioning is still spot on. I don't think I can emphasize that enough.
Here's a card I made with this ombre image:

Here's another one I made with a different word, but the same colors:

And lastly, one I made with pink and reds:

This one needs more bling. It was getting feisty, so I put the stuff back in the box. grumble
You can do this with a stamp positioner, too. Well, YOU can. I can't, which is why I caved and bought a MISTI. I might have just taken another step in justifying its purchase, too. Maybe.
If you try this, let me know!
Thanks for stopping by!


Brilliant!
ReplyDeleteNow I have another technique to try when my MISTI finally gets here! Excuse me while I go track my package...
ReplyDeleteFabulous idea. I am still resisting the MISTI, I just can't justify the price.
ReplyDeleteGotta get me a Misti!
ReplyDeleteLove this Leslie!! Thanks for the great tutorial. I bought a MISTI and now I can add this to the list of reasons I am glad I bought it!! It's a great stamping tool. Thanks for the ombré tutorial!!
ReplyDeleteVery clever! Looks great! And I'm jealous of your Misti!
ReplyDeleteAwesome! Thanks for sharing!
ReplyDeleteThese are fantastic.......thinking I may need a MISTI too!!
ReplyDeleteDarn you, darn you, darn you...a Misti...crap now I really have to think about it...but then the inkpads would be a heck of a lot cheaper...lol. Thanks so much for the tutorial, you did a great job.
ReplyDeleteWell aren't you clever? and enabling :) Love your cards.
ReplyDeleteFabulous! Can't wait to give this a try.
ReplyDeleteWell aren't you just fancy and schmancy all at the same time. I really like how this came out and your tool did all the hard work for you. Love it!
ReplyDeleteOh my gosh, this card is beautiful! Love the effect you achieved. :)
ReplyDelete