Showing posts with label From The Ashes. Show all posts

Monday, December 7, 2015

From The Ashes

I have a category on my blog called From the Ashes. It's a term I use when I make something out of crap stuff laying around on my desk. It's like cleaning, but not, as I don't have to put anything away, and in the end I have a card. #WIN

Here is my desk with all the parts-is-parts laid out:


We have (from left to right): a Hero Arts set I wanted to use again before I put it away, an unfinished card panel, a package of Santa hats, a stamped mouse from the HA set, a die-cut circle from some SU card stock, a die-cut circle of fun foam, and a bag of Pretty Pink Posh bling I bought last year and have never opened.

Here is the card that rose from these ashes:


Those silver circles are very shiny, so naturally I am incapable of capturing that on film pixels. The sentiment is stamped in HA Silver and embossed with SU silver embossing powder.

Maybe not my best work, but all that stuff is now off my desk, and I have one more card for my holiday card pile.

In other news, Hanukkah started last night, and I still haven't mailed my cards. I did start addressing the envelopes, though. Baby steps. Thank goodness I have six more days of holiday before my cards are late. :)

Thanks for stopping by!

Some of the stuff I used: MME Mistletoe Magic 6x6 paper pad, glitter paper from Mike's, Copics (0, C0, C1, C3, RV11), Little B Santa hat stickers, SU silver embossing powder, and the following:


Sunday, August 16, 2015

From The Ashes

I spied a piece of pretty paper in the pile of not-quite-UFOs next to my work area, and I decided to use it. It was just a piece of paper with a stamped sentiment. So I did this:


It was too easy, and now I have a pretty card and one less piece of paper in my way. I win.

Thanks for stopping by!


Thursday, January 1, 2015

From The Ashes

Happy New Year, everyone! Today I ventured into the craft room and came out with three cards. Yep: three! All of them were made from parts-is-parts, from both the UFO pile and the pile of card stock next to my trimmer. The only new things used were the dies that jumped into my cart at Frantic Stamper, and the white card bases.

Here's one of the cards, then I'll explain:


The die is new, and I cut it three times from a remnant of black card stock next to my trimmer.  The background is from the UFO pile, and the red layer was a piece torn off a failed card and sitting on my desk. 

I stuck the three layers of sentiment together, then stuck them to the UFO panel. They looked weird all lined up, so I made them not-lined-up, even slopping over the edge. After I put it all onto a white base, I covered the letters with clear Wink of Stella:


Next up, a different die and a different UFO remnant:

Oh, look, the H is crooked.

For the heart-shaped O in Love, I cut a pink heart from another UFO, set it into the black opening, and filled it with Glossy Accents. I also covered the text with Wink of Stella:


See? Same thing, just different parts.

When I cut that pink heart from the second UFO, I thought I'd cut the whole thing again from the UFO, and that gave me the third card:

Oh, look, the H is crooked, again.

The die fit in this spot on the UFO, and it was a total surprise color-wise when I looked at it. I decided to put it onto an orange panel, but the bottom half blended too well, so I cut a white circle for contrast.  I first put the whole die-cut in the circle, but I liked the die-cut more centered, so I got some slop-over.

I cut an orange heart out of a remnant of the orange panel and put it into the heart-shaped O in Love like I did with the other card. I colored the heart with clear Wink of Stella and filled the opening with Glossy Accents. I did not cover the rest of this die-cut with Wink of Stella:


So don't throw away your failed experiments! Eventually you could use them like I've done here to make fun cards.

Thanks for stopping by!

Stuff I used: Frantic Stamper Live, Love, Laugh die, Frantic Stamper Happy Birthday Script die, Wink of Stella clear brush, Glossy Accents, and lots and lots of UFOs and remnants.

Tuesday, September 2, 2014

SOS #167: Don't Crimp My Style

It's Tuesday, and time for a new challenge at Shopping Our Stash. This week's theme is Don't Crimp My Style, and we'd like you to use a crimper. If you don't have a crimper you can use corrugated cardboard instead. OR, you can use Ric Rac, since it's wavy ribbon.

I used my crimper to make this:


This is another card made from my UFO pile. I made the embossed & inked background a few months ago when I was playing with my go-to Online Card Class water color technique. I wondered what would happen if you first embossed a background, then stamped an inked acrylic block over it. What you see above is what happens, and I kinda love it. But I'd made several, and this one was left in the UFO pile, so it finally got used. Go, me.

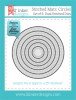
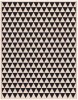
Oh, back to today's challenge: Crimping. I started off with an experiment: I crimped a piece of Kraft card stock, then die-cut some hearts from it. I knew some of the crimping would flatten out, but I wasn't sure just how much, so that part was the experiment. Even though about half the volume was squished, I kept the hearts since I think they nicely cut all the bright colors in the background.

After I'd assembled the card, I added some crimped leaves. For these, I die-cut them first. Then, with the leaves still in place (not popped out yet), I ran the whole rectangle through the crimper, then popped out the leaves. This let the leaves retain all of the nice ridges from the crimper.

Here's a detail shot so you might actually be able to see what I'm blathering on about:


I was attempting to channel my inner Lauren by following the current sketch from Cardabilities:


Since there's so much going on here, and it's sooooo far outside my comfort zone, I went pretty much with the example element shapes, and I'm kindof happy with how mine turned out.

So, I think you should go into your stash and find either your crimper or some hoarded corrugated cardboard and play along this week over at SOS. And make sure to check out the projects by my teammates!

Thanks for stopping by!

Stuff I used: Class A Peel pink dot sparkles, various Distress inks (I've forgotten what I used to make the background), and the following: