We're about mid-way through my
CSSC #10 sketch challenge, so I went into the craft room today to make another card.
Let me just say "it seemed like a good idea at the time". You see, I caved and bought a roll of washi tape (I KNOW, right?) ... Sigh, here's the card, then I'll explain:
And yes, it follows the sketch, which I turned on its ear:
This all started with a roll of Santa's Belt washi tape. I thought (innocently enough) that it would make for an easy card. HAHAHAHAHAHAHAHA! Three hours later ... just kidding - it was only about an hour and a half ... I had a card.
What took so long? Well, just because I found the SSS Schoolhouse Red to be an almost perfect match for the washi tape, so what? I had a red rectangle with a piece of washi tape on it. Big whoop.
I used a piece of plaid paper from my ancient Basic Grey Jovial 6x6 pad for the horizontal element. Then, when I placed the red rectangle over it to the left, it practically filled the card. I didn't want to cut it down too much, as I liked that there were two gold grommets/holes on either side of the buckle. Plus, Santa isn't skinny.
Also, I wanted to use HO, HO, HO as the sentiment, so I dissected (trisected?) a stamp to get just one HO, stamped it thrice with Memento Luxe black ink, and clear-embossed it. Then I cut them out with a circle die and layered them on black circles for contrast. Not only did the Santa fill the left side of the card, those circles filled the right side.
I accepted defeat and made a 5x7 card.
I did trim down the Santa a bit, but I kept the two-grommets-per-side on the belt. Santa's coat looked nekkid, so I found an old 1/4" punch and punched some black card stock for buttons.
I tried and tried to get all three of those HO circles to work on the right side, but it was just too much, even on the 5x7 base. I opted to stamp the HO twice on the card base, and used only one circle HO. (Go ahead, have some fun at my expense. I can take it.)
I added the
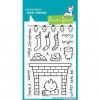
merry Christmas from a Lawn Fawn set.
For my last act, I added red pearls to the snowflake centers, then covered the buttons with Glossy Accents and set the card aside to dry.
Not able to leave well-enough alone, I made a second card using the same orientation of the sketch:
This card happened because I had a stamped kitteh out on my desk, and a strip of a Gelli print, so all I needed was a sentiment. I opted to use my now-opened Dylusions word set.
I added the "ha ha ha" using an old MFT alphabet set to help elongate the image on the left side.
About that sentiment. I think it's a hoot, but I had to change the comma into a semi-colon, and {shudder}
till should be
'til (short for until), but I couldn't figure out how to fix it. Next time I'll mask off the second
l. It's spelled properly on the packaging. Sigh.
And yes, it pretty much follows the sketch:
So, there are 10 days left to play. LOTS of time! The link-up is on the
original post; you have until 11:55 pm EST on the 21st to enter.
Thanks for stopping by!
Some of the stuff I used: Basic Grey Jovial 6x6 paper pad, Little B washi tape, 1/4" circle punch, SU black card stock, Neenah linen card stock (off-white/cream), Copics (0, C1, C3, C5, RV11), vat of clear embossing powder, Doodlebug Red, White & Blue pearls assortment, MFT Mini Banner Alphabet, and the following: