Friday, September 16, 2011

Sing Your Art Out

Welcome to "Sing Your Art Out" sponsored by Hambo Stamps! Today Hambo friends, customers, and the Bacon Bits Design Team (Bacon Bits - I love that!) are bringing you fun creations that depict song titles! It might be our favorite song, or just one that was fun to design. If you arrived here from Marcie's blog you are in the right place! If not, you might want to start back at the beginning at the Hambo blog to make sure you are eligible for the hopper prize!

A prize will be awarded to one participant whose song-themed creation tickles the Bacon Bits’ fancy in a singin' wingin' way! Another prize will be awarded randomly to a hopper who comments on all the blogs along the hop. The winners will be announced on the Hoedown blog, as well as on the Hambo company blog, Talk to the Ham, on Wednesday, September 21.

My creation had to cook in my brain for a while. I got a clue when out of nowhere, one of my tweeps linked to Van Morrison's "Moondance", and an idea was born. Once I had "moon" on the brain, I knew I could do this! This would also work for "Fly Me to the Moon", or Cat Stevens' "Moonshadow". I could milk this. I could. But I won't.

So here's my moon-inspired card:


I used the Hambo moonscape image, turned it upside down and had it shining down on the Earth. Yes, those trees and "grass" are supposed to depict the Earth. In a brainiac moment, I thought I could sponge a moon beam, and I think it looks okay, though it may be in Los Angeles - you know, dirty air? I used SU Going Grey for the center and Basic Grey for the edges (dirt). I went back and added some So Saffron to the very center of the "moon beam" to make it look less ... grey. Then I went back over the grey with some blue. I need to learn when to quit.

For bonus points I added some flowers from last week's Hambo Hoedown digi. The right side of my card needed something, and the left-over printed images were just sitting there in my UFO pile ... you see, I really had no choice. None.

So hum along now ...

It's a marvelous night for a moondance,
With the stars up above in your eyes,
A fantabulous night to make romance
'neath the cover of October skies.


You're welcome for that ear worm. Now hop on over to Pat's blog for another great sing-along song!

Thanks for stopping by!

PS: Yes, I know the top corner is cut. No, I don't want to talk about it.

Thursday, September 15, 2011

Hambo Hoedown - Home Is Where ...

This week's Hambo Hoedown image (free if you played last week and remembered to email them your card) is this adorable house:

I immediately saw a Dr. Seuss house. :)

This week's challenge is to incorporate something from around the house that you don't normally see on a card! Um, well, I kinda stretched this a bit, and used something you won't normally see on one of MY cards. First, here's my card:

See those trees? They came from this household object:

Yep - a tissue box. So I guess my title would be "Home Is Where The Tissues Are". :) Now, I know a lot of crafters that would say this is a "normal" item to incorporate into a card, but not in my world. I just don't ever do that, unless someone challenges me to do so. I thought the pattern on this box would make cool trees for the Dr. Seuss house, so that's what I did. The strip of grass behind the house is a piece of the flap that I ripped off the side of the box. It's jagged and I think it's perfect. I also used some of the blue dot thingies. Please don't ask me what they represent, because I honestly don't know, but I do think they look cool there.

Other stuff I used: SU sentiment, SU Pacific Point card stock, A Muse Studio cloud dies, and ribbon from my Every Color of Green and Blue Ribbon But The One I Need box. Oh, and both SU markers and Copics for coloring.

I'm now going to link this over at the Hambo Hoedown, and email it to them before I forget. :)

Thanks for stopping by!

Tuesday, September 13, 2011

Jingle Belles Rock # 37 DECK the Halls

This week's Jingle Belles' challenge was DECK the halls! We were asked to incorporate a "card" into our card:

make a freestanding (2.5 x 3.5") xmas-themed Artist Trading Card
OR
add an ATC-sized element to your holiday card
OR
incorporate a playing card into your design
OR
use a recycled xmas card (or an element from
one!) on your (newly made) holiday card!


So many options. So many. And believe it or not, I just a few weeks ago ordered a mini deck of cards, but I was stumped as to how to incorporate it into a holiday card, so I didn't. Instead, I went with an ATC-sized piece of something-something, and after 4 or 8 false starts, I ended up with this:

DO NOT ask me what happened here, because I'm still trying to figure it out. What possessed me to go with acetate for the base?! WHAT?!?! And it's the thick stuff, so it is very stiff and weighs about 3.7 pounds. The ATC element is the piece of SU flocked red&white DSP. The piece of striped flocked paper under it is from the same pack of hoarded and unloved papers.

The acetate base is 5" square, and the front square of DSP is 4", so I could slop over the other elements onto the clear parts of the card front. I put the red piece at an angle, then added the two green die-cut pieces to get them off my table. Same with the lace - it was left over from something else, and it looked like it would work, so I used it.

The flower + snowflake + snowflake brad add a circle element with all that horizontal and vertical stuff. I was stumped about what to do for a sentiment, because I didn't want to cover up the center of the red ATC thingamabobber, so I went with a die-cut piece of vellum that I stamped with a Paper Smooches sentiment. Ever-challenged with adhering vellum, I used a MS glue pen and glued it to both the green flowers. There's not much holding it on! :)

That's it! I declare it "finished"! Now watch: next week's challenge will be to make an acetate card base. :)

Thanks for stopping by!

SOS Challenge # 17 - Shabby Chic, Distressed or Vintage

This week's challenge at Shopping Our Stash is Shabby Chic or Distressed or Vintage. --> Do you have a plethora of Tim Holtz supplies longing to be used? Or how about some vintage findings, or shabby chic trims? Dig out your vintage-themed papers, stamps, embellishments or go shabby chic. Or you can just distress the edges of your papers!

Well, most of you know by now I don't have the vintage gene, and I couldn't tell you the difference between "vintage" or "shabby chic" (pron: sheeeek), but I have a huuuuuuuge collection of goods from Webster's Pages, and they know vintage, or is it shabby chic? ;/

So here's my card:

I tried about 4 different things before I just gave up and let the paper be the focal point. No matter what I did, it covered up those pretty clocks, and I wanted them all to show. Ergo, I opted for lace since it's see-through. The top two laces are from my Webster's Pages haul, and the bottom piece of lace is from this roll:

Yes, it's a lot. It's kindof stiff, so it won't do much but lay there, so it was perfect to add to this card. Only about 2 miles of it left now ... The vanilla seam binding, antique brad and Blue Bayou card base are all SU.

Now go into your stash and find something vintage-y, or shabby-sheek-y, or distressed, or make it look distressed, then make a card with it and link it to this week's Shopping Our Stash post so we can see what you've made!

Thanks for stopping by!

Saturday, September 10, 2011

Happy Holidays?

Yes, I know it's not even Halloween yet, but I decided to include a Christmas Card with this month's Stamp Camp projects. Just because. I mostly CASEd this card by Jan Tink, but of course I made a few changes, just to make it my own. Here's mine:

I used the same papers (Frostwood Lodge) from the Holiday Mini - I think it's brilliant how she got 4 different patterns in there with tiny strips of each. I would have been loading this thing up until it weighed 3 pounds. ;/ What I changed: I don't have that snowflake die* (yet), so I used the Northern Frost Sizzlit Decorative Strip die and cut just one from some of the Silver Glimmer paper. It's a really detailed die, and the paper is kindof thick, so I didn't bother punching out the little bits in the center - just around the outer edge:


Something else I did differently - I added a piece of the velvet ribbon to the bunch, and put a rhinestone brad around all of it and put that through the snowflake to hold it in place. Last month The Ladies had such a swell time with the brad-around-ribbon thing I thought I'd hit them up again with it. :)

That's project 4 of 4, so now it's time to cut the card stock and make up the kits. I have a few more things up my sleeve, and if I get my act together, I may even get to make them today. Wish me luck! :)

Thanks for stopping by!

ETA: She used the snowflake punch, not a die, and yes I have it, but I just broke it, so we still won't be using it tomorrow. ;/

Friday, September 9, 2011

Hambo Hoedown - Fall Colors

This week's Hambo Hoedown image is this cute bunch of flowers:

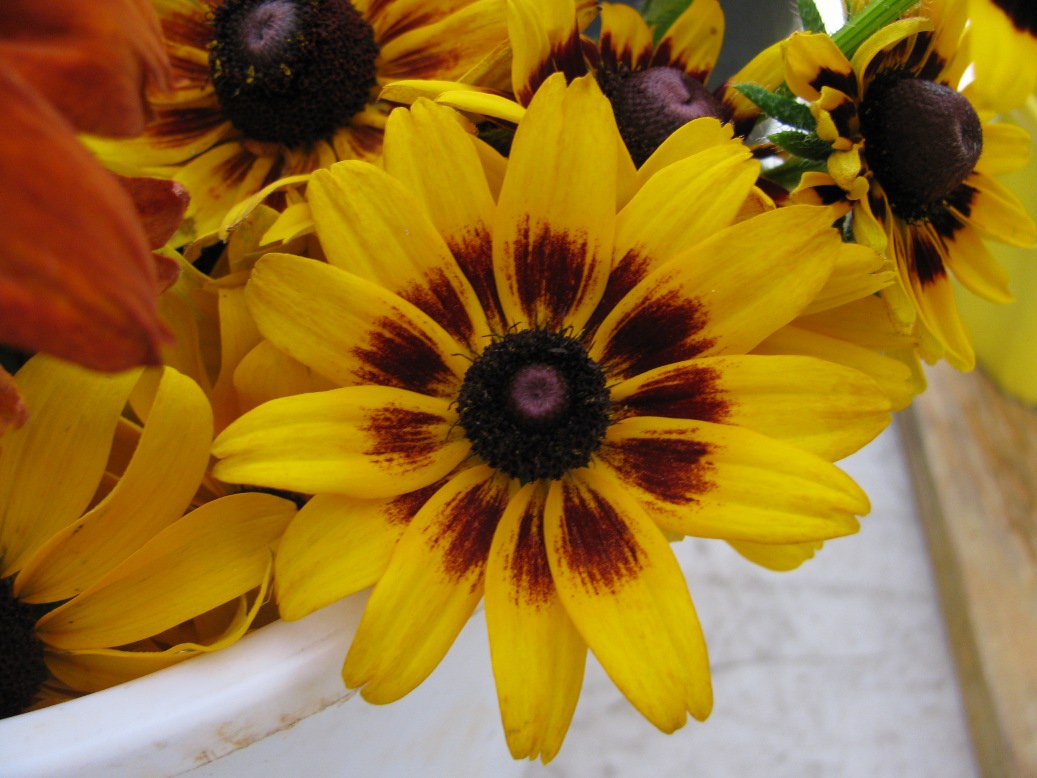
Our instructions were to use this image to make a card using "Fall colors", whatever that meant to us. Well, one of the things I love about fall are the sunflowers and Gloriosa Daisies at the market. Like these:


Another influence was a photograph of a whole field of sunflowers that our resident photographer sells. So, based on the glorious coloring of these Gloriosa Daisies and the "field of flowers" idea, I made this:

I split up the image and printed the two bigger flowers a LOT, colored them, then cut them out. Yes, I did. Ow. But I think it was worth it. I really like how this came out. :) The sentiment is from an MFT set, and the clouds are cut with an A Muse Studio die set. (I love how tiny they are!)

And yes, I know, I need to work on my blending skillz. I told you stamping on a Friday night after a loooong week at work was not the best idea I've every had. I think I'll take a Copics class, and soon!

Alrighty, then, I'm headed over to the Hambo Hoedown blog to link this, then I'll email it so I'll get next week's image, then I'm going to bed. I need my sleep so I have the strength to stamp some more! :)

Thanks for stopping by!

Thursday, September 8, 2011

Doilies

I had no intention of getting this doily set, but Hostess Dollars can be very alluring, especially for something on your "maybe" list. :) Then Sue, one of my tweeps who I've met in person by the way all the way from Vancouver yes that's right, showed me a very cool card and I CASEd it. Here's mine:

She used Cajun Craze, Pool Party and Daffodil Delight, with a Pool Party layer, punched Lace Ribbon Border and In Color brad. I went with Calypso Coral, Pool Party and Island Indigo, and Calypso Coral layer & brad, and I'm pretty happy with the result. :) There is a big empty bottom right in which they can stamp a sentiment, or not.

This card was crazy-easy to make. They will love that!

Okay, one more project to go before midnight Sat/Sun. I think I can do this! :)

Thanks for stopping by!

Wednesday, September 7, 2011

I Made Another Box

It's been a slow, slow, non-productive week here in the Crooked household. I've started a bazillion projects for this weekend's Stamp Camps and made nothing but a mess. In desperation, I thought I could distract The Ladies with chocolate - hey, it's worked before! :) In my world, chocolate needs a reason for being out on the tables ... it needs to be disguised as part of a project so it's not so obviously a distraction ... it needs a box project.

Last month I made this box out of some new Christmas papers, but since it's too early for Christmas projects in September, I decided we'll make one with Halloween papers instead. I just made this:

It's a 2-5-7-10 box, and I used the new Simply Scored tool which makes it easy-peasy! No measuring - there are tabs on the Simply Scored to mark where you need to ... score. Here's what makes it so easy:

(Sorry for the really, really awful photo, but it's NIGHT here, and it's DARK.) You put the tabs at the 2, 5, 7 and 10 marks, put your paper in, and just score at each marker. For my Stamp Camps, measuring and scoring projects can be fraught with "oops" and "oh, no" to where I just want to make things easier. This could do it! :)

The DSP is from the Frightful Sight pack. The ribbon is Delphinium (retired) so I'll probably switch it out with Concord Crush. Wouldn't these make great co-worker treat bags? *I* think so.

Okay, that's 1 1/2 projects down, 2 1/2 to go. It's gonna be a long week, people.

Thanks for stopping by!

Tuesday, September 6, 2011

SOS Challenge #16 - Birds, Bugs or Beasts

This week's challenge at Shopping Our Stash is to use Birds, Bugs, or Beasts (no people). I chose to use butterflies:

Somewhere in my CASE THIS, er, I mean my INSPIRATION file (yeah, that's better) is a card with yellow and black butterflies. I decided that the time I was spending looking for it to CASE it, I could make up my own, so I did. I'll still give it "inspiration" credit, though. If anyone knows the card of which I speak, please let me know so I can link to it. kthx

I stamped the Houndstooth butterfly from Butterfly Prints in Daffodil Delight on white and in Basic Black on Daffodil Delight, then punched them out with the Butterfly punch. The white card stock layer is in two pieces, and I dry-embossed the top piece with the Houndstooth embossing folder. (I tried embossing just the top 2/3 and it came out a warped mess.) I covered the seam with a narrow strip of black card stock, then stuck the butterflies on with glue dots. I colored some of the smallest pearls with a black Sharpie and used them as the butterflies' bodies. Lastly, I chose a sentiment from Teeny Tiny Wishes.

I think this is a potential card for my September Stamp Camps (which are next weekend - yikes!).

So go rummage in your stash and find some bugs or birds or beasties, make a card, then post it over at Shopping Our Stash so we can see what you've made!

Thanks for stopping by!

Monday, September 5, 2011

Jingle Belles Rock # 36 - Love's Labor Day Lost

If you're looking for the Fall Fun Blog Hop, please scroll down to the next post. :)

This week those Jingle Belles pulled a fast one on us. In honor of Labor Day here in the USofA, we were asked to CASE (Copy And Selectively Edit ... really? I thought it was Copy And Steal Share Everything ... hmph) someone else's card from the vast submissions lists of weeks past, even one of our own.

I had planned to spend days perusing the Jingle Belles' archives, and I did - in fact, I did NOTHING all day Sunday but blurf and make a horrible mess at the Captain's Table - but I kept coming back to this one:

These are by Lisa H of Recklinghausen Musings, and were in my Top 3 from last week's Midas challenge. I loved how her cards were mostly all white or cream, with just an accent of gold or silver. So using them as my inspiration, I made this:

In making my mess yesterday, I had stumbled upon a 12x12 sheet of that bling-y paper and pulled it out in case I got inspired. Fortunately, those bling-y bits are evenly placed so all I had to do was line up my paper cutter between the rows. I'll call it "snow" for the purpose of this card.

I die-cut a remnant of the paper from my own Midas card for the deer. He is leaping at an awkward angle because of where I had to place the teeny tiny strips of dimensionals between the rows of bling. I did the best I could. ;/

I reached into my box of Miscellaneous ribbons and pulled out that piece of ruffled white and a spool of skinny gold. Poifect! Naturally, I thought the deer's neck looked nekkid, so I used a piece of the gold ribbon to make him a bow.

The sentiment is (poorly) embossed with gold embossing powder. Maybe the person looking at this card in November or December will be blinded by the bling and not notice. A girl can dream.

I still have 3.5 cards to make for next weekend's Stamp Camps, so it's back to work for me!

Thanks for stopping by!