Saturday, May 19, 2012

Marquee Card

For my next trick, I worked on the Marquee card. I made one last night based on a combination of Julie's instructions for a square card (with measurements) while simultaneously attempting to on-the-spot convert it to an A2 sized card. It was beautiful, and a resounding failure. It now graces the trash can.

I started over and followed the instructions that came with the class, because I know they would work. Next time, if there is a next time, I'll do the A2 version. WHAT was I thinking?!?!?

I still did it backwards, but I'll get to that in a sec. I also made it white, so it's impossible for me to photograph. Here's the card, then I'll explain:

See that black circle in the center? When you open the front flaps of the card, the "curtain" pulls back and reveals your message. Fun, huh?

Here's the card half-open:

and almost all the way open:

Here's the inside message:

I dusted off and used my SU Riveting set from forever ago. It's in my "don't you ever get rid of this one" drawer of stamp sets. I stamped it in Memento black and use SU Pink Passion (also retired) for the ring of color. It's stamped off once so it's not so BRIGHT, because, you know, it's GAH pink!

The last thing I did was color the center heart with a silver glitter pen.

The papers are from The Heaplet, and now they are almost gone. So happy! :)

About that "backwards" part. I made the card base white, and did the whole inside before I got a clue about the outside. I actually thought about it over night. Today I decided to do white-on-white for the outside, so I inked up my now-open Impression Obsession Greenery Cover-A-Card background stamp with Ranger Embossing ink and heat-embossed it with white EP. Here you can see the card right after I did the embossing:

The blue is a post-it-note I used to cover the already-finished innards of the card. The cool thing about the IO Cover-A-Card stamps is they are so BIG, this 5x5 card easily fit over it with room to spare! But I did have to protect the opening. Once I was done with the embossing, I took off the post-it.

White-on-white is cool, but boring, so I decided to add a spot of color:

This is a piece of hot pink Washi tape I stuck onto a piece of card stock and punched out with my SU Small Heart punch. Perfect.

So there it is -- a marquee card. I think this could work for either a wedding or engagement. I can now say I've made one, and that piece of bird paper is mostly gone, too. I win!  :)

Thanks for stopping by!

Friday, May 18, 2012

Zipper Card


One of the projects of the Fold It class I'm taking is how to make a Zipper card. I'd never actually heard of this one, so it intrigued me, and was one of the first ones I tried to make. What, today was the last day of a two-week class and I'm just starting to make my cards? *I* don't see anything wrong with this picture, do you? *glares*

Anyway, this one looked cool, so I gave it a shot tonight. Actually, I'd planned to do three different cards tonight, and I did make three, but it took three attempts of one card to get it right. :(

Here it is, then I'll explain:

Looks strangely familiar, non? YES! The chevron piece was cut from the digital one I printed and didn't use for last night's card. The hexagons are a Paper Smooches stamp. I also stamped it on remnants of the printed color card stock from last night and cut a few out to put on the left side of the strip. Just a little something-something, ya know? The twine was an afterthought ... you know me and white space.

I really want to stamp "wishing you a ..." to the left of the chevron piece, but I can't find a stamp in my stash that says that, and anyway, I'm tired. I'll try again tomorrow. If I find one, I'll show you the updated card.

Now about the 'zipper" part of this.  Fortunately for me, I messed up two of these, so I have one I can use to demonstrate the mechanics. Here it is "unzipped", or "not yet open":

 You can kinda see the perforated lines above and below the chevron. What you do is pull up on the "tab", or the pointy end of the chevron, and it unzips along the perforated lines to reveal ... your message:

Ta-da! The Happy Birthday is white-embossed onto the black card base so it shows when the top strip is pulled back. How cool is that? (Please ignore the top edge where I rrrrrripped off the back and stuck it into my heaplet. Pffth.

Now you see why "wishing you a ..." would work so well on the front. I may just cut one out on the Silhouette, since I'd have to stamp it on textured card stock ...

One note about stamping on textured card stock: I can't do it:

 Too hard. See how easy it is to stamp on smooth card stock:

Yes, I tried to use smooth card stock for the front, but (1) it was boring, and (2) after four attempts I found I couldn't get the perforating blade to cut all the way through. Yeah, it was too heavy. So I used a piece of Bazzill instead, and only destroyed 3/4 of that sheet. Stamping is HARD, people, HARD!

Speaking of which, I'll attempt the other two cards tomorrow. They might take longer than it took Julie to make them in her video. Just a guess ...

Thanks for stopping by!

Thursday, May 17, 2012

The Rule of Three

In the stampy world, we follow the rule of three, and if not three, then an odd number, but for the sake of my tale tonight it's a rule of three. The focal point of a card is a function of thirds, and images or embellishments work best in threes.

In life, too, things happen in threes, both good and bad. Let's take, for instance, the mail. Most of you know by now I L-O-V-E LOVE my Post Office. LOOOVE those guys. I might bake for them this year, even.  But my current personal postal delivery person? Not so much. My previous postal delivery person would put something inside my door if it wouldn't fit into the tiny opening in our communal lock box. Not this one, nope. Just look at this:

This was a small flat-rate box full of washi tape. Do you see that lip on the door opening? The one up against which the box is wedged? Yeah, pffth. When the postal delivery person opens the BACK of the lock box, there are no small doors like this, so no lips. They don't seem to understand this box cannot be un-wedged by the recipient. Fortunately for me, I could hack open the edge of the box and pull out the smaller packages inside, and when finished, I crushed this box to get it out.  Now, I ask you, what if it had been a book? Hmmm? I would have had to resort to a nasty message wedged behind it, if I could get my hand in that far. Okay, that's one.

Next time:

 Flat rate envelope. Edges bent up on both sides. I couldn't un-wedge this one, either, so I cut it open, emptied it, and saved the mangled envelope as evidence. What if this had been card stock? That's two.

I printed off both of those pictures and put it with the mangled envelope, intending to go to the local Post Office branch last Saturday and complain loudly. Then I opted to wait and see if there was a #3. There was.

Last night:

Please save me. I did finally un-wedge this one, but oh, my word. The whole box, including the post on which it stands, complained loudly. The neighbors were entertained, too. I was not happy.

I don't know what sort of favor this person thinks they're doing for me, but I really wish they'd stop. And I do plan to go to the Post office this Saturday, with all three photos and the mangled envelope, and register an official complaint. Hmph.

Now about that stampy rule of three. Last night I alluded to a card that desperately needed saving from a glue mishap.  I ended up saving it by adding three additional images. I DID! Lookie:

This all started when I saw last week's Play Date Cafe challenge:

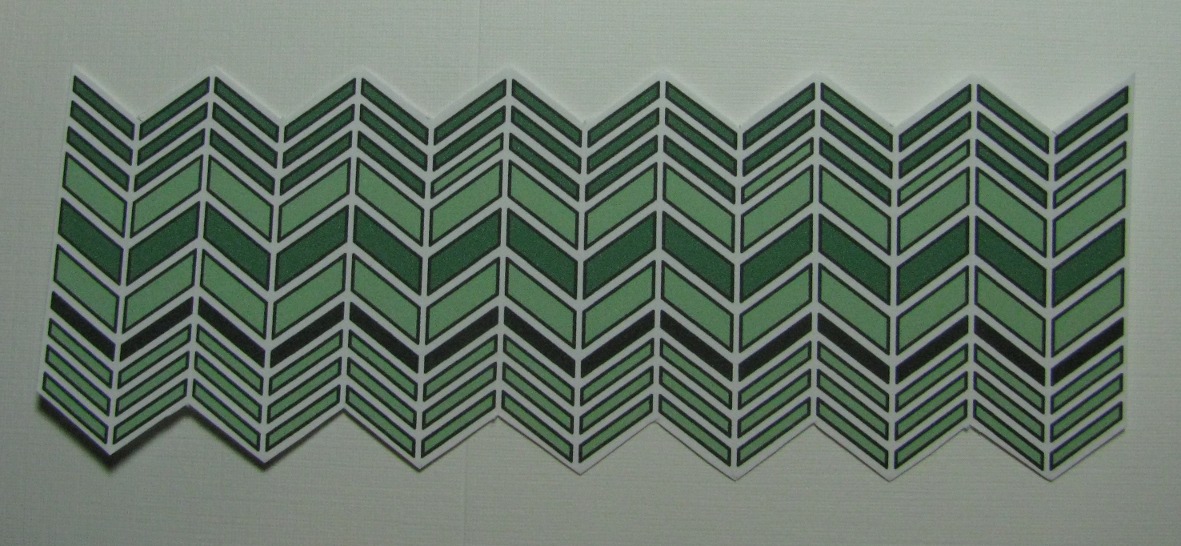
I immediately knew I'd use the lone gold fish I had left over from some other card (image by Hero Arts). I spent the next two days working out the green part. I had this idea to use the chevron digital image* we got as part of our A Cut Above class and fill it with the greens, which I did here:

Then, for some reason that escapes me now, I abandoned that idea and ended up going back to print some color rectangles of the greens so I could just die-cut some chevrons with my MFT dies:

Don't ask, because I don't know.

Now, about those smaller fish that come in threes.  Ahem. Well, you might say two of them cover unfortunate accidents. The one above the chevrons covers some glue that I managed to erase with my adhesive remover, but that left an irremovable smudge behind. It was bad.  The second one covers a schmear of Gelato that happened after I did this:


What you see here is a combination of poor planning and genius. I heat embossed the A Muse goldfish four times, because I know me pretty well, and I screw up, a lot. The thought of dragging out the black EP and heat tool again ... ugh, it was easier to have an extra, just in case.

I covered them with three different Gelatos, working from dark to light instead of light to dark, so I had to clean off the surface of each one up above there. Geez. I took my finger and rubbed them to blend the colors, then I cut them out.

Here's the finished card again, so you don't need to scroooooll up all the way to the first one:

The top two small fish cover boo-boos, and the third one at the bottom right is for balance. So, yeah, this card took me three days to make. Oh, another "three"! Ha. Anyway, I like this "three" way better than the postal service delivery person "three". And I'll use that digital chevron some day. It's replaced the big fish in the UFO pile. Do you see why I'll never be finished?

Thanks for reading this far!  And thanks for stopping by!

* That digital image is just that: a digital image. It is NOT a cut file. I just manipulate it using the Silhouette software, then print it and cut it out. I've had several comments about the detail, but it's not cut.

Wednesday, May 16, 2012

Dust 'Em Off!

The latest challenge at A Blog Named Hero is to dust off a seldom- or never-used Hero Arts item and use it to make a card.  My only problem was where to start?!?! I took the opportunity to go through my bag(s) of I MUST OWN THIS stamps that are still, um, in their packages. Yes, indeedy.

I selected my Hero Arts Three Ferns stamp, and then I had A Moment. Angels may have sung, even.  First, there was the fern stamp. Then I had an email from a pal asking if I had any traditional Sympathy cards. I also had read something about stamping on patterned paper, and wanted to do that again. This is what came out:

 Ta-da! It was kismet. And I don't even care that the fern didn't perfectly stamp! Both the text paper and the green layer are from The Heaplet. Ink is Ranger Distress Bundled Sage. Sentiment is Paper Smooches, stamped in SU Basic Gray. Pearls by KaiserCraft.

Okay, now if you'll excuse me, I need to go try and salvage a card I spent HOURS making yesterday, and trashed with some poorly schmeared glue. :(

Thanks for stopping by!

Tuesday, May 15, 2012

Paper Smooches Birthday

(If you are looking for this week's Shopping Our Stash challenge, please scroll down, or click here.)

When I saw the latest Paper Smooches Sparks challenge, I was inspired to play. I made three cards last night that I threw away, but I tried again today. Here is the sketch:


And here is my latest attempt:

This is NOT how it started, but in the end I'm glad I got to open both my Party Posse and Party Pals stamp sets, and I also used remnants for everything but the card base.

As soon as I stamped this image, I knew I was in trouble since I am not a fan of coloring, so paper piecing it was! I stamped the balloon on a yellow scrap and the critters on some Basic Grey PB&J pieces. Then I had to stamp the eyes and teef again so they stood out.

Once I decided to cover the balloon in Crystal Effects, I thought maybe I should have just colored it instead of paper piecing:

Well, it IS very shiny. :)

Here's a close-up of Miss Kitty and her jewels:

Yeah, she's wearing her pearls! There are other pearls on this card front, mostly to cover unexplained ink smudges. Well, at least her eyes aren't blood-shot, so there's that. :)

Thanks for stopping by!

SOS #52 - BINGO!

It's time for another challenge at Shopping Our Stash, and this week is a big one! This is week 52, which means we've had ONE YEAR of challenges! Whoot! In celebration, we're changing things up a bit.

First, the challenge - it's BINGO! A BINGO card has 5 letters across and 5 rows, so it's a 5x5 grid (25 squares). You need to use the items in a row across, a column down, or a diagonal. We felt the need to clarify, because some of you BINGO professionals might try to do a Four Corners or some other fancy schmancy BINGO game, but that won't count here. Nope. It's gotta be a row, a column, or a diagonal.

Also, because you need to do a 5-element project, we are giving you TWO WEEKS to produce yours. That's right - you have two weeks to link us up to your creations.

Aaaaaand, to make it even MORE interesting, some of us are having giveaways! Yep, we are. We're all acting independently on the giveaway part, so make sure to visit the blogs of my fellow DT peeps and see if they are giving away anything. Oh, am I? Why yes, I am! I'll go into da rulez later.

Here's the BINGO card:


I used the 'B' column: yellow, glitter, monster, brad and fabric.  Here's my card:

I first made this card as a joke, but it grew on me, so I declared it to be my card for SOS 52! The  monstahs were cut from yellow patterned paper on my Silhouette. I designed the monstah myself back when I made this card. The grass is sticky-back canvas (which passes for fabric), and I distressed it with some Ranger Bundled Sage Distress ink. The baby monstahs have brads for eyes, and the clouds are die-cut from blue glitter paper.

All of these papers, except for the card base*, were from scraps. Even the birthday banner was a UFO.

Ready for my giveaway? I have four -- 1,2,3 FOUR -- embossing folders:


These can all be yours if you do the following:

1. Make a card for this challenge and link up over at Shopping Our Stash.
2. Leave a comment on THIS POST telling me which # you linked as at SOS.
3. You can enter more than once if you make more than one card.

My giveaway will span both weeks of the challenge, so you have until midnight EDT on Monday the 28th to link up to SOS and come back here to leave a comment.

Okay, that's enough blathering from me. Now it's YOUR turn. Study the BINGO card, then go into your stash and create a project using all the elements in a row, a column or a diagonal. Then come back to the Shopping Our Stash blog to link us up so we can see what you've made!

Good luck, and thanks for stopping by!

*In a break with tradition, this is a 5x7 card. I had to make it bigger to contain all the monstahs!

Sunday, May 13, 2012

Jingle Belles - Embossing

The current Jingle Belles challenge is to use embossing on our cards. I'm still working out of my Heaplet, so I was handicapped from the get-go. I mean, well ... just look, then I'll explain:

I selected a piece of old old old SU holiday paper from The Heaplet and ran it through an SU embossing folder. It's thin, one-sided paper, and it, um, distressed itself. This is actually my second piece, since I attempted to sand the first one and I shredded it. You can see I left the white showing on this one so it looks like I meant to do that. I was almost out of that piece of paper, too, which I'll whine talk about here in a moment.

I decided to follow this sketch from Cardabilities:

So I got to work on the center section:

First, I added the black border. I'm not even sure it goes, but there it is.  Next, I grabbed one of my MS doily tags, and it was so WHITE, I sponged it with Crumb Cake ink. Then I had an idea I'd use one of my Big A$$ buttons in the center, but none of them were the right color, of course, so I'll just MAKE one, right? Let me just say that I managed to disappear that whole piece of paper by punching the wrong sized circles out of it. By the time I got one the right size, I was forced to punch circles out of thin chipboard, and only had one piece of patterned paper for the top layer. It was a mess.

So you're wondering where that button is, aren't you? It's in the trash! I was coloring the edges of the chipboard and managed to slip not once, but TWICE and colored over the last remaining piece of patterned paper I had. FAIL!

So I had lunch.

Then I remembered these fabby stickers I got from Miss Lauren herself, no less, and by this point I didn't even care that it was shiny. I punched a Kraft circle to put under it (yes, that's Kraft ... my photography skillz sukketh, k?) and that part was decided.

Sentiment ... I needed a sentiment. I decided to go for bonus points and heat-emboss a sentiment! The JOY stamp was stamped in Ranger embossing ink -- so sticky! -- and heat-embossed with Ranger Antique Linen Distress EP. I like that it's not shiny, and it almost balances out the sticker. Almost.

Oh, that was stamped on Kraft, so I made some red inky spray with some Ranger reinker and a mini mister and sprayed it, then distressed the edges with a really dark Brown. Then I rested.

I  ... don't even want to talk about the washi tape.

Oh, look, it's Margarita O'clock!

Thanks for stopping by!

Another Scrappy Challenge

Sometimes I should just cut my losses and stop. You know, when you start with what seemed like a good idea at the time, then it goes from bad to worse to JUST THROW IT OUT, but you can't, so you keep going? That would be this card:

I pretty much hate it. It all started with a scrap of embossed striped Bazzill card stock I rescued from The Heaplet. It was boring, so I colored it with green and silver Gelato crayon thingies, schmeared them together to blend, then wiped off the embossed part. Meh.

Then I spied that negative pom-pom-looking thing in my UFO pile, so I decided I'd contrast the green and white with black. Again, you neat people are really missing out on all this inspiration. Seriously.

I rescued a scrap of SU Night & Day and put the pom-pom scrap at the bottom and another strip of black at the top.

I was actually using this sketch from Skipping Stones Design:

so I still needed a strip of something across that black piece, an element for the flower, and a sentiment at the bottom.  A woman's work is never done.

Here you can see where I added ... wait for it ... a strip of washi tape:

 That flower ... about that flower. It's from a package of SU felt flowers I hoarded, meaning I have an unopened package of them, too. The center of the flower has brown stitching, and, well, that just wasn't going to work, so I sewed a black button through it, and through the whole top layer. It's not going anywhere.

That left me with the sentiment. Stamping across strips of embossed card stock isn't a lot of fun, so I went looking for a black rub-on or sticker. Oh, yes, I haz some. Most of my SU rub-ons are brown, so I used a sticker from Class A Peel instead:

It's a little wonkier than it was in the package, but I think it looks fine.

Next, I'll work on my Jingle Belles card for this fortnight, unless I get distracted. :)

Thanks for stopping by!

Sketchy 3-Fer

Today I was trolling the challenge blogs in my Google Reader, looking for something to jump out at me, when I saw this one at CPS-Card Sketches:

Doesn't this scream SCRAPS!? It also screams WASHI TAPE! I couldn't decide what to do, so I made three! 

First, the obvious, and the one with the lowest sweat factor:

I mean, c'mon, this was too easy. So I challenged myself to break out some MFT chevron dies (never used) to make this one from paper scraps:

This one was a little more work, mostly because I applied glue to the wrong side of a chevron and had to re-cut it. ;/

For my third card, I did a combination of the two and die-cut washi tape:

I stuck the tape to a piece of white and cut it. What I didn't know was the tiniest die just cuts a wavy edge, not actually a skinny chevron, which explains the edge on the pink and orange strips.

Here are the three dies I used:

I need to play with these more - they are a lot of fun!

Okay, laundry calls and I need lunch. I have another challenge on deck, so I'll be back later.

Thanks for stopping by!

Saturday, May 12, 2012

Emerging Butterfly

I DID IT! I DID IT! I DID IT! For TEN DAYS I've been trying to make this work, and I finally got it!

One of our last lessons in the online A Cut Above classes was how to do partial cuts with the Silhouette. Jennifer's example used a butterfly cut file, and she made it so the body of the butterfly wouldn't cut, thus making the wings appear as if they were emerging from the card. SO COOL!

I already have several butterfly images for the Silhouette, and I tried, and I tried,  and I tried, but I got no satisfaction. I always messed up the last step. Then Kristina came to our rescue in the forum and showed us how to do what was needed, and TA DA! I GOT IT!

Here's my card:

 Kinda difficult to tell here, but look at it from the side:

See how the body isn't cut? This. is. so. cool.

So, if you haven't taken the A Cut Above classes yet, please do! You can take the whole series that covers both die-cutting and the Silhouette, and they will also be offered in two parts starting on the 15th, so you can take only the part you want. I think this may be the best online class I've taken. HIGHLY recommended.

Oh, all of the parts-is-parts for this card, except for the base, were from the Heaplet. Scraps, baby! :)

Thanks for stopping by!