Thursday, November 13, 2014

The Road To A Friend's House

The other day I decided I needed to break out some of my new dies and show them some love. Naturally, I went for a more complicated design, but I got it all in there!

Here's my card, then I'll explain:


When I saw the new stamps and dies designed by Julie Ebersole for Ellen Hutson, I NEEDED to own a few of them. These house and tree dies are perfect for building a scene without a lot of fuss (no masking, etc.), so I die-cut them plus a bunch of the trees.

Now, about those snowy hill dies (new from Simon Says Stamp). There are actually pairs of dies in this set. One cuts, and one impresses the stitching. I really like this since you can cut as close (or as far away) from the stitching as you'd like. Plus, you can cut without the stitching if you want to. Note: I cut the dies apart, so if I wasn't supposed too: oops.

I colored the houses and trees with Copic markers, then started assembly. Once I figured out where I wanted to put the houses, I lifted them up to color behind them with my yellow marker. Saving the tiny windows, coloring them, and replacing them in their right spots sounded like work.

The snow hill under the houses is popped up on one layer of foam tape, and the piece over it has two layers of foam tape.

I was so excited to finish the layering that I actually forgot to sponge the sky, so I ended up doing that after the houses were in place.

A black marker to add some birds and a blue card base, and it was finished.

Oooh, I just had another idea for these houses. Off to play!

Thanks for stopping by!

Stuff I used: sentiment by A Muse, and the following:


Wednesday, November 12, 2014

The Great Outdoors

The current Jingle Belles challenge theme is The Great Outdoors, and I had an idea. It happens once in a while.

After much futzing, here's what came out:


I know, I know, the theme is OUTdoors, and this is obviously INdoors, but hear me out. I love looking at snow from the warmth of my couch. I don't actually mind snow, or even driving in it*, but I think the best part of Winter is snow falling OUTdoors when you are INdoors.

So, let's start with the OUTdoor part: the snowy trees. I stamped my SU Lovely As A Tree tree in an Olive ink onto a piece of Kraft card stock. I knew I wanted to put a window over them, so I masked off around the window (actually, a little bit inside of it), then stamped the trees.

Next up: the INdoors. My room needed a floor and some wall decor, so I first made a faux wood floor. I used a pencil and ruler to draw the diagonal lines, then went over them with a brown marker, and drew in some horizontal lines to make it look like wood planks. I didn't bother with a wood grain. I just went over the wood with Antique Linen, then again around the edges with Gathered Twigs.

For the wall I used a piece of paper from a pile of unfinished card parts, cut a hole in the center a bit smaller than the window, stuck it down atop the faux wood floor, then added one of the windows. It fit.

The snow was made using a glaze gel pen. I even remembered to do it before I put on the acetate layer!

I glued on a few more windows, then a piece of acetate cut from some old packaging, and topped it with the final window.

Trim. The floor needed a piece of trim, so I colored a trip of card stock with Gathered Twigs, trimmed it (I crack myself up), and glued it down. I managed to schmear some brown onto the green paper, so I thought I'd add a cat toy to cover it up. In hindsight, I could have added some car hair along the floor, thus adding a bit of realism to the piece, and getting it off of my floor, but nooooo, I didn't do that.

Instead, I took a piece of the thickest twine I could find (#FAIL), rolled it up a bit, and glued it over the smudge. It took almost as long to wrestle that piece of twine into submission as it did to make the rest of the card. I might exaggerate. Maybe.

Because of the wood floor, I added a layer of white before mounting the thing to a Kraft card base. I used a piece of Neenah Solar White Linen because it's a bit lighter than regular Neenah Solar, but this card still weights about 4.7 pounds.

For my final act, I glued the kitty's butt to the window and put a glue dot under his head so he sticks to the acetate. The end.

I will only ever make one of these cards, and I hope The Belles won't disqualify me since it's an INdoor card looking OUTdoors. That's also an indoor cat looking out, for what it's worth.

Thanks for stopping by!

* I grew up in SW Ohio, and I've also lived in MI and the Chicago suburbs, so I don't mind snow. In fact, I love it! I don't even mind driving in the stuff. Well, except for the 28 years I lived in the DC area. Those people are scary. 

Stuff I used: SU Crumb Cake/Kraft card stock (they're mixed up in my collection, so I'm never sure which one I get), SU Lovely As A Tree stamp set, mystery green patterned paper, and the following:


WOYWW Nov 12, 2014


I've spent an inordinate amount of time in the craft room today with not much to show for it. I've been looking for a seemingly lost turkey stamp for days, and in tearing apart every bag of "stuff" I've found, I've had a few side journeys that involved putting things away. I KNOW! Some of the stuff didn't make it to storage, though, and landed on my desk.

Today, while looking for Kraft card stock, I found a bin of miscellaneous white card stocks I'd managed to miss when organizing card stock last month, so I took time out to package and label all of it. So you see, lots of time -- not a lot of crafting.

Imagine my surprise when I stepped back to my desk and found this:


Yeah, there are about 4 different projects in that heap. Time to play WOYWW! Let's do some numbers!


First, to the left of my work area sits a trimmer that is surprisingly visible. It's usually stacked with stuff.

1. Card in progress for the current Jingle Belles challenge. That will be my next post. It's also why I was looking for Kraft card stock.

2. Two Distress Inks plus blender I used to color the faux wood floor in #1. It's sitting on top of a green ink I used in failed versions one through three.

3. My pile of printed, undone challenges, topped with some cream card stock parts and a baggie of something I found while looking for the missing turkey stamp.

4. Tree from the precious SU stamp set Lovely As A Tree. May it never retire. Each year Demos from across the country sit, sweating, twisting their hands, and worrying if the set will finally retire. And every year there is a collective sigh of relief when it doesn't make the retiring list. Oh, my stamp is sitting on top of the ink I used with it.

5. A Cat's Pajamas stamp sitting on top of the ink I used to stamp it, then I threw that piece of card stock away. Stamp is sad.

6. Twine I used in #1 to cover a boo-boo. That effort made more boo-boos, but I'll whine about that in the post with the finished card.

7. Two stamps I pulled out of one of the bags through which I was looking for the dang turkey stamp. I feel they need to be used before I put them away.

8. My art eraser. It says "shit". I have another one that says a worse word. I love these erasers.

9. A GinaK stamp set I pulled out of ... see #7.

10. A stamp I used a few weeks ago. I keep forgetting to clean it, so it hasn't been put away yet.

11. A small piece of black card stock on top of a growing pile of ... I don't know what. Hmmm, I wonder if that elusive turkey stamp is under there.

12. A pile of stamped and die-cut images I made during my October crafty retreat. See #7.

13. A pile of die-cut window panes that resulted from cutting many layers of the window for #1. I cannot throw them out. Yet. Give me a few minutes.

14. A die-cut cat that will eventually sit on the window sill in #1.

That's it! Oh, and I do plan to put most of that stuff away once I finish posting the completed card (see #1). No, really! :)

Thanks for stopping by!

Tuesday, November 11, 2014

SOS #177: NOT Ready for Christmas

It's Tuesday, and time for a new challenge at Shopping Our Stash. This week's theme is NOT Ready for Christmas, and we'd like you to use a Christmas stamp on a non-holiday project.

I don't know about you, but November 1st was waaaaaaay too early for the EARLY BLACK FRIDAY STARTS TODAY emails and ads. I heard a very nasty rumor that some stores are having Black November. My head hurts. So it's only appropriate that we're using holiday stamps for non-holiday cards this week, at least in my world.

I made this:


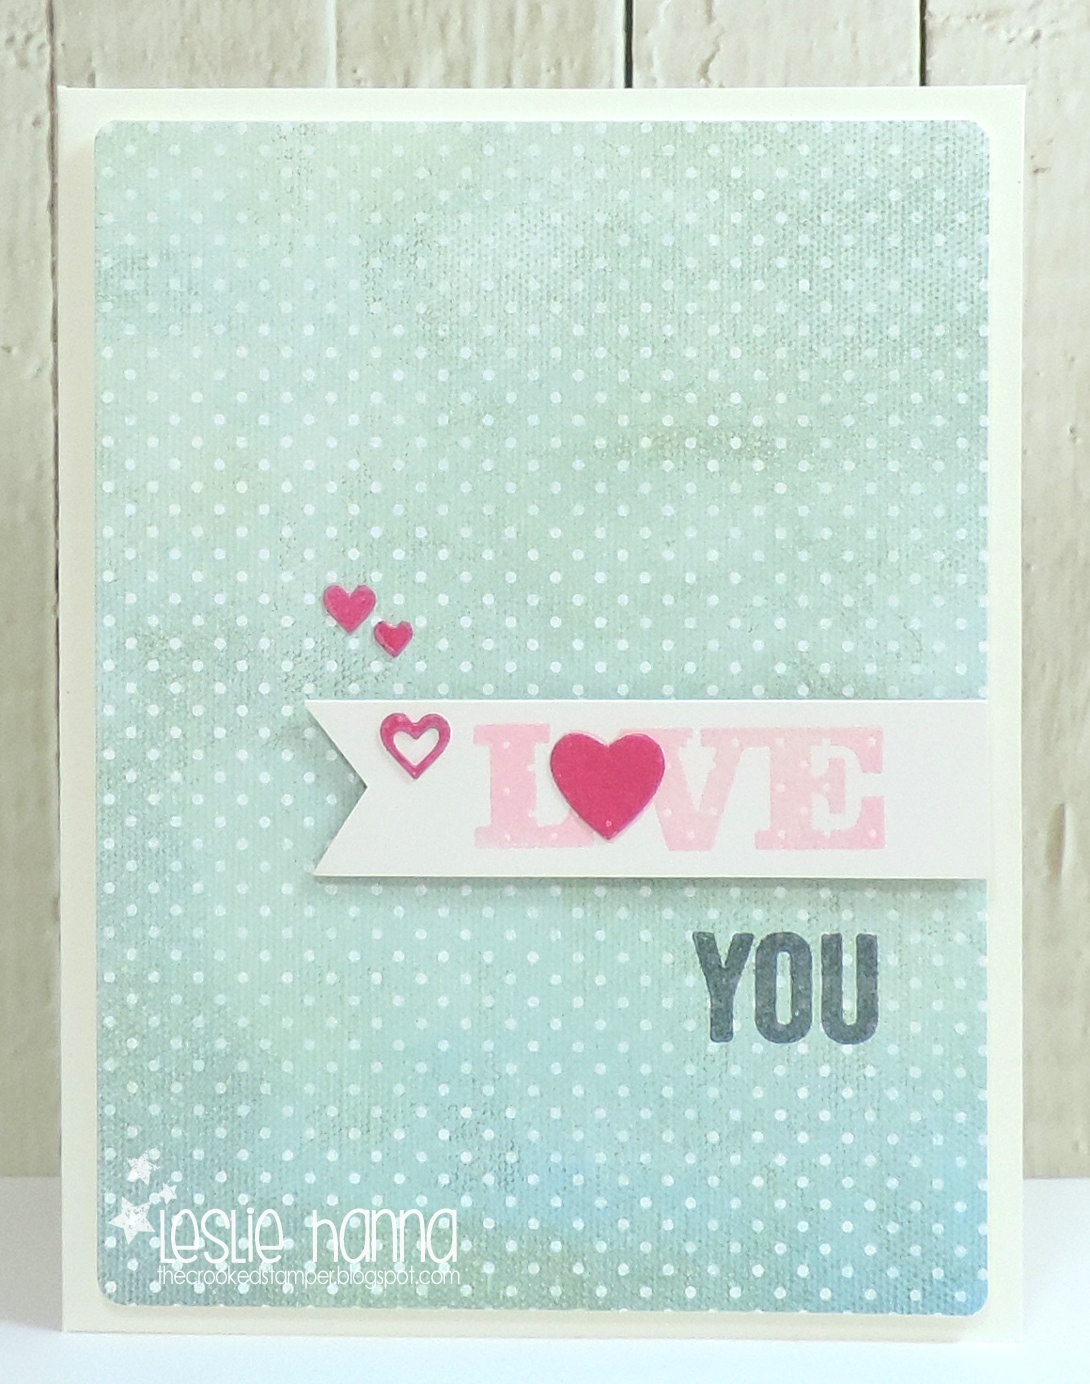
Yes, you see (gah) PINK! I love that some Christmas sets have LOVE words in them (Peace, Love, Joy), and you can use the LOVE all by itself! I broke out my Memento Luxe pink inks, and used the lighter one for the words, then clear-embossed them. I say "them" because I made two cards. Please bear with me a moment.

I schmeared the darker ink onto a piece of card stock and clear-embossed it, too, then die-cut the coordinating heart from it, twice.

Okay, okay, here's the second card so my words sound more better:


The patterned papers I chose are both green, because - try as I might - the pinks just weren't right. BONUS is that the first paper is from a set of holiday papers. go, me

I stamped the YOU from a Simon Says Stamp set directly onto the papers using Memento Luxe Gray Flannel and clear-embossed them, too.

Now, about those extra hearts ... I'd thought about adding more, but wasn't sure. Then I noticed that, even though both papers have a pattern on them that's straight, I'd managed to adhere that first banner crooked, and in carefully peeling it off to correct the situation, it bent. GAH! So instead of one or two hearts, I needed one to at least cover the boo-boo, plus more to make it look like I meant to do that.

My die of choice was my newly re-discovered Impression Obsession Heart of Hearts, that is a heart die made up of a bazillion tiny hearts of varying sizes. I placed this die on the remaining embossed piece of card stock from which I'd cut the two big hearts, and got a nice pile of teeny tiny hearts to use. I used an open one to disguise the boo-boo and the rest were placed in what I hope is a pleasing manner.

So, got holiday stamps? I think you need to play this one!

Thanks for stopping by!

PS: I'm also entering this in the OWH November ODBD challenge. This month's challenge is HEARTS.

Stuff I used: Memory Box Snow & Cedar holiday papers from 2009, David Tutera cream cards & envelopes, vat of clear embossing powder, and the following:


Monday, November 10, 2014

OWH Sketchy Birthday

When I saw the new OWH sketch:


I knew it was perfect for the pack of paper I hadn't yet put away. surprise

Here's my card:


I still had my pack of Authentique Renew papers out, and I had a large collection of thin strips of paper, so I cut them to 3/4" and I was on my way! I didn't follow the dimensions given in the sketch, because I like to wing it. I did try the white layer at the suggested size, but I needed more elbow room, so mine was cut a bit larger.

I layered the pieces on black for some definition, and because there was a partial piece of black card stock on my desk. Now it's gone.

The birthday sentiment was in my UFO box, and I layered it on black, too.

This is a great sketch for using up paper pieces, and when they all come from the same pack, the matchy-matchy is heavenly.

Thanks for stopping by!

Stuff I used: Banner from UFO pile with sentiment from a set long forgotten, stamped in some black ink I can't remember; mystery black card stock, and the following: