Well, I felt I did not need a stinkin' template. Heck, I could make my own! Actually, I was using my laptop that evening, which is not hooked up to a printer, so I opted to try and make my own template (how hard could it be) rather than go into the next room, turn on the 'puter and the attached printer, and print the template. The added bonus to this effort was that if I could use all SU stuff to make the template, too, I could use the card in a workshop. Gotta love that!
So I set off to make the template and I started with the Coluzzle. After much playing, I came up with a way to make the template almost any size you wanted to! NOT something you could do with a provided template!
One of my customers missed the workshop (we had much ice that evening), and she cannot come this month, either, and she asked me if I could tell her how I made the pocket heart. I tried to tell her in words, and then I had a maybe-in-hind-sight-not-so-brilliant idea: Do A Tutorial!
First, I must apologize to all my beloved two (or maybe three) readers...after I took these photos, some of them one-handed (they will be obvious), I uploaded them to my laptop and shrunk them first before applying my watermark. All this means is the watermark is REALLY BIG. Please just try to see past it... I'd appreciate it.
So here we go!
 Here are all the materials you will need to make the template. I will also take you past the template into how to form the heart, so there are items for that, too.
- Coluzzle Circle template, mat and cutter.
- Piece of scrap cardboard (like part of a cereal box).
- Piece of double-sided paper.
- Scrap of paper (any kind will do)
- Ruler
- Bone folder
- Pencil
- Scissors
- Art eraser
- Hole punch
- Brad

Step 1: Take out your Coluzzle. You will note I have marked mine with different colors of Sharpies so I can find the other side of the circle when I cut something. This comes in handy for this project.
 Step 2: With your ruler, measure the diameter of one of the circles. Here I used the black circle, which measures 2 3/8".
Step 3: On your scrap paper, draw a line the same size as the circle diameter.

Step 4: Draw the other 3 sides to form a square.

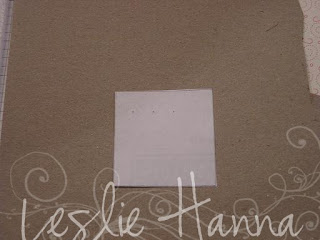
Step 5: Cut out the square and stick it to the cardboard scrap. Make sure you leave enough room around the square to cut out the arcs. Read on and this will make sense.

Step 6: Put the cardboard on the Coluzzle mat, then line up the Coluzzle that you measured (here I use the black circle) with the square. [Could I have made that sentence any more confusing? Hopefully the picture helps you decipher my words.]
 Step 7: Using the Coluzzle knife, cut out the arc. You will end up with the arc of the circle touching the edges of the scrap-paper square.
Step 8: Cut out the other three arcs on the remaining sides of the square.

Step 9: Cut or punch out the cut-out and you now have ...your template!
Note that I labeled the template with the color of the circle I used from the Coluzzle and also the size of the square. This is only important if you are like me and would probably make multiple templates of the same size because you forgot you already had one.
If you just wanted to know how to make the template, you are done. Stop reading. Now! If you'd like to see what to do with the template, please read on!
 Step 10: Trace the template onto your double-sided patterned paper. Hint: I find it easier to see the pencil lines on the lighter side of the paper, but that is totally your choice. Especially if you are young enough to see it, unlike me.
Step 11: Cut out the traced pattern.

Step 12: Cleanup. If you are like me and cannot cut anything out without missing part of the line, you will need to go back now and erase the left-over lines. I find that using an art eraser (I got mine at a local art store) is a much better idea than ever using the erasers that come attached to my #2 pencils. Way better idea.

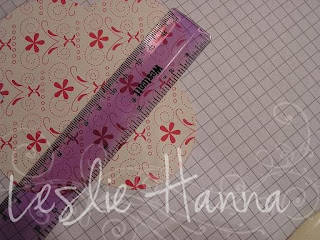
Step 13: Line up your ruler with two of the corners and score with your bone folder.
It should look like this.
Step 14: Score the side adjacent to the first one. When you are done it should look like this.


That's adorable! Now I need a Coluzzle!
ReplyDeletesuper cute!
ReplyDeleteThis comment has been removed by a blog administrator.
ReplyDelete