
Here's mine, then I'll explain:

I chose black & off-white, the better to give me additional fits while taking photos. The ribbon holds it closed. Here it is sans ribbon:

The paper is a piece of SU DSP. I chose it because I thought it would coordinate well with the paper I chose for the inside that you'll see momentarily. I chose to make my book 1/2 of an 8 1/2" x 11" piece of paper, so it's 5 1/2" tall. Since I scored it in the center to make it fatter and to look like a book, the cover is just a bit over 4". I cut the DSP so it hung over the three edges by about 1/4" so it would wrap around to the inside.
*head spins re-reading that*
You know what? I should start with the inside. Let me try that. Here it is:

I actually did start with the inside. I cut that teal card stock so it met the edges of the covers, but it stopped just before the scored lines of the binding. Then I used a piece of black washi tape to finish off the center section. It perfectly meets the two pieces of teal card stock.
See how the paper from the front folds over to finish off the inside? That's why you need to cut it about 1/4" too long for the front. Paula's post explains that way better than I am.
While we're here, let's talk about that boxy thing on the right:

Paula used her Silhouette to perfectly cut out a bazillion of these, but she also made hers 1/2" thick, where I went for 1/4", so I only needed half a bazillion. I saw this as an opportunity to make a small dent in my stash of half-sheets of miscellaneous white card stock that I never use because that white doesn't match anything. That's right: all whites are not the same.
So I cut them all to 3 3/4" x 5", then used a rectangle Nestie to cut out the center. Then I realized just how much work this was going to be. We all know how alignment-challenged I am, right? I had to cut all of those rectangles exactly the same or they wouldn't line up. Yikes! I used the first one as a template to align all the others, so I got it close. Sorta. I just made sure to make the hole larger than it needed to be to hold a gift card, then the imperfections didn't matter so much.
I had originally stamped a text background stamp on the top rectangle, which you can see here:

but I had to add more layers, so it got covered up. Hopefully it looks like a real text page, and, oh yeah, I meant to do that. The top layer of paper matches the hand-made paper I used for the outside binding.
That note paper on the left was cut from a sheet of Simple Stories Sn@p LIFE that I had out.
So now that you've seen the inside, let's go back to the cover:
I cut the two pieces of paper so they met the score lines on the front and back, and hung over the sides by about 1/4". I stuck them down to the outside covers, then ran some 1/8" Sookwang tape along the inside edges to hold the paper once it was folded over. You need to use that good tape when you ask a piece of paper to hold an unnatural position.
When I was done with the folding and taping, I cut a piece of handmade (not by me) paper for the binding.

It's thicker than Mulberry paper. I stuck it down the center with a strip of 1/4" of Sookwang tape, then folded over each side and stuck it down using more Sookwang tape. It looked boring, so I added a few pieces of the black washi tape.
The last thing I did was emboss a sentiment onto the cover:
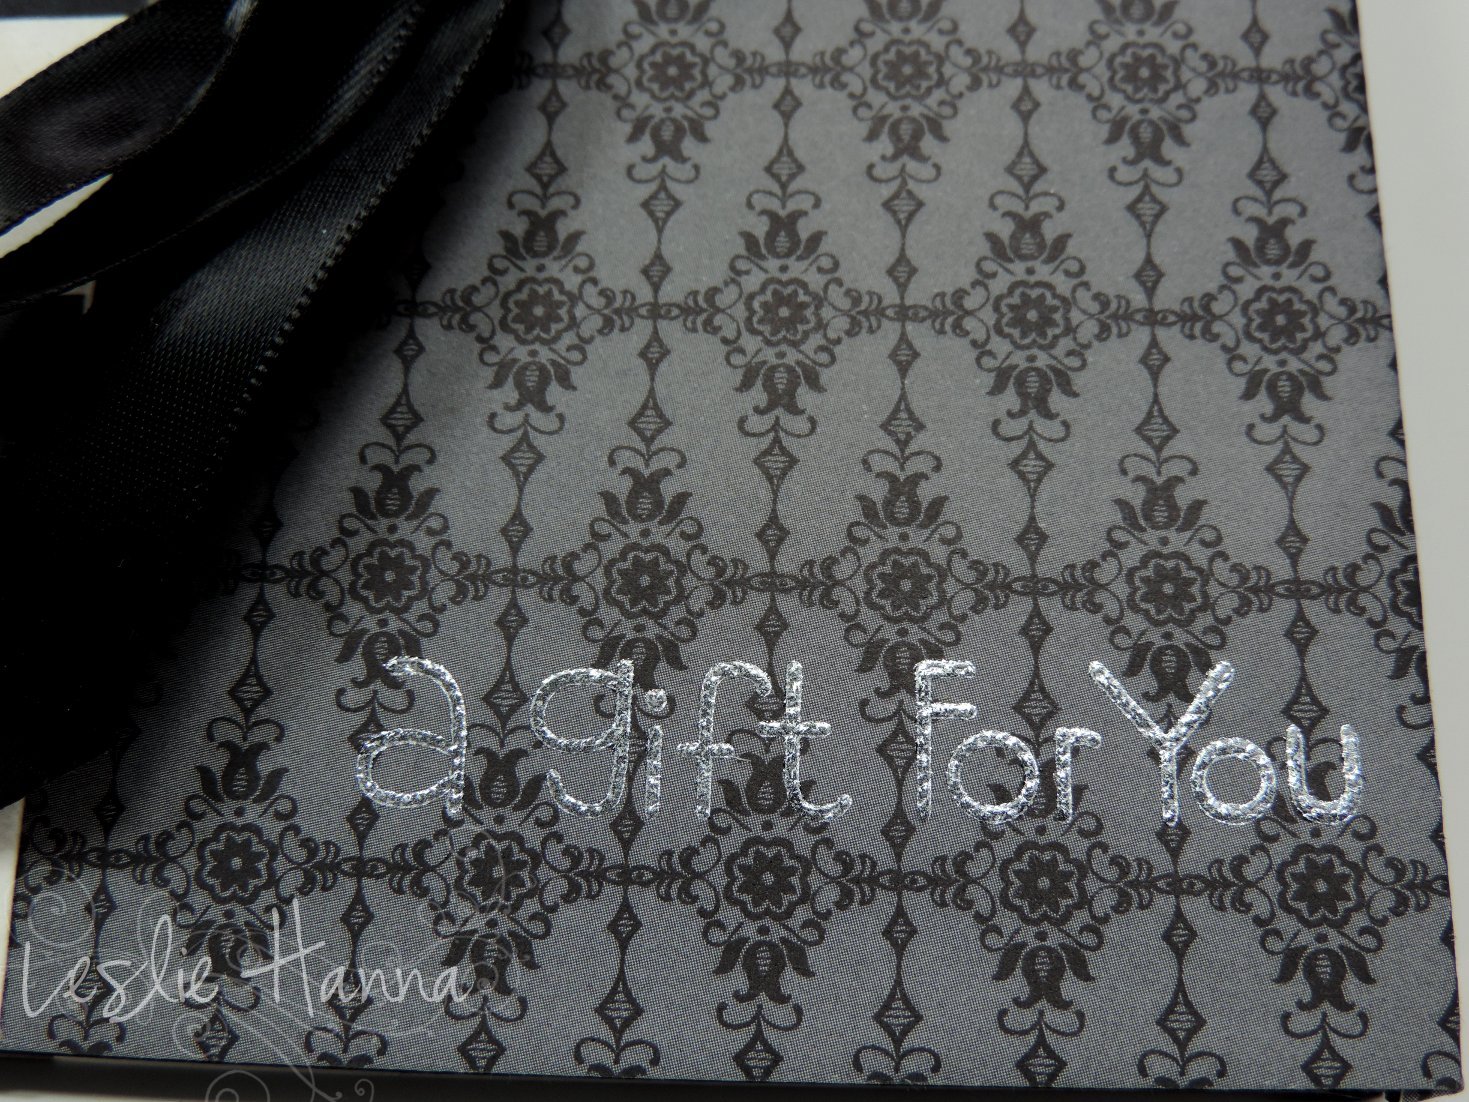
There it is!
Thanks, Paula, for a great post! I love this, but it's definitely a project I'll only make once.
Now if you'll excuse me, I have laundry to do and card challenges to tackle.
Thanks for stopping by!
You have far more patience than I. This kind of project would require the purchase of an electronic cutting machine.
ReplyDeleteLeslie, this came out terrific! I love the combination of papers and that you used a Nestie set. to do your die cutting. I don't mind the slight uneveness on the inner edge at all. I am wondering if there is a set with the right sizes for both the outside & inside cuts and temporarily taped/glued in position which would simplify it. I so agree that it's not a piece I'd make often but sometimes a special gift demands a special package and this one would certainly fit he bill. Have a great week!
ReplyDeleteWow! That turned out really well, but it does look like more work than I would be willing to do. You did a great job with it!
ReplyDelete