One of the challenges I pulled out this weekend was from Inspired By:
LOVE this. So today I went in search of ... you guessed it: washi tape. And you know what? I have not. one. roll. of blue with white dots that isn't baby blue. HOW IS THIS POSSIBLE?! Sigh. So then I was on a mission to find something, ANYthing, blue with white dots.
When I started rummaging through my pack of washi sheets (you can cut that, you know) I found a yellow polka dot sheet and a blue & white striped sheet. Pretty much the opposite I was going for, but I decided to try it.
This is what came out, then I'll explain:
In my own defense, I had every intention of using ONLY the yellow and blue pieces, but ... because of a failed previous effort to use that washi sheet on a different project, I'd cut the blue piece so it was too short for a second strip across the white panel. FAIL. I had to go to Plan B, and that was to add a third color.
If this disqualifies me from the Inspired By challenge, I'm okay with that because I was inspired by the photo, and I kinda like the splash of red on there.
The teeny tiny stars are from an old package of A Muse bling. I had to color the blue ones with a Copic marker to darken it a bit. It was baby blue. (What, are people no longer making royal blue or navy blue bling? Pffth.)
Well, that was tougher than I thought it would be. I might need a margarita.
Thanks for stopping by!
Products used:
Neenah Solar White card stock 25 sheets (SSS | EH) ream (SSS | EH)
We R Memory Keepers washi sheets 6x6 sampler (SSS) Also available by the 6x6 individual sheet. I got a 12x12 pack online somewhere else, but there's no blue stripe in it. How rude.
MFT Big Greetings (SSS)
Corner Chomper 1/4" & 1/2" (SSS | EH)
Martha Stewart Mini Scoreboard (SSS|EH)
Sunday, January 20, 2013
Scandinavian Christmas
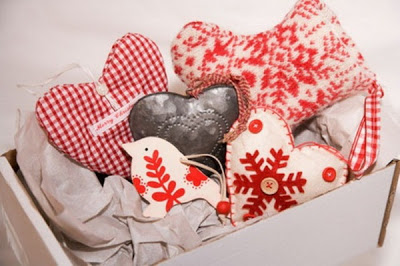
The current challenge over at Jingle Belles is Scandinavian Christmas, and they gave us this photo as inspiration:
I went in search of red & white paper. Anything red & white. I am lacking in red & white. I found some tiny checked paper, but ... meh, not quite right. I have some red & white houndstooth washi sheets, but no, not right either. I do have the red & white felt snow flakes that Stef used, but that wasn't my idea, so no.
I ended up with a piece of flocked SU DSP which is red & white and very tactile, if you know what I mean, and made this:
That paper is so busy you really need to let it stand on its own, and I'm not going to complain. I love paper that does all the work! :)
I embossed the A Muse Studio sentiment with ancient PSX Platinum EP onto some SU Shimmer White card stock. It was still boring, so I opened and used my relatively new-to-me Li'l Inkers bow die on some more Shimmer White card stock. It's very tiny. There may be as much Glossy Accents holding it together as there is weight to the card stock itself. It's so easy to put together, though, I see myself using it again.
For this card, I took an extra step to add some color to the center of the bow and anchored it to the paper with some ancient skinny ribbon in the wrong color red. I cut a teeny tiny slit behind the bow and fed both ends of the ribbon through it, then slipped the bow under the loop and pulled the ribbon tight, then taped down the ends of the ribbon on the back of the paper. Once the card was assembled I added a drop of Glossy Accents under each end of the bottom layer of the bow to secure it and keep it from moving. It's not going anywhere.
Here it is up close and personal:
Aaaaand, you can see what I just noticed: embossing powder scatter!!!! Why can't I remember to use the powder tool first?! Sigh. Please just look away.
Wow, that's a lot of blathering for sticking a piece of flocked paper onto a card base. I think I need to cut back on the coffee.
Thanks for stopping by!
I went in search of red & white paper. Anything red & white. I am lacking in red & white. I found some tiny checked paper, but ... meh, not quite right. I have some red & white houndstooth washi sheets, but no, not right either. I do have the red & white felt snow flakes that Stef used, but that wasn't my idea, so no.
I ended up with a piece of flocked SU DSP which is red & white and very tactile, if you know what I mean, and made this:
That paper is so busy you really need to let it stand on its own, and I'm not going to complain. I love paper that does all the work! :)
I embossed the A Muse Studio sentiment with ancient PSX Platinum EP onto some SU Shimmer White card stock. It was still boring, so I opened and used my relatively new-to-me Li'l Inkers bow die on some more Shimmer White card stock. It's very tiny. There may be as much Glossy Accents holding it together as there is weight to the card stock itself. It's so easy to put together, though, I see myself using it again.
For this card, I took an extra step to add some color to the center of the bow and anchored it to the paper with some ancient skinny ribbon in the wrong color red. I cut a teeny tiny slit behind the bow and fed both ends of the ribbon through it, then slipped the bow under the loop and pulled the ribbon tight, then taped down the ends of the ribbon on the back of the paper. Once the card was assembled I added a drop of Glossy Accents under each end of the bottom layer of the bow to secure it and keep it from moving. It's not going anywhere.
Here it is up close and personal:
Aaaaand, you can see what I just noticed: embossing powder scatter!!!! Why can't I remember to use the powder tool first?! Sigh. Please just look away.
Wow, that's a lot of blathering for sticking a piece of flocked paper onto a card base. I think I need to cut back on the coffee.
Thanks for stopping by!
Birds of a Feather
When I spied the current Paper Players sketch:
... my brain saw a Polaroid shape, and I made this:
The stamp is from Hampton Art and I haven't used it in forever. The patterned papers were all from The Heaplet, and yes, I am very proud.
I was originally going into my stamp stash to look for an old Hero Arts stamp to use for the current challenge over at A Blog Named Hero, and in my decaffeinated state I mistook Hampton for Hero. I must tell you I've always thought this was a HA stamp. I am so ashamed. I guess I'll need to make another card for the ABNH challenge, but I'm okay with that. :)
I'm going back in for more!
Thanks for stopping by!
Products used:
Hampton Art Birds of a Feather (SSS)
Neenah Solar White card stock 25 sheets (SSS | EH) ream (SSS | EH)
Li'l Inker Instant Camera die
Ranger Distress Broken China ink (SSS|EH)
Corner Chomper 1/4" & 1/2" (SSS | EH)
Dymo labeler
... my brain saw a Polaroid shape, and I made this:
The stamp is from Hampton Art and I haven't used it in forever. The patterned papers were all from The Heaplet, and yes, I am very proud.
I was originally going into my stamp stash to look for an old Hero Arts stamp to use for the current challenge over at A Blog Named Hero, and in my decaffeinated state I mistook Hampton for Hero. I must tell you I've always thought this was a HA stamp. I am so ashamed. I guess I'll need to make another card for the ABNH challenge, but I'm okay with that. :)
I'm going back in for more!
Thanks for stopping by!
Products used:
Hampton Art Birds of a Feather (SSS)
Neenah Solar White card stock 25 sheets (SSS | EH) ream (SSS | EH)
Li'l Inker Instant Camera die
Ranger Distress Broken China ink (SSS|EH)
Corner Chomper 1/4" & 1/2" (SSS | EH)
Dymo labeler
Saturday, January 19, 2013
Merci
I seem to be into one-word titles this weekend.
I love it when a plan comes together. When I saw the current (current, I KNOW!) sketch at CAS(E) This Sketch!:
I knew immediately which stamp I'd use: my Paper Smooches Potpourri set! Here's what came out:
Sorry it's so dark. Something is more off than normal on either my camera or my lights. And yes, I lightened and brightened it in my editing software. Must address this, and soon.
As I stood looking at the black on white, thinking it needed color, I remembered the current Dynamic Duos challenge is:
so I colored the center with my Distress Barn Door marker, and added some red pearls to the centers.
For the left and right sides of the card, I employed the same technique I did on this card and just scored both sides in opposite directions.
I like it! :)
Okay, I'm going back in to do a few more challenges.
Thanks for stopping by!
Products used:
Paper Smooches Potpourri (SSS|EH)
Avery Elle To The Point stamp set (SSS)
KaiserCraft Basics - Pearls
Distress marker - Barn Door (SSS|EH)
Hero Hues black ink (EH)
Corner Chomper 3/8" & 1/8" (SSS|EH)
Martha Stewart Mini Scoreboard (SSS|EH)
Neenah Solar White card stock 25 sheets (SSS | EH) ream (SSS | EH)
I love it when a plan comes together. When I saw the current (current, I KNOW!) sketch at CAS(E) This Sketch!:
I knew immediately which stamp I'd use: my Paper Smooches Potpourri set! Here's what came out:
Sorry it's so dark. Something is more off than normal on either my camera or my lights. And yes, I lightened and brightened it in my editing software. Must address this, and soon.
As I stood looking at the black on white, thinking it needed color, I remembered the current Dynamic Duos challenge is:
so I colored the center with my Distress Barn Door marker, and added some red pearls to the centers.
For the left and right sides of the card, I employed the same technique I did on this card and just scored both sides in opposite directions.
I like it! :)
Okay, I'm going back in to do a few more challenges.
Thanks for stopping by!
Products used:
Paper Smooches Potpourri (SSS|EH)
Avery Elle To The Point stamp set (SSS)
KaiserCraft Basics - Pearls
Distress marker - Barn Door (SSS|EH)
Hero Hues black ink (EH)
Corner Chomper 3/8" & 1/8" (SSS|EH)
Martha Stewart Mini Scoreboard (SSS|EH)
Neenah Solar White card stock 25 sheets (SSS | EH) ream (SSS | EH)
Bikes
I don't follow many sports, including cycling, but several of my friends do, so this past week has been a difficult one for them. I mentioned to one of my tweeps, Libby, that I had an unintended bike theme in my condo's decor, and I promised to share once I was home in the daylight so I could take some half-way decent photos.
First is this print:
Back story: There used to be a most-excellent rib joint in my town, and their walls were adorned with framed prints by G Rodo Boulanger. I knew I needed one, so I haunted all the print places in the mall (this was before the Interwebz were in every Living Room) until I found this one. I think I would have purchased any of them, but this one spoke to me. It hangs over my couch, and yes, all my walls are that taupey tan color.
Next, I found this at one of the Sugarloaf Craft Shows that come through here several times a year:
The artist was a metal artist, and he had a grouping of five bikes, a group of trees, and a few other things. I asked him if he could make a three-bike grouping instead of five since I didn't have a wall that big, and he did. It's a little bent up from how it was shipped, but I'm okay with that. It used to hang on my Dining Room wall, but then I painted that wall striped and the bikes didn't work there any more. It's in a hallway now.
Last, I have this number:
Another Sugarloaf purchase. It holds a few ornaments I've made over the years, and sometimes I remember to dust it.
So there you have my unintended bike theme decor. And for all you cycling fans, I hope your sport can survive the bad press and you find new heroes to worship. As for me, I'll be stamping.
Thanks for stopping by!
First is this print:
Back story: There used to be a most-excellent rib joint in my town, and their walls were adorned with framed prints by G Rodo Boulanger. I knew I needed one, so I haunted all the print places in the mall (this was before the Interwebz were in every Living Room) until I found this one. I think I would have purchased any of them, but this one spoke to me. It hangs over my couch, and yes, all my walls are that taupey tan color.
Next, I found this at one of the Sugarloaf Craft Shows that come through here several times a year:
The artist was a metal artist, and he had a grouping of five bikes, a group of trees, and a few other things. I asked him if he could make a three-bike grouping instead of five since I didn't have a wall that big, and he did. It's a little bent up from how it was shipped, but I'm okay with that. It used to hang on my Dining Room wall, but then I painted that wall striped and the bikes didn't work there any more. It's in a hallway now.
Last, I have this number:
Another Sugarloaf purchase. It holds a few ornaments I've made over the years, and sometimes I remember to dust it.
So there you have my unintended bike theme decor. And for all you cycling fans, I hope your sport can survive the bad press and you find new heroes to worship. As for me, I'll be stamping.
Thanks for stopping by!
Friday, January 18, 2013
Blue
This week I did something I don't usually do: I made one card for five challenges. Yes, I did. As I collected my list of challenge prompts for the weekend, I found a recurring theme, so I went with it. Here's my card, then I'll explain:
The recurring theme was Blue. Look at the list:
From CASology:
From the City Crafter Challenge blog: Winter Blues:
From {PIN}spirational Challenges:
Do you see how I was swayed? All I needed was a sketch, which I found at the Mojo blog:
and I turned it 90 degrees:
and for good measure, I threw in the current Simon Says Stamp challenge to use washi tape. You don't have to tell me twice!
Now, where were we ... oh, yeah, my card:
I started with the blue tea cup, and then cut some doilies with my MFT dies. The blue doily was created by ink-to-paper using Distress Broken China ink. If you look closely, it's not perfectly inked, but I totally meant to do that. The ink for the doily, tea cup and sentiment are all Broken China.
For the two sections of the top of the card, instead of using card stock or paper or stamping, I opted to score it in two different directions. I used my new-to-me mini score board, which comes in very handy because of this:
Sigh.
I had scored a line about 1.25 inches up from the bottom of the layer because I knew that's where I'd put the washi tape. I selected some tape that was close in color to the blue I was using. Then I decided there was a need for contrast, so I colored the dots in the tea cup with my SU Poppy Parade marker, and added some MME Enamel dots. I was a bit itchy with all that white at the top, but I just let it go and called it done.
In other news, Bobra has pulled WAY ahead in the Evercats Daily Cat contest. Thank you all who have voted for my little boy! If you haven't voted yet, you still have time! Just go here, click on 1-20, then click on his photo (#656). One vote per person per contest date. Ask me how I know. :( Stack the deck? Moi? Never!)
Thanks for stopping by!
Products used:
SU Tiny Teacup
Ranger Distress Broken China ink (SSS|EH)
MFT Mini Doily Circles (SSS)
MFT Open Scallop Doily Duo (SSS)
Simon Says Stamp For The Record (also available with matching dies)
Hambly washi (SSS)
My Mind's Eye Enamel Dots - Together (SSS)
Neenah Solar White card stock 25 sheets (SSS | EH) ream (SSS | EH)
SU Poppy Parade marker
Martha Stewart Mini Scoreboard (SSS|EH)
The recurring theme was Blue. Look at the list:
From CASology:
From the City Crafter Challenge blog: Winter Blues:
From {PIN}spirational Challenges:
Do you see how I was swayed? All I needed was a sketch, which I found at the Mojo blog:
and I turned it 90 degrees:
and for good measure, I threw in the current Simon Says Stamp challenge to use washi tape. You don't have to tell me twice!
Now, where were we ... oh, yeah, my card:
I started with the blue tea cup, and then cut some doilies with my MFT dies. The blue doily was created by ink-to-paper using Distress Broken China ink. If you look closely, it's not perfectly inked, but I totally meant to do that. The ink for the doily, tea cup and sentiment are all Broken China.
For the two sections of the top of the card, instead of using card stock or paper or stamping, I opted to score it in two different directions. I used my new-to-me mini score board, which comes in very handy because of this:
Sigh.
I had scored a line about 1.25 inches up from the bottom of the layer because I knew that's where I'd put the washi tape. I selected some tape that was close in color to the blue I was using. Then I decided there was a need for contrast, so I colored the dots in the tea cup with my SU Poppy Parade marker, and added some MME Enamel dots. I was a bit itchy with all that white at the top, but I just let it go and called it done.
In other news, Bobra has pulled WAY ahead in the Evercats Daily Cat contest. Thank you all who have voted for my little boy! If you haven't voted yet, you still have time! Just go here, click on 1-20, then click on his photo (#656). One vote per person per contest date. Ask me how I know. :( Stack the deck? Moi? Never!)
Thanks for stopping by!
Products used:
SU Tiny Teacup
Ranger Distress Broken China ink (SSS|EH)
MFT Mini Doily Circles (SSS)
MFT Open Scallop Doily Duo (SSS)
Simon Says Stamp For The Record (also available with matching dies)
Hambly washi (SSS)
My Mind's Eye Enamel Dots - Together (SSS)
Neenah Solar White card stock 25 sheets (SSS | EH) ream (SSS | EH)
SU Poppy Parade marker
Martha Stewart Mini Scoreboard (SSS|EH)
Thursday, January 17, 2013
For Bobra
I shamelessly entered Bobra in the Daily Cat contest over at Evercats, and he needs your vote to edge out that other cat. I would really appreciate it if you could take a moment and go vote for him. Click here, then click on DC (Daily Cat) of 1-20-2013. He's #656, second photo in first photo now! This is the handsome fellow you seek:
Look at that face! Look at that tongue! He neeeeds your vote. Voting is open ... looks like through the 19th.
I thank you.
Look at that face! Look at that tongue! He neeeeds your vote. Voting is open ... looks like through the 19th.
I thank you.
Best-Laid Plans, Revisted
The other day I posted my daily whine about a stack of cards I'd assembled for OWH, but I seemed to have failed in the execution. Several of you posted very helpful comments (thank you!), and I went back in to try again.
The problem was lack of definition or contrast. See:
Yawn. Just because the papers go together doesn't mean they can stand on their own. The twine + multi medium worked (see that linked post), but ugh, not times 50. For my next trick, I tried faux stitching, and this is how the first one looked:
I kinda liked it. I liked it so much I did a few more:
You KNOW this is just my way to show you some more of the pretty papers, right? :)
Here's one with a solid:
Here's one from before I started rounding the corners of the top piece:
And last, but certainly not least, my favorite combination of the lot:
For those of you wondering, I cut the whole 6x6 paper pack into 2" strips, then I went through and paired them up. I cut one of the strips in half, giving me two 3" lengths, and those became the top layers. I just put them on off-center based on this sketch at Retro Sketches:
I have about 45 more cards to faux stitch, stamp, and tie bows for, so I'll be back some time next week. HA, I kid. But my next project will be blue. I'll explain that when I return.
Thanks for stopping by!
Products used:
Basic Grey Hello Luscious 6x6 paper pack
Simon Says Stamp For The Record (also available with matching dies)
Hero Hues black ink (EH)
May Arts black twine string burlap (SSS)
clearbags.com linen note cards (I buy these in quantities of 250 for the lower price)
The problem was lack of definition or contrast. See:
Yawn. Just because the papers go together doesn't mean they can stand on their own. The twine + multi medium worked (see that linked post), but ugh, not times 50. For my next trick, I tried faux stitching, and this is how the first one looked:
I kinda liked it. I liked it so much I did a few more:
You KNOW this is just my way to show you some more of the pretty papers, right? :)
Here's one with a solid:
Here's one from before I started rounding the corners of the top piece:
And last, but certainly not least, my favorite combination of the lot:
For those of you wondering, I cut the whole 6x6 paper pack into 2" strips, then I went through and paired them up. I cut one of the strips in half, giving me two 3" lengths, and those became the top layers. I just put them on off-center based on this sketch at Retro Sketches:
I have about 45 more cards to faux stitch, stamp, and tie bows for, so I'll be back some time next week. HA, I kid. But my next project will be blue. I'll explain that when I return.
Thanks for stopping by!
Products used:
Basic Grey Hello Luscious 6x6 paper pack
Simon Says Stamp For The Record (also available with matching dies)
Hero Hues black ink (EH)
May Arts black twine string burlap (SSS)
clearbags.com linen note cards (I buy these in quantities of 250 for the lower price)
Tuesday, January 15, 2013
The Best-Laid Plans ...
When I saw the current sketch at Retro Sketches:
I immediately thought this would be a great sketch to use to disappear another 6x6 pad of paper and make a bazillion cards for OWH. I saw the three sections at the top as two strips of paper: a short one on top of a longer one.
I was so excited I pulled out my Basic Grey Hello Luscious 6x6 pad that only had a few papers used, and cut it - THE WHOLE THING ... EVERY. SINGLE. PAGE. ... into 2" strips. Then I paired up the strips. I'll get into more detail in another post, but I wanted to show you a corner into which I've managed to paint myself.
First, here is one of the cards:
Kinda boring (and blurry), huh? The corners on this floral piece are rounded, since the first few I did with squared corners were even less appealing. But there's still something not right, right? In hindsight, I should have layered the pieces with black, but noooooo, I'd already stuck them all to the card fronts. DUMB. Make your prototype first, people!!!
So then I tried a trick one of my pals, Linda, showed us on her SOS blog post last week. I took some black twine, wet it with some Claudine Hellmuth Multi Medium, then carefully laid it around the floral piece. The glue dries clear, and you end up with a stiff and stuck-down black border. I finished it off with a bow and got this:
Better. It definitely needed the contrast.
That's one. I have 50+ more to go:
What would YOU do? I don't think my hand is steady enough to draw a black line around the smaller pieces. Maybe some faux stitching in black (that doesn't need to be quite so straight)? Any other ideas? I might have to spend my weekend waiting for twine to dry. :(
Thanks for stopping by.
Products used:
Basic Grey Hello Luscious 6x6 paper pack
Simon Says Stamp For The Record (also available with matching dies)
Hero Hues black ink (EH)
May Arts black twine string burlap (SSS)
Claudine Hellmuth Multi Medium, Matte 4 oz (SSS|EH) 1/2 oz (SSS|EH)
clearbags.com linen note cards (I buy these in quantities of 250 for the lower price)
I immediately thought this would be a great sketch to use to disappear another 6x6 pad of paper and make a bazillion cards for OWH. I saw the three sections at the top as two strips of paper: a short one on top of a longer one.
I was so excited I pulled out my Basic Grey Hello Luscious 6x6 pad that only had a few papers used, and cut it - THE WHOLE THING ... EVERY. SINGLE. PAGE. ... into 2" strips. Then I paired up the strips. I'll get into more detail in another post, but I wanted to show you a corner into which I've managed to paint myself.
First, here is one of the cards:
Kinda boring (and blurry), huh? The corners on this floral piece are rounded, since the first few I did with squared corners were even less appealing. But there's still something not right, right? In hindsight, I should have layered the pieces with black, but noooooo, I'd already stuck them all to the card fronts. DUMB. Make your prototype first, people!!!
So then I tried a trick one of my pals, Linda, showed us on her SOS blog post last week. I took some black twine, wet it with some Claudine Hellmuth Multi Medium, then carefully laid it around the floral piece. The glue dries clear, and you end up with a stiff and stuck-down black border. I finished it off with a bow and got this:
Better. It definitely needed the contrast.
That's one. I have 50+ more to go:
What would YOU do? I don't think my hand is steady enough to draw a black line around the smaller pieces. Maybe some faux stitching in black (that doesn't need to be quite so straight)? Any other ideas? I might have to spend my weekend waiting for twine to dry. :(
Thanks for stopping by.
Products used:
Basic Grey Hello Luscious 6x6 paper pack
Simon Says Stamp For The Record (also available with matching dies)
Hero Hues black ink (EH)
May Arts black twine string burlap (SSS)
Claudine Hellmuth Multi Medium, Matte 4 oz (SSS|EH) 1/2 oz (SSS|EH)
clearbags.com linen note cards (I buy these in quantities of 250 for the lower price)
SOS #85 - Suits Me to a T
Happy Tuesday! It's time for another Shopping Our Stash challenge. This week's theme is Suits Me to a T, and we ask you to use at least two items that start with T: tag, tape, twine, trees, tinsel, Tattered Angels products, tin foil, tin cans, trim, tea bag, tea cup, tomahawk, tangerine, tigers, turtle, etc. Be sure to list what they are in your post!
I chewed on this one for a while and finally came up with this:
That's Tweedle Dee and Tweedle Dum, and they are twins. For good measure, I colored their pants teal, and at the last moment I added some twine.
Everything on this card isscraps remnants. The paper is from my Simple Stories Snap Color Vibe paper pack, and it was even cut to 4" already; I just needed to trim the other side. Granted, this pattern seems like it should be vertically oriented, but my brain couldn't flip the sketch, so it's sideways. I apologize if you have vertigo.
The grey layer is another quarter sheet of SU Basic Gray, and the strips were trims left over from making these cards. See what happens when you don't keep a spotless craft desk? INSPIRATION, that's what!
The sentiment is made of two stamps, both from the Hero Arts Calico Borders set. The HB sentiment is actually repeated, but I cut it in half. I wanted to curve it into that film strip image, and I was tired of wrestling with it. Being so long, like in this post, it just works better for me cut in half. That's only part of the film strip image, too.
Oh, and I was following this sketch from Clean & Simple:
Now it's YOUR turn. Start thinking about things that begin with the letter T, choose at least two of them, make a card, then come back to Shopping Our Stash and link us up so we can see what you've created!!!
Thanks for stopping by!
Products used:
Tweedle Dee & Tweedle Dum stamp by Leavenworth Jackson, purchased in an unguarded moment at my LSS many, many moons ago
Hero Arts Calico Borders stamp set (SSS|EH)
Copics: C1, BG49, YR18, E000
Spellbinders Circle dies Large (SSS) and Small (SSS)
Simple Stories Snap Color Vibe paper (SSS)
Memento black ink (SSS | EH)
SU Basic Gray card stock
Neenah Solar White card stock 25 sheets (SSS | EH) ream (SSS | EH)
I chewed on this one for a while and finally came up with this:
That's Tweedle Dee and Tweedle Dum, and they are twins. For good measure, I colored their pants teal, and at the last moment I added some twine.
Everything on this card is
The grey layer is another quarter sheet of SU Basic Gray, and the strips were trims left over from making these cards. See what happens when you don't keep a spotless craft desk? INSPIRATION, that's what!
The sentiment is made of two stamps, both from the Hero Arts Calico Borders set. The HB sentiment is actually repeated, but I cut it in half. I wanted to curve it into that film strip image, and I was tired of wrestling with it. Being so long, like in this post, it just works better for me cut in half. That's only part of the film strip image, too.
Oh, and I was following this sketch from Clean & Simple:
Now it's YOUR turn. Start thinking about things that begin with the letter T, choose at least two of them, make a card, then come back to Shopping Our Stash and link us up so we can see what you've created!!!
Thanks for stopping by!
Products used:
Tweedle Dee & Tweedle Dum stamp by Leavenworth Jackson, purchased in an unguarded moment at my LSS many, many moons ago
Hero Arts Calico Borders stamp set (SSS|EH)
Copics: C1, BG49, YR18, E000
Spellbinders Circle dies Large (SSS) and Small (SSS)
Simple Stories Snap Color Vibe paper (SSS)
Memento black ink (SSS | EH)
SU Basic Gray card stock
Neenah Solar White card stock 25 sheets (SSS | EH) ream (SSS | EH)
Subscribe to:
Posts (Atom)


