I was a busy little bee over the weekend, so I thought I'd share some of my VSN creations with you. The main theme was Back To School, and each challenge hostess chose a school-related theme for their individual challenges. For example, one of the challenges was based on Phys Ed, or Gym (as some of us called it), so her challenge was to make a card based on a sport or activity. Here's mine:
heh heh I am so bad. Then, while in the throes of challenge cards, I had another idea and made this one:
This next one was based on "the wheels on the bus go round and round", so we were supposed to make "something with wheels", or as a bonus we could make a round card. Well, that wasn't happening in 45 minutes, so I opted for the "wheels" and made this:
This was in honor of my car being towed to the mechanic to get a new battery and unflatten the tires. :(
One challenge was "the 3 Rs", and we had to use three things that started with the letter R. Here is my card:
I used a Red Rolled Ribbon. If someone wanted to make a case that this was actually twisted, not rolled (ala shaken, not stirred), it's sitting on a rectangle. Also, please note that the layer is orange, and the ribbon is red with orange dots. Yeah, this is about the only time I'd use it. ;/
Another challenge was "Kids' favorite foods". Not necessarily what we want them to eat, but what they like to eat. I made this:
Cupcakes, loved by kids of all ages. :)
One challenge was ABCs, where we needed to include an image or technique that start with the letters A, B and C. I made this:
A = Animal, B = black card stock, and C = circles (on the washi tape). Easy.
The last one I'll share tonight was for the Graffiti challenge, where we needed to use something that sprays. I made this:
That blue oval was a UFO, and I don't even remember how I colored it, but it was quite a while ago. I stamped that Tim Holtz image on it last week, then put it back into the UFO pile to languish a little longer. For the VSN challenge, all I did was spray the oval with pearlized water (it's shiny now), stamp the background on the Kraft card base, add the ribbon and stick on the oval. Since it was a UFO (and already done), this was like a 20 minute card. And that UFO is GONE! :D
So that's part of what I created, each one in under 45 minutes, and it was so much fun. I'll alert you to the next VSN so you can play, too. Heck, you could even hostess a challenge of your own!
Thanks for stopping by!
Wednesday, September 26, 2012
Tuesday, September 25, 2012
SOS #70 - Furry or Feathered Friends
Happy Tuesday, and welcome to another challenge at Shopping Our Stash. This week our theme is Furry or Feathered Friends. We ask you to make a card that features any furry or feathered friend(s), which could be any animal, bird, or animal/bird print paper. No insects or spideys, though, no matter how much fur they have, got that?! (ew)
For my card I chose a furry, huggie bear:
I think I deserve some kind of award for the experience I had making this card. First: the papers. All the papers are from A Taylored Expressions kit that I opened for the SOS challenge #7 waaay back in July of 2011. It may or may not have still been out, since I have nowhere to put kits, as I don't usually buy them. The patterned papers, ribbon, brown layer, button and red layer under the circle are all from the kit.
The bear is my furry friend, And now for the sad, sad story. The bear is from a Paper Smooches set, and it has (had) an accompanying "Bear Hugs" sentiment. I pulled out the sentiment when I took out the bear, then whilst in the throes of coloring the bear, my hand brushed against the sentiment and I heard the sound of something hitting ... something. I froze. I looked down.
Now remember, I have a standing desk, and it's angled (things slide off all the time). I also have white carpet. This was a small clear stamp. I also store all my not-used-yet-so-I-can't-put-it-away bags and boxes of stuff at the foot of my standing desk. Let's just call it what it is: an abyss. I sat down and felt around. Nothing. I started emptying bags and boxes. Nothing. It is gone.
So for this card I had to pull out the Hugs sentiment from another set. I also had to put the bear set away sans Bear Hugs sentiment. I haz a sad. :(
Will I change my ways? Nope. I shall adapt, though. From now on I will always stick my stamps to a block when I take them out of the package. I will not lose another one! Let this be a lesson to us all.
Alrighty, then. Now it's your turn. Go into your stash and find a furry or feathered friend (remember, no insects or spideys). Then make a card, and link us up over at Shopping Our Stash so we can see what you've made!
Thanks for stopping by!
Sunday, September 23, 2012
Just Call Me A Scrap Wrangler
Last night my VSN high kept me up waaaay past my bed time, and while chatting with a few tweeps, I ended up watching the OWH Scrap Wrangler video. The admittedly fake Western accent bothers some people, but if you get past it (it's kinda cute, I think), she has some great ideas for managing our s-crap.
She goes way beyond what I'm willing to do, since I make cards for more than OWH, so a lot of her pre-cut ideas won't work for me 100%. However, she's right in that you don't need anything bigger than a 1/4 size of background papers. And you don't need to keep anything that's not a rectangle.
Note: She has a Donate Pile and a Recycle Pile. I only had the Recycle Pile, but that's me.
Since I was totally stamped out from yesterday, I devoted today to wrangling my scraps. I took some really bad Before and After pictures, but I think you'll get the idea.
Here is my Before box of solid scraps:
That's a large box from The Container Store. It has paper in there from the beginning of time, I think. I know I discovered colors SU hasn't carried in 5+ years or more.
Here's the top view, so you can see what I deal with when I say, "Hmm, I wonder if I have a scrap this color ..." :
Mmmm-hmmm. You can see why I usually give up and cut into another piece of card stock.
Just because I can, here's the back of the box:
It wasn't until I started to unload it that I found what I was looking for last week, and the week before ...
I took out my paper trimmer, set up a huge recycle bag, and got to work. I started at the back of the big scrap box, pulling out green card stock. I cut it into 1/4 sheets and piled them up by color. Anything smaller got recycled. I have so much of the stuff, that if I need a piece for layering, I'll cut into another 1/4 sheet - I'm okay with that.
Then I moved on to the next color, until I was done. I'm telling you, I found colors I can no longer identify.
Sandy (from OWH) said we should toss anything that's a color we're pretty sure we'll never use.Well, since I have so much Basic Grey paper, I thought I'd keep the older colors (and the pinks and the purples), just in case I need a layer. Hey, it's already paid for, right?
I actually tackled the colors separately from the neutrals, including whites and creams, and I stored them separately. I know how I operate, and white is the first thing I look for, and then it's black or brown to layer it.
Here is the After of the scraps. First, the empty box:
It's now a table to hold the other stuff. :D Yes, I am very proud.
Here's the Whites and Neutrals:
Since I like to use the same white for the sentiment that I use for the base, it's important to me to keep them sorted. I have SU Whisper White and Very Vanilla up front, followed by Naturals White, a huge pile of Naturals Cream I forgot I had, a pile of PTI white (that I'm using now for bases, so I need the scraps for sentiments), and in the back I have "specialty" papers, which right now are pieces of Bazzill and the textured linen card bases from clearbags.com that I 'm using.
And here's what's left of the colored card stock:
That box is half as tall as the original. Yes, I'm very proud of this, too. I may stack up a few more storage boxes to raise that up to the same height as the other ones so I don't hurt myself looking for a card stock layer.
Next, I tackled The Heaplet. Here's The Heaplet Before:
I cut everything into 4.25x5.5 pieces, but I did save a few smaller pieces, especially with the double-sided papers. I ended up with 4 tidy piles:
Back right are the 4.25x5.5 pieces. Back left we have 6x6. Front right are smaller pieces I NEEDED to keep, and front left are what I call "specialty" papers like wood, wood grain, star sheets, and one or two pre-printed digital images.
So, will it stay like this? I hope so! My new MO going back into stamping mode will be (1) trim it and put it away, or (2) recycle it. That's my plan, anyway. Wish me luck!
Okay, I think I need some food, then I may do the last two VSN challenges I didn't get to yesterday. I'll be sure to share my creations with you as the week goes on. One or two of them have potential for OWH cards, even. :)
Thanks for stopping by!
She goes way beyond what I'm willing to do, since I make cards for more than OWH, so a lot of her pre-cut ideas won't work for me 100%. However, she's right in that you don't need anything bigger than a 1/4 size of background papers. And you don't need to keep anything that's not a rectangle.
Note: She has a Donate Pile and a Recycle Pile. I only had the Recycle Pile, but that's me.
Since I was totally stamped out from yesterday, I devoted today to wrangling my scraps. I took some really bad Before and After pictures, but I think you'll get the idea.
Here is my Before box of solid scraps:
That's a large box from The Container Store. It has paper in there from the beginning of time, I think. I know I discovered colors SU hasn't carried in 5+ years or more.
Here's the top view, so you can see what I deal with when I say, "Hmm, I wonder if I have a scrap this color ..." :
Mmmm-hmmm. You can see why I usually give up and cut into another piece of card stock.
Just because I can, here's the back of the box:
It wasn't until I started to unload it that I found what I was looking for last week, and the week before ...
I took out my paper trimmer, set up a huge recycle bag, and got to work. I started at the back of the big scrap box, pulling out green card stock. I cut it into 1/4 sheets and piled them up by color. Anything smaller got recycled. I have so much of the stuff, that if I need a piece for layering, I'll cut into another 1/4 sheet - I'm okay with that.
Then I moved on to the next color, until I was done. I'm telling you, I found colors I can no longer identify.
Sandy (from OWH) said we should toss anything that's a color we're pretty sure we'll never use.Well, since I have so much Basic Grey paper, I thought I'd keep the older colors (and the pinks and the purples), just in case I need a layer. Hey, it's already paid for, right?
I actually tackled the colors separately from the neutrals, including whites and creams, and I stored them separately. I know how I operate, and white is the first thing I look for, and then it's black or brown to layer it.
Here is the After of the scraps. First, the empty box:
It's now a table to hold the other stuff. :D Yes, I am very proud.
Here's the Whites and Neutrals:
Those are cardboard storage boxes from IKEA that proved too flimsy to hold my dies. And maybe too small, too. ;/ They are perfect for these scraps, though.
Since I like to use the same white for the sentiment that I use for the base, it's important to me to keep them sorted. I have SU Whisper White and Very Vanilla up front, followed by Naturals White, a huge pile of Naturals Cream I forgot I had, a pile of PTI white (that I'm using now for bases, so I need the scraps for sentiments), and in the back I have "specialty" papers, which right now are pieces of Bazzill and the textured linen card bases from clearbags.com that I 'm using.
And here's what's left of the colored card stock:
That box is half as tall as the original. Yes, I'm very proud of this, too. I may stack up a few more storage boxes to raise that up to the same height as the other ones so I don't hurt myself looking for a card stock layer.
Next, I tackled The Heaplet. Here's The Heaplet Before:
I cut everything into 4.25x5.5 pieces, but I did save a few smaller pieces, especially with the double-sided papers. I ended up with 4 tidy piles:
Back right are the 4.25x5.5 pieces. Back left we have 6x6. Front right are smaller pieces I NEEDED to keep, and front left are what I call "specialty" papers like wood, wood grain, star sheets, and one or two pre-printed digital images.
So, will it stay like this? I hope so! My new MO going back into stamping mode will be (1) trim it and put it away, or (2) recycle it. That's my plan, anyway. Wish me luck!
Okay, I think I need some food, then I may do the last two VSN challenges I didn't get to yesterday. I'll be sure to share my creations with you as the week goes on. One or two of them have potential for OWH cards, even. :)
Thanks for stopping by!
Saturday, September 22, 2012
More Washi Cards
I got distracted. I know, it happens all the time around here, so I don't know why I'm surprised. Actually, I'm not surprised. I should be working on my VSN challenge cards, but nooooo, I needed to make more cards using this easy-peasy sketch from Clean & Simple:
and this time with some more of my new washi tape. While shopping for cute Halloween paper at Mike's, I found a pack of patriotic washi tapes and I just had to have it. It came with three rolls: red strips, white with red & blue stars, and white. Remember how I just said I use the tapes as packaged the first time? I lied. How do you think white tape would look on a white card base? Not so good, unless you wanted the white-on-white look, which I didn't. So I swapped out the white for a navy blue. Better.
Then I decided the red stripe was too burgundy, so I grabbed another red to use instead. Can you believe I have no red & white striped washi?! How is this even possible?!?!
Okay, now that you've felt my color angst, here's the first card:
Isn't that tape perfect for OWH?
I made two of those, then I decided to make two more, this time with the red striped tape that came in the pack. And lo and behold: it's the perfect red after all:
I love it! You'll also notice I only stamped one sentiment this time, since last time they were so wonky. I should know better.
Also, see that heart at the top? The one dealing with all the white space? I made that. One of the tips we learned in class:
was to be inspired by shopping, but to use that inspiration and try to come up with something based on what you already have. I wanted a shiny star in the top left quadrant of my card, and planned to die-cut them and emboss them with silver or gold to make them shiny. Instead, I ended up with this heart:
I die-cut them, stuck them to a piece of scrap paper, covered them with Versamarker, and heat-embossed them with Platinum EP. It didn't cover very well, so I decided to add more EP. Um, this works when you're using a container and a spoon, but not when you're dumping it onto scrap paper and then dumping the excess back into the jar. What a mess. Times 4. But the hearts are cool, non?
Okay, I need to stop being distracted and go back to work on some VSN challenges.
Thanks for stopping by!
Washi Miss You
When I saw this week's sketch at Clean & Simple:
I knew exactly what needed to be done. You see, not too long ago Simon Says Stamp had a 25% Off sale on their washi tape, and, well, yes, I shopped. Even though I've sworn off buying more of what I already have too much of, some of the stuff on my Wish List (where I'd left it because I was strong), magically found its way to my shopping cart. Sigh.
Don't you agree that this sketch just screams washi?! So I broke out two new sets (3-packs) of washi to make a few cards for OWH. Like with any recipe, the first time I follow the directions, and then I make it my own on subsequent visits. So I used each 3-pack of washi tapes with their sistren for these cards. I made two of each.
Here's the first one:
I added a few punched hearts since they were on my desk, and because I have this fear of white space. And because on this particular card, there were unfortunate glue smears.
Here's the second card:
I mean - how easy is this?! Okay, I stamped the sentiment a little off, but still, not too shabby, huh?
In other news, it's time for the second round of VSN challenges over on Splitcoast. It's been a lot of fun so far, so please join us!
Thanks for stopping by!
Friday, September 21, 2012
Birthday Banners
Hello there, and Happy Friday! I am in the throes of VSN tonight over on Splitcoast, so of course I stamped a non-VSN card. I did. You see, we have 45 minutes to make each card, and I made one in 20 minutes, so I had time to kill.
One of the lessons we learned in our Kick Start class is to keep track of not just cards we want to CASE, but what it is specifically about the card that inspires us. This keeps us from truly copying the original (though I usually change my mind mid-creation and make it my own anyway), but it also lets us combine elements from different cards we liked into one new creation.
That said, I was reading The Paper Players challenge:
and I was tempted to CASE the card sample made by Dawn Easton - second card down, the white-on-white with bright colorful banners - but instead I wrote down "white-on-white" and "color". Then I remembered I had die-cut a bunch of banners/pennants out of some retired SU papers and not used them, so when I got home I made this:
All I did was use a neglected embossing folder on a 4x5.25 piece of the same paper as the base, then added the banners and a few pearls. In my world, this is CAS. I even let the embossed background stand in as the sentiment.
I'm also experimenting with something new: Inlinkz. The better to enable you. :D Please be patient with me while I work out the kinks.
Thanks for stopping by!
PS: Come play over at VSN! It's fun!
PPS: Aaaaaand, the collection over at Paper Players is closed. Of course.
Tuesday, September 18, 2012
Kick Start Day 1 Homework
Yes, my friends, I'm taking another online card class. This time it's called Kick Start, and we're getting tons of ideas about how other stampers organize their ideas and translate them to a card. So far I've managed to create work for myself, but it's all good! In the end, I should be better organized and hopefully have some go-to ideas for when I'm in a creative slump.
That said, I was inspired by one of Jennifer's cards in Monday's class to make a faux chipboard shape by just stacking up layers of card stock that you've die-cut. I've done this before, but apparently I forgot I knew it. That reminds me of a class I was teaching, where I asked The Ladies if they'd be insulted if I presented a technique they already knew. One of them replied, "Oh, you go right ahead. I'll bet I forgot I knew it and it will all seem new again." I love that. So, yeah, that's what happened here: it was new again!
Here's my card, then I'll explain:
Yes, I know the back-drop is poppy and the letters are pink and they clash, but the white-on-white was blinding me, and the card stock was handy. I need you to appreciate the letters. Here they are, up close and personal:
I cut several layers of vanilla, and a few layers of textured Melon Mambo. I even glued them together mostly straight, and used a ruler to align them before I glued them down. I KNOW! And I'm not even drunk.
There are two really sad things to note here. (1) I didn't pick something easy like a heart to cut multiples. Nope, I chose tiny letters. (2) I think I own Thickers in this color.
ANYway, I liked the look, and I even used two words from my Paper Smooches set that I normally would not have used ("You are" and "SO" - okay, that's three words, but two stamps. Work with me here ...), and I used one of the larger hearts in my Nestabilities sets I normally would not have used, so there's that. AND, I used a few inches of Washi tape.
In other news, in case I forgot to mention it here (sorry if I have), I'm hostessing a challenge for this weekend's Virtual Stamp Night (VSN) over on Splitcoast, and I'm up first -- 5:00 pm Friday. No pressure. BE THERE OR BE SQUARE! Come play!
Also, I just signed on as a hostess for one day of the Hope You Can Cling To (HYCCT) month-long challenge extravaganza, also at SCS. I'm on the 28th, but plan to play along all month.
Now if you'll excuse me, I have a few cards to make. :)
Thanks for stopping by!
Recipe
Stamps: Chit Chat (Paper Smooches)
Paper: Bazzill Avalanche, SU Melon Mambo, vanilla remnant
Ink: Memento black
Other: Nestabilities Classic Hearts, Corner Chomper, Washi tape, Memory Box Parker Lower Alphabet
SOS #69 - Embossing
Happy Tuesday, and welcome to a new challenge at Shopping Our Stash. This week we ask you to use embossing on your card or project. It can be heat embossing or dry embossing, or hey, go for the gusto and use both!
Here's my card, then I'll explain:
The fleurs-de-lis are a single stamp from Verve. What, you thought *I* lined those up?! HA! If you did, you didn't read the name of this blog. No, that's one stamp, and it's heat-embossed. I stamped it with Ranger Black Soot onto a piece of Basic Grey paper and embossed it with clear embossing powder. I like having the option of stamping in a color and clear-embossing. I may stop using all my hoarded colored embossing powders. *ahem*
I also used an embossing folder on the white panel, because I could, and I need to keep up with that whole over-achieving expectation. And in case you didn't notice, I snuck (sneaked) in a piece of washi tape for the vertical element. I may or may not have purchased more washi tape, so you could possibly be seeing more of it in the weeks and months to come. Let's call it paying the piper. Or dealing with my guilt.
I also used some ribbon, which makes 3 or 4 times in the past few days. Ribbon may be making a comeback, here, folks! It's all about using the stash, right?
The sentiment was stamped on a remnant of white, and the button is also from my stash.
Now it's your turn! Go into your stash and figure out how to use heat (wet) embossing, or dry embossing, or both, on your project; make your project; then go back to the Shopping Our Stash post and link us up so we can see what you've made!
Thanks for stopping by!
Recipe
Stamps: Bountiful Backgrounds (Verve ), Essential Messages (Hero Arts)
Ink: Ranger Distress Black Soot
Paper: PB&J (Basic Grey), Linen cards (clearbags.com), Basic Black (SU)
Other: Washi tape; SU Basic Black taffeta ribbon; Houndstooth embossing folder; clear embossing powder; misc button and twine
Sunday, September 16, 2012
You Are Appreciated
I love the Retro Sketches ... sketches, and I haven't played enough lately. I decided to play one before it expired *checks post cutoff* - dang, it ended Friday. Oh, well, let me start again.
Welcome to another episode of "missed it by thiiiis much", in which I finally get to doing a sketch even though it's past the posting deadline. It's still a great sketch, right? And it's not like I'd WIN. It's not about winning anyway; it's all about the challenge.
So here is last week's challenge:
I like the asymmetry, don't you?
I rummaged in The Heaplet and found a piece of patterned paper that I cut into two pieces, and I made two of these:
The layer is Always Artichoke, left over from my mini-marathon earlier today. And how long has it been since I've used grosgrain ribbon?! Speaking of SABLE. (look it up in the left side bar)
In real life, there are what I think would be Almost Amethyst stripes in that paper, and I did ponder for a moment digging in the cabinet and pulling some out, but I resisted. I think the Artichoke works best, here.
As an added bonus, I didn't even trim that paper. That's the width it was in The Heaplet. I just cut it shorter, and I have a teeny piece left over that I'm debating tossing or using. I know, what's wrong with me, right?!
In other news, I'm no longer a Stampin' Up Demo, so things are changing around here. On the blog, I'm linking to some of the supplies I use (to better enable you), and in The Captain's Quarters, I'm starting to take out the retired card stock colors from the bowels of the cabinet and I'm mixing them in with their brethren and sistren on my main card stock supply shelf. As things thin out, I may or may not replace them. I do love the SU card stock, and I have all the colors memorized, so I'll probably keep buying it. However, I did stock up on some Bazzill card stock, so you'll start seeing that in the mix here real soon. I'm working my way through my hoarded white card stocks from various companies, too, and I'll eventually decide which one I'll stick with.
That's it for now. I may leave the house and hit up the grocery for some eats. Food stuffs are getting pretty thin around here, and my tummy is growling. A girl's got to have some priorities, non?
Thanks for stopping by!
Love You x 2
Even though I've sworn off buying any new paper until I make a significant dent in the hoarded supplies I already have, I did succumb to the lure of ... mmmm, paper ... during one of my recent shopping therapy sessions. I only bought 2 or 3 sheets, which for me is showing incredible restraint.
Earlier today, as I wandered around in The Captain's Quarters, I spied a piece of the new aforementioned pretty paper and went in search of a sketch so I could use it. I still have the Artful Delight September Sketch out (well, it's in that pile that lives on my desk, but it had risen to the top):
and I made this:
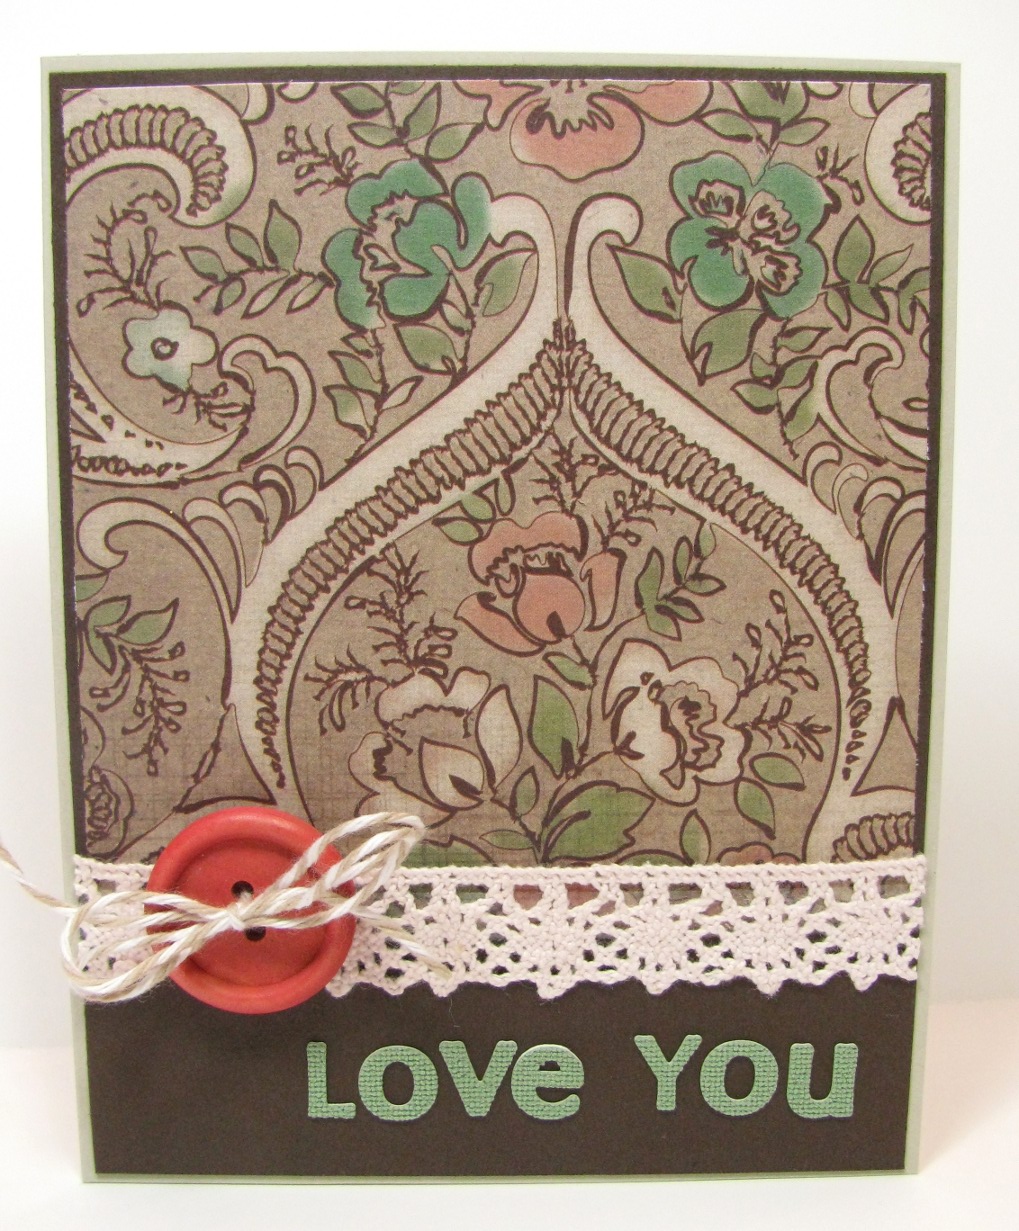
I used a lot of old and a lot of new here. The patterned paper is new, the sticker letters are new, the lace is sorta new, the button is old, and the card base is Sahara Sand - not my go-to-white I've been using lately. The button is a little off -- not green enough, but the greens I have weren't blue enough. Ah, a crafter's dilemma. Since I was into using up stash, I didn't bother making my own button this time.
However, I feel it's my duty to share with you that just because you have elements in the right color does not mean you should use them. I present Exhibit A:
Even though in real life those letters and button match better, I am not in like with this combination. It's just off. Blech.
I did manage to crank out another sketch challenge, so I'll get that posted next.
Thanks for stopping by!
Subscribe to:
Posts (Atom)