Showing posts with label Ribbon. Show all posts

Sunday, April 24, 2011

Okay, Okay, One More (But This One Is Different)

Back when I first started playing with ribbon wreaths, my pal MB, who had assured me I had the skillz to attempt this in the first place, was inspired by my meager efforts to make one of her own. Now remember, this woman HAS ribbon skillz, where I do not, unless you count tying a bow on a card. THAT I can do.

Here is her "I think I'll try this" result:

*thud* I KNOW! GOR-JUS! Seriously. Oh, and that's a 22" frame, where my first few attempts were 3". Uh-huh. See how nice and densely packed her ribbons are?

So I had this hair-brained idea that I could maybe make a dent in my boxes of Every Color Blue and Green Ribbons But The One I Need and USE THEM to make a door-sized wreath. Yeah, I thought that.

Here's the result of my labors:

Now let's talk about this. First, it's a 12" frame. I'm not THAT crazy to go up to 22". Second, it's already had two hair cuts. Third, those ribbons are naturally curled because of my "I must store all these ribbons on wooden clothes pins" project of several years ago. Yep, tightly wound, like their owner.

It still looks straggly, so I'm sure it needs some filling in, but right now my back hurts too much to think about it any more today.

As for those Every Color Blue and Green Ribbons But The One I Need, and why I even have them? Back in my neophyte crafty card-making days, I bought them because I thought they would inspire me to use them with the colors contained therein, or because they would certainly go with something, but alas, they go with nothing. This wreath is my attempt to use all the "goes with nothing" and "gah, what color is that green?" ribbons TOGETHER so now they go with each other. Here's a sampling from the top of the wreath:

Sadly, I have not made a very big dent in the Every Color Blue and Green Ribbons But The One I Need cache, though the size of the spools has diminished considerably. I only emptied 6 spools; the rest are just smaller. Sigh.

In other news, thanks for all the entries on my Blogiversary post. I'm working on a method to select the lucky winner. Hopefully later today I'll get a clue.

Thanks for stopping by!

Saturday, April 16, 2011

I Tried Something New

I left the house today. I did. It was pouring rain, so I went out. Actually, I went to see MaryBeth at a local craft show that I chose not to do, since it's not May yet, and I can't get my brain around doing a craft show before May. I just can't.

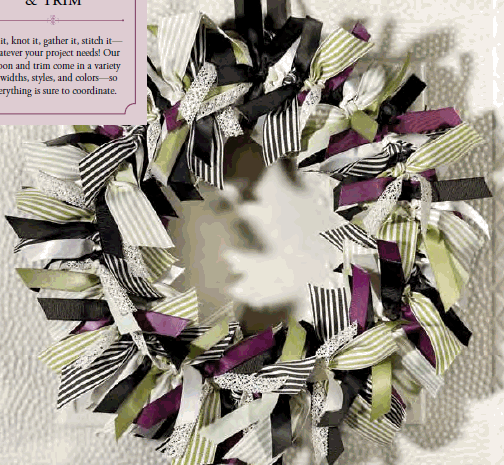
She does a lot of ribbon work, so I asked her how tough she thought it would be (for me, not her) to make something like this:

(from page 190 in the 2010-2011 Stampin' Up! Idea Book & Catalog) I have been in awe of this project since I first got my paws on the catalog. And ribbon? Hello! You've come to the right place. :) But how to begin?

First you need a circular something - like a ring. I stopped at every freaking store within 10 miles of here and found NOTHING. Zero. Zip. Here was my basic route:

You see, if I ever (EVER) leave the house to go somewhere that's not to work, I make darned sure to plan my day in a circle. So in that squiggle above, my house is the black X at the bottom. Moving to the right was the path I took today.

My first stop was the top right, to see MaryBeth and the craft show. Every. last. stinkin'. other. black. x. is a stop I made, IN VAIN, to find something, ANYTHING, that passed for a metal ring. I'm talking craft stores, dollar stores, hardware stores. NOTHING!

Oh, that tiny blue line? By the time I left the hardware store, I stopped in at Chipotle, which was only 20 paces from my car, to get a salad to go. Then I came home and ate it.

Dejected, I went searching for knowledge on the Interwebz. First, I found some metal rings online for not too much moolah, so I ordered a few to try them out. Then I found this video on YouTube to get a clue about how to make the actual wreath. She used a way different ring than I plan to use, but I was no longer completely clueless, so I started to play.

I started with my much-neglected circle cutter, and cut 3 circles from some scrap cardboard at about 3", and again at about 3.5" so I ended up with three cardboard rings that I then glued together for a practice ring. I pulled out some of my 1249563 miles of ribbon and went to work.

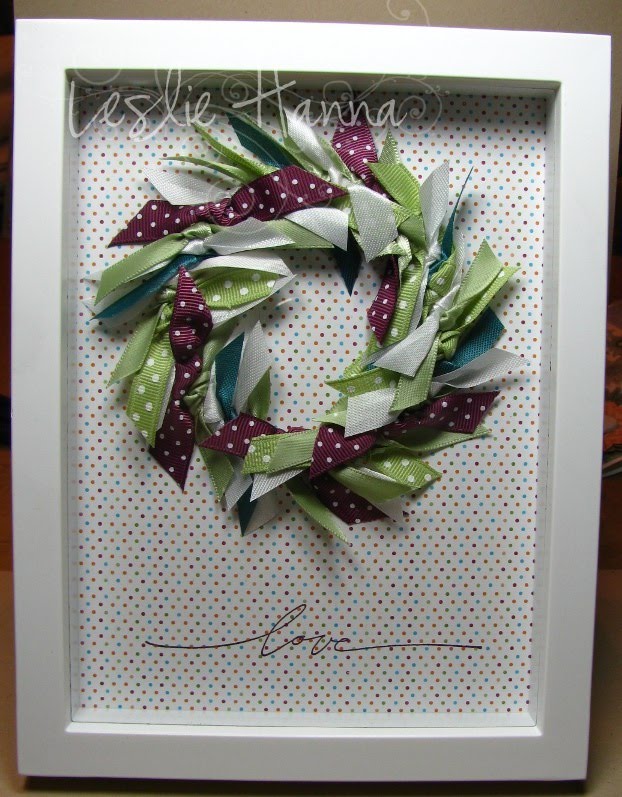
This is not as easy as it looks. I cut, I tied, and I tied some more. Then I trimmed and trimmed some more. Finally, it looked passable, and I made this:

My first attempt. Not too bad. I have some other ideas up my sleeve, too, but this was one of them. What do you think?

Gotta keep trying new things, right? :)

Thanks for stopping by!

Sunday, October 5, 2008

Sunday, Installment #4 (and Last!)

Way back in September, I stumbled upon this challenge over at Julee's blog, one of my lurking spots. ;-) It was a variation of a one-sheet-wonder, where we were to take a 6x6 piece of double-sided paper, cut it according to her instructions, and make four cards based on her provided sketches. It sounded easy enough, so here I am five weeks later, finally getting to them.

I chose to use the SU Juntos Designer Series paper, which is available in the Spanish supplement. I fell in love with the colors, so I had to have it, and this challenge would give me a chance to actually open the package. Some of you fellow hoarders know what I mean.

I cut a 6x6 piece of one of the sheets, did some initial layering, then set the materials to one side, where it all got promptly buried. Now that I am working on using stuff on the table, I have worked my way back down to the partially-constructed cards, and I made myself finish them today.

The good thing about being so very late with the challenge is I have no need to actually follow it to the letter, so I took a few liberties. Plus, you will notice, I used no ribbon! Yes, it almost killed me, and I think the cards are boring without it, but I did it all the same. Looking back, I think they could actually use some ribbon, but I think I'll just call them all done right now!

So here's the layout for the 6x6 cutting instructions:

Here's the card sketches:


And here's what I came up with:


Eh, probably not my favorites, but it was fun to stretch myself out of my usual rut. Speaking of which, I have already selected some paper to use for my next project later this week. Time permitting, of course.

I see I have managed to whittle away an entire day stamping and doing laundry. Time to call it a night and get rested up for the commute to the Day Job in the morning. Thanks for stopping by!

Tuesday, June 3, 2008

Careful What You Ask For ...

Be careful what you ask for! Famous last words, right? Many posts ago I offerred up a different kind of challenge where I'd send you a piece of ribbon and you'd have to use it and post back here what you did with it.

Well, about that same time, HeatherP over at RibbonsAndInk was offering up the exact same challenge! So we swapped ribbon and went to work. This is what she made with my ribbon. Pretty cool, huh?
This is the ribbon I received from her:

It is blue and the edges are sparkly. It actually goes irridescent when you move it around. Very cool, but also very challenging to actually USE. But that is the whole point, is it not?

When I first opened the envelope, my thought was to somehow make this into a flower, so I did this. I found I was incapable of holding all eight pieces of ribbon at one time, so I ended up skewering the individual folded petals on my paper piercer. Word of caution, just in case you might try to do this same skewering technique: the easiest way to get the buggers off the skewer is to first put a 1/2-punched circle of card stock on the skewer, then the ribbon, so you'll have something to grab onto to slide the stack off the skewer. Got that? Good!

The petals are held together with a Build-A-Brad, on which I stuck an image from a PSX alphabet set inked in Brilliant Blue.

I did originally have this on a card, but it went South very fast. I added and added, then took away and took away, and ended up with just this flower and lots of sad scraps in my trash. Ach, it was too fat to mail, anyway! Bah! Moving on ...

... I made the same flower but with flat petals instead. Not sure I like it, but I have plenty left to play with. ;-)

The edges of the card are inked with balled-up plastic wrap tapped in some Brilliant Blue ink. The image under the flower is from SU's Baroque Motifs.


So then I got a query from one of my beloved two (maybe three) readers, and she wanted to ... send me some ribbon! Ack! Like I need more ribbon!!! But we collectors never have enough, do we? So I took her challenge, and yesterday I received this:

Lots of possibilities, here! I'll have to think on it, along with the other stuff, and I'll get back with you when I become enlightened. Hey, Sunday I made baby cards, so you just never know when it will hit me. ;-)

Oh, and let us not forget this baby:

This was handed to me by HeatherS as we rummaged through our free Grab Bags of ribbon after our trek to the Ribbon Outlet. She challenged me to use it on a card. See, I have not forgotten! I ... um ... er ... maybe do not know exactly where in The Other Room this little thing of ribbon might be hiding ..... I am sure I will stumble across it one of these days. :-)

Well, the rain is a-comin' down, so I think I'll shut down the laptop and go play with my stamps and ink. I can do that by candle-light, if need be. ; -)