Showing posts with label Thanksgiving Marathon. Show all posts

Sunday, November 28, 2010

Thanksgiving Marathon, Part Twelve (and LAST!)

One more! This is what I made with those distressed panels and ribbon roses:

No, you are not lost. This is The Crooked Stamper blog. I just took a sideways step for a moment. I usually use this sentiment for guys and put it on fun, colorful DSP, but as soon as I decided to use black with the distressed vanilla, ergo vintage-y and old-looking, I knew the sentiment needed to be used here. In black.

The die is a Tim Holtz die I bought in a weak moment. I was probably still under some Jennifer McGuire spell after her class or something. It's a Movers & Shapers die, but I don't have any of the moving parts.

I sponged the sentiment panel with Crumb Cake, then sponged Basic Grey around the edges so it didn't blend into the background. I punched a hole on the left side of the sentiment panel and tied the ribbon through it. The sentiment panel is popped up on Dimensionals, and the ribbon rose is stuck on with a few glue dots.

This was pretty easy to put together, and it is certainly different than most of my stuff.

When I finish the last 3 of this card, I will have made 48 cards during this 4-day weekend, and most of them today. Yeah, I was a slug there for a few days.

Thus ends the weekend marathon. Thanks for sticking with me. If you have just arrived and your InBox is stuffed - sorry. ;( You are probably safe until next Thanksgiving. I don't think I could do this again any time soon.

Thanks for stopping by!

Thanksgiving Marathon, Part Eleven (1 more card)

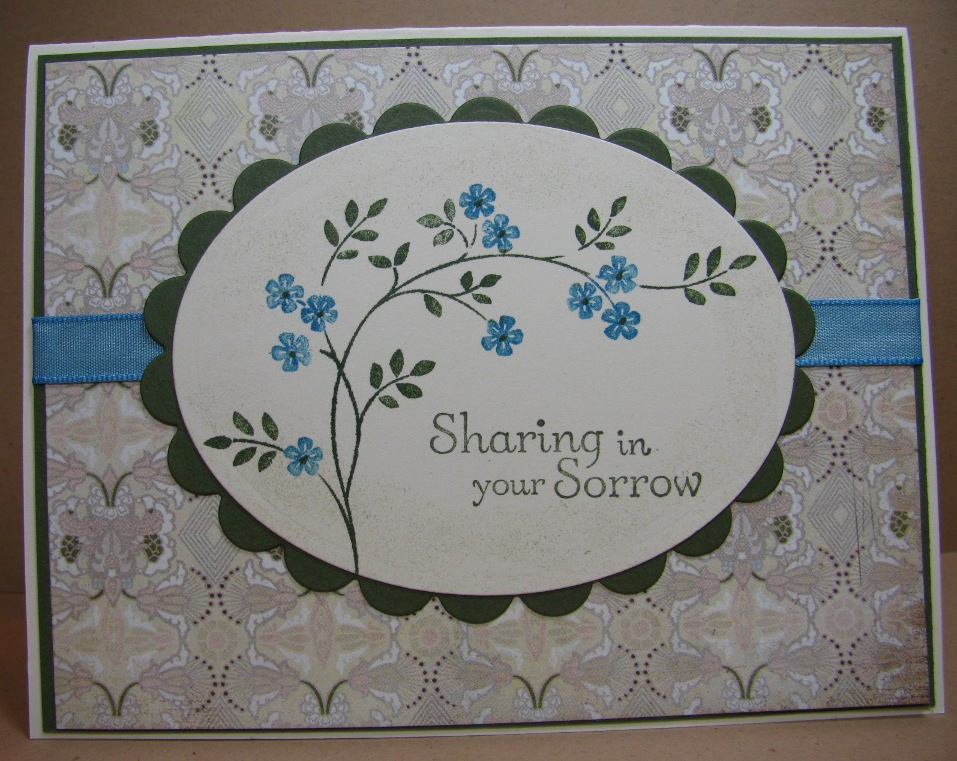
One more sympathy card design - done! This was largely CASEd from this card on SCS. Here's mine:

I was attracted by her pairing of Marina Mist with Pear Pizzazz. I started out in that direction, but once I picked up my Basic Grey cappella paper pack (out on the table ... no surprise there), I knew I'd be using Artichoke instead. I still went with the Marina Mist, just to see how it would look.

I also turned my oval 90 degrees from hers, and my Marina ribbon is taffeta, not satin. And no paper piercing under the sentiment. And it's horizontal instead of vertical. And no seed beads in the flower centers. But other than that, it is exactly like hers!

After it was all assembled and photographed (such as it is), I decided it needed Crumb Cake ink sponged around the edges of the oval, so I did:

See?

(Gratuitous close-up.) I made 4 of these, which brings my weekend total to 46. FORTY-SIX! Okay, I'm going for 50.

In other news, lookie what I made this afternoon:

A twisted ribbon rose. One of my alert Tweeps - Lisa, aka: PaperGrace *, sent me this video link, and I had to try it. So easy! I also wanted to try the "Crumb Cake ink on the embossing folder" technique, which I did here:

You can see I made a few more roses, too. This is my On Deck project. My first reaction was to pair it with Red, but that has been done to death. Also, I'm a rebel, and if everyone else is using red, I'm just going to have to use something else. Just before I started typing this post, I figured out my evil plan. These will be birthday cards, but maybe not what you might expect. heh heh

I must now go work on said evil plan. I might even finish these tonight!

Thanks for stopping by!

* PaperGrace. She is such a sweetie-head! She read my tutorial on how to make the folded paper wreath, and she made some! Check it out here and leave her some comment love. :)

Thanksgiving Marathon, Part Ten (2 more cards)

I am pleased to report I have two more card designs done. This first one was again dictated by the available supplies. I have several pieces of this paper in my "to be put away" section of the Heaplet (yes, it has sections):


... and I decided I needed to use it with the Spring Chicken sentiment. My only disappointment was not having one Nestie in my vast collection that fit that sentiment. I KNOW! HOW can this be?!?!?! So I decided to go with this one and add some bling in the white space. I made three of these, all a little different, depending on where that sassy bird was on the paper.

This next one is a sympathy card:


If it's possible to have a "go to" sympathy card, this would be mine. All sorts of people buy it - men, women, teens. It's a great one when you don't want anything too flowery or sappy. It can also be used for someone going through a rough time. Just a good all-around card.

The stamps are from Endless Creations, and are several years old. The words are all one stamp (like *I* could get them that straight) and the square images are all separate. You may not recognize those colors. They are the original In Colors from 2007 - Vintage Violet, Marigold Morning, Cranberry Crisp, True Thyme and Buckeroo Blue. I still have some hoarded card stock, and I am using it sparingly. One day I will be forced to come up with another color combination, but I'm pretty sure it won't beat this one. Oh, I made 4 of these.

That's 7 more cards for next weekend! Whoot! I have another sympathy set in the queue, and THEN I'll get to those now-neglected Hambo stamps. They must be very sad by now.

Thanks for stopping by!

Thanksgiving Marathon, Part Nine (CRS)

It all started innocently enough. I was putting away some stamps (I KNOW!) and even though I had other plans, I spotted the stamps I use for my CRS cards, realized I had sold out of those also, and decided to make some right then and there!

The good news, other than the cards being done and added to my inventory for next weekend, is I would make a decent dent in my Heaplet and scrap remnant piles. I had a half-piece of 12x12 paper and another whole one underneath it that became candidates. There is no science to how many I decide to make when I get in these moods - it's all about the supplies. The supplies dictate the level of work. I got three layering pieces out of the half-sheet and 6 from the whole sheet = 9, so I was making 9 cards. So I stamped 9 of each of the images on vanilla card stock.

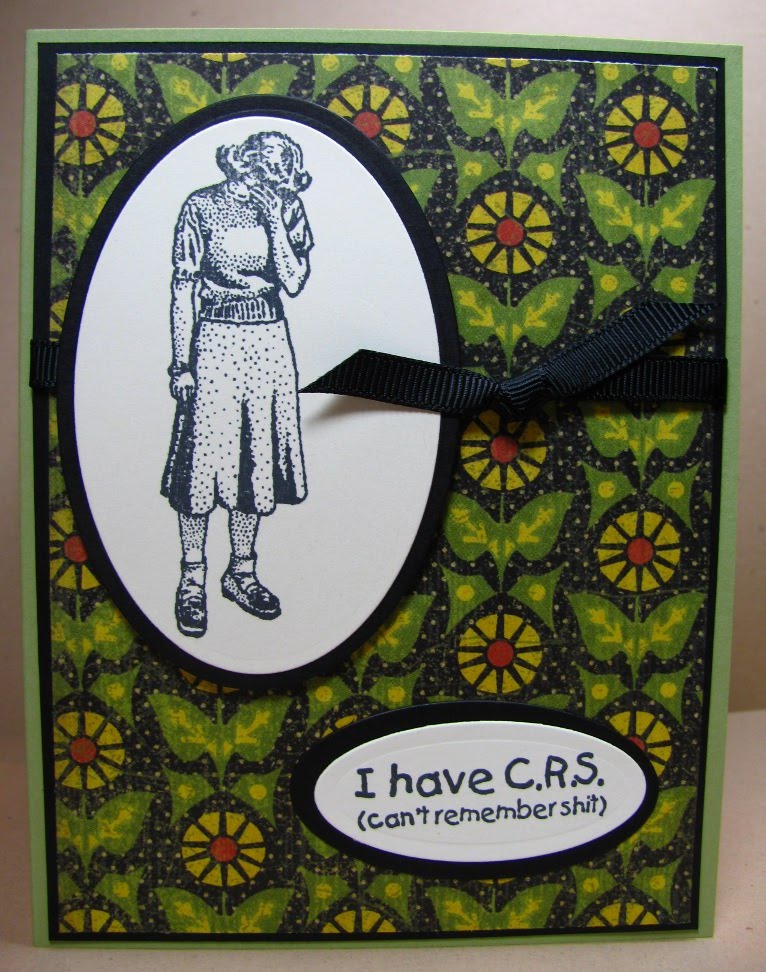
This is what I made, so the rest of this will make sense:

Making one card out of left-over pieces is one thing, but making 9 involves a lot of cutting. Yeah, I use a die-cutting machine, but I still have to select the dies that fit (more on that in a sec), and crank that baby once for each piece I cut. You can see there are 4 pieces that are die-cut, times 9 cards = 36 cranks of the Big Shot. (Ow, my back.) I also cut 9 black layers and 9 bases (regular paper cutter for those). Here are all the parts-is-parts when I stopped to rest:

I find with mass-production, it's easier to do things in stages and save the final assembly for last. Another thing I find (and I tell my Stamp Camp Customers all the time) is it's easier to assemble all the parts first, then assemble the card. I cannot tell you how many times I've attached a layer to a card base and forgotten to wrap the ribbon first.

So the first thing I did was stick the layers together for each of the pieces:

All the vanilla pieces got stuck to their black layers, and the DSP got stuck to their black layers. Nothing is stuck to the card bases yet.

The next thing I did was cut the ribbons, wrap and tie around the DSP layers, then I stuck that down to the card base:

You'll notice I left the ribbons untrimmed. My Momma didn't raise any fools. That came in handy later.

At this point I stuck the lady's image to the card front using Dimensionals, and the sentiment to the bottom of the card front. THEN I trimmed the ribbon.

If you look closely at this one, you can see how the lady's image layers are real close to that knot in the ribbon:

On a few of the cards, I tied the knot too far to the left, and the layers didn't fit. I had to un-tie the knot and move it over a little. This would have been tough with already-trimmed ribbon ends. I know me, and I know I'll mess up at some point, so I like to leave these final trimmings for the end of the process.

Another option, which I also do on occasion, is to go ahead and wrap the ribbon and stick the layer to the card base, but wait until I've placed the other pieces before I tie the knot. Depends on my mood, and the phase of the moon, and if I remember.

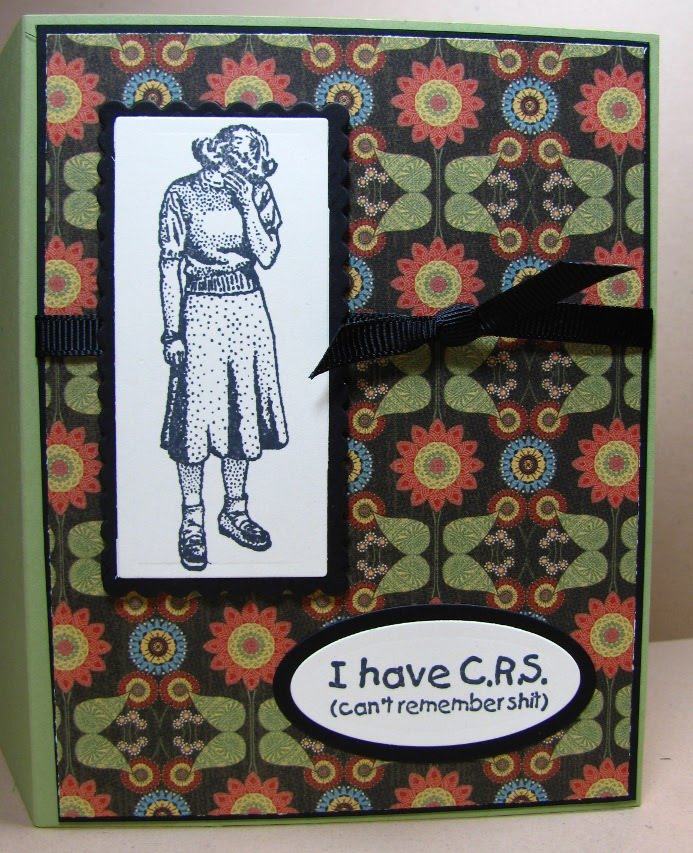
Here's the other color DSP I used:

By the way, the patterned papers are Graphic 45 (LOVE!) and the stamps are from River City Rubber Works. The card base is SU Pear Pizzazz.

Oh, and two of the ladies came out as rectangles:

This might even qualify for a SYFY entry. When I stamped the images, I left enough space (or so I thought) between them for whatever die I chose to use. I was pretty sure I'd use the Nestie Petite Ovals since they are skinnier than the regular ovals, but I misjudged with my stamp placement, and one of the images on each piece was too close to the edge for the die to fit. Being too lazy to stamp them again on another piece of card stock, I made an executive decision that these two would be cut using the Long Rectangles instead. Done.

I also used a BUNCH of black remnants to cut the layers, so between that and having disappeared 1.5 sheets of DSP from the Heaplet, this is a win-win day! And all before noon! Whoot!

Okay, those babies are bagged and tagged and ready for next weekend. I think I need some lunch, then I'll get to work on the Hambo stamps on my table.

Thanks for stopping by!

Thanksgiving Marathon, Part Eight (Some Cods)

I've decided that a 4-day weekend is a bad thing for people who work well under pressure. I've been a slug most of the weekend, but I am on a roll today, people, and it's day 4 of 4. Sigh.

As I started to clean up and put away my Christmas crafty supplies and stamps, I ran across my Cod sentiments that I'd left out to remind me to make some more. I can't seem to keep these in stock ... a huge number of people have friends and relatives in Boston or Maine. ;)

I made 5 of these:


And 3 of these:


I used a white souffle pen on the white parts of the hat to give it a little dimension. I actually prefer liquid applique, but even though it gets pouffy when it's heated, it flattens out in the envelope and loses most of its effect. I could have used Flower Soft, but I would have had to get up to get the glue. Pthth.

I also finished 4 more of these:

... and put away all the supplies when I was done. PLUS, I printed and stamped 40+ City Cards which I will color this week in phases. It will save my stiff neck, for sure.

I have a pile of Hambo stamps on my table that need some inky love before I put them away. Irreverence coming right up!

Thanks for stopping by!

Saturday, November 27, 2010

Thanksgiving Marathon, Part Seven (A CARD!)

I know, I know. I said I wouldn't make any more holiday cards, but these folded trees were in the UFO pile and they were bothering me. I could not understand why mine didn't look like these, and I just chalked it up to "no mojo" and abandoned the whole thing. Pthth.

Until tonight. I was determined to make it work. With encouragement from one of my tweeps who told me she had to trim the bottom of the tree to make it look not so lop-sided, I bring you tonight's card:


... and what I hope will be my last holiday card for this season. I added red glitter-pen dots to the tree to help it blend with the other red, and I added glue dots under the folds to stick it down, which maybe wasn't such a great idea. I clipped off the tines/legs of the brad and stuck it to the tree with a couple of glue dots.

Boring? Maybe. Off my table? YES!

I really, really, really want to make something irreverent. Maybe it will come to me in a dream. I have all day tomorrow, right? :/

Thanks for stopping by!

Thanksgiving Marathon, Part Six (A Tutorial)

Because I still have no mojo, and because someone asked, and because I cannot find the video I watched to learn this myself, I shall now show you how I made my paper wreath.

Here is the finished one so you can see where we're headed:

First step: cut 8 pieces of 3" x 1.5" paper:

Working with one piece at a time, do the following:

Fold it in half:

... then fold it in half again:

(That other piece of paper is just for perspective. It was not meant to confuse you. Sorry if it did.)

Next, with the open edge at the top, fold down one corner like this:

... then do the other one:

You have folded one of the pieces:

(Ignore those scissors. You don't need no stinkin' scissors to make this.)

Do the other 7 pieces the same way:

This is a nice, monotonous task. Good for occupying your hands while watching TV or ... whatever.

Time to start the assembly process. Take two of your folded pieces:

Notice those open edges:

You will use these. Remember these. Now hold one of the folded pieces in one hand, then holding the second folded piece in the other hand, put the two pointed ends of piece 2 into the openings of piece 1 (the openings I showed you with those handsome arrows):

Don't you just hate it when someone does a tutorial and they do the "this is really easy" part and you don't get it? And it doesn't look easy? That's why I took another angle of this to see if it's any clearer:

See the pointy ends of piece 2 (on the right) sticking into the openings in the top of piece 1 (on the left)?

Once you get that part, you are home free. This is how the first two pieces look pushed together:

Don't worry about that "pushed together" comment. All will become clear once you start adding pieces. Just add the next piece's pointy ends into the open ends of the previous piece. (Keep it G, people.) Here is my third piece done:

Keep going until you have 6 of your 8 pieces nested. Then I like to put # 7 & 8 together separately:

Then put that onto the other 6. You can try it one at a time - whatever works for you. Here it is with 8 pieces - almost done!

The last step is to put the pointed end of piece 1 into the opening of piece 8:

Ta-da! Here is your finished wreath:

You might needs to move the pieces around a little to make it even.

Want to see what it looks like with 10 pieces? Here I've placed the 8-piece wreath on the grid paper so you can see the size of it. I have two more nested pieces waiting in the wings:

I just pulled the wreath apart at one section and added these two others to get ... a 10-piece wreath:

... and for giggles, I did one with 12:

So there you have it! Easy-peasy, right?

If you still have any questions, please let me know!

Now I think I'll go make some more Holiday cards (the ones I said I wouldn't make any more for this year) and see if I can salvage my last failed attempt and get rid of some UFOs. Wish me luck!

And thanks for stopping by!

Friday, November 26, 2010

Thanksgiving Marathon, Part Four(th)

For my next trick, I told The Ladies we'd make a version of this in December's Stamp Camp:

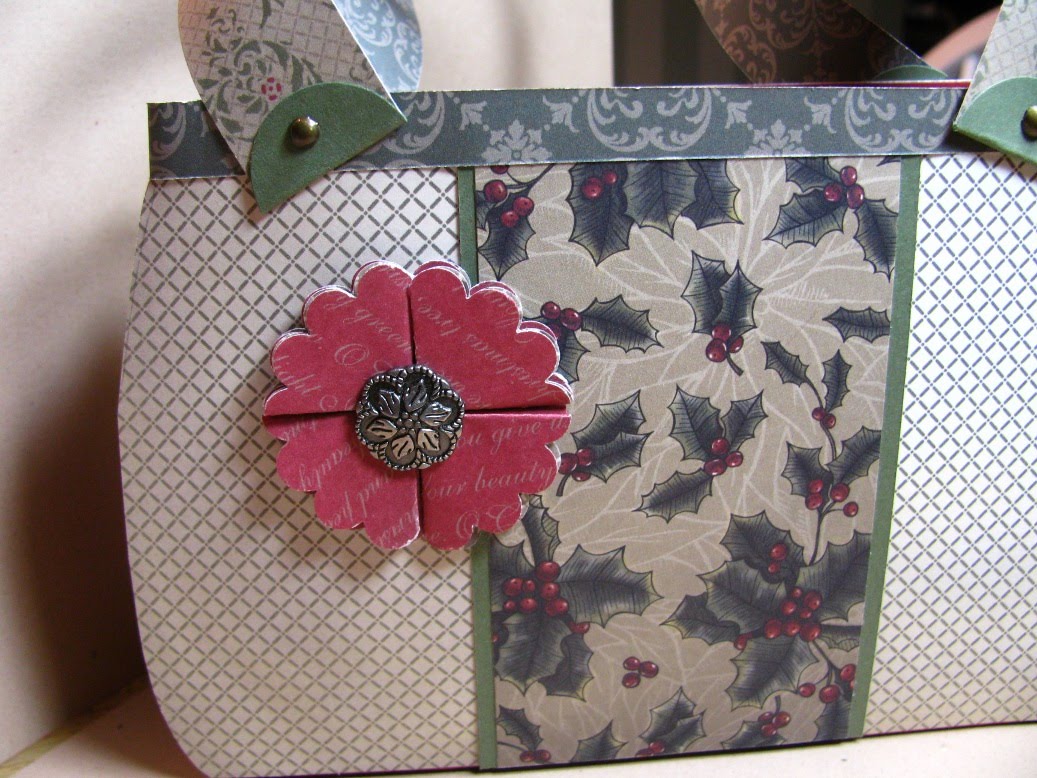
The "purse" will hold 4-6 cards & envelopes. It's made with SU card stock, but all the DSP and bling is Heidi Grace from many years ago. Totally illegal in an SU class. Last month one of my customers brought a purse she'd purchased at a craft show that was made with the SU Deck the Halls vintage-y papers, and it was beautiful! It reminded me of these. It used a base very similar to the one I'd made, but the "shape" was stuck onto the front and back to make it more purse-like. Everyone ooooh'd and aaaaah'd over it, and then looked at me with pleading eyes, and I said Yes, fine, okay. There was joy in Muddville.

For my Stamp Camps, I decided I wouldn't go for the whole "purse" look (no patience for that, plus The Ladies have to be able to make it in under 30 minutes) - I just wanted it to be "not square". This is what I came up with:

Before I got to this point, I tried many different things, a few of which I'll show you here. First, the bling-less version:

Boooooring. It needed something, but I wasn't sure what. I kicked around a few ideas with some of my Tweeps, and decided it needed a red flower. I tried this one:

It's 3 scallop circles, fan-folded and stuck together. It's totally crooked, and it was a little too much work. Believe it or not, I do think about my experience and what The Ladies will endure when I make up this stuff. Keeping in mind they would also need to make the purse, I decided this flower wasn't going to happen.

Next up was this one:

Not nearly as dimensional as the first one, but sooooo easy to make. SOLD!

Here's the whole purse again:

... and that beeeeautiful flower, up close and personal:

And because I cannot post anything without at least one out-of-focus photo, this is the side view that shows how the box is covered by the front and back shaped panels:

Yeah, my head is swimming from the out-of-focus, too.

I may go back and add some more stuff to it, like maybe a piece of lace tied to one of the handles. Maybe.

You may notice I still haven't made any Birthday or irreverent cards this weekend. Yeah, I'm running a little behind. I need to kick-start my mojo, or something. I'm attending the AVAM BAZAART show tomorrow, so maybe all that funky stuff will wake up some of my brain cells.

Thanks for stopping by!

ETA: HAHAHAHAHAHA! OMG, total FAIL! The whole reason I wanted to make this purse was because the sample my customer showed everyone had a pocket on the outside that would be perfect for a gift card. Do you see a pocket on this purse?! Nooooooo, you do not! Did I purchase the die for the sole purpose of making this purse with a pocket on the front?! Yes, I did. Ergo, FAIL, FAIL, FAIL! I shall try again tomorrow. Sigh.

Thanksgiving Marathon, Part Second

Yes, Part Second. Last night I woke up to the reality that I'd failed to get this baby rolling and posted Part First a little late.

I addition to needing a bazillion birthday and irreverent cards for my show next weekend, I also have my December Stamp Camps the weekend after that, so, you see, I really REALLY do need to get my rear in gear this weekend.

This morning I wanted to try this idea from Mary Fish for one of my Stamp Camp projects. I told The Ladies that we'd probably do packaging or last-minute things they could make with materials they already have. I also expedite the December order so if they feel the need to shop based on the Stamp Camp's projects, I am here to enable. It's what I do.

So here is my version of Mary Fish's project:


I liked them without the ribbon, but I like it with, too. I couldn't believe I hadn't even opened my Poppy ribbon yet! I KNOW! I just loooove the Poppy color, and what's not to love about this twill?

You can see a Hershey's Nugget fits perfectly inside one of these tiny boxes:

Wouldn't these be fun to put at place settings, or on co-workers' desks? So easy, too, except that one part of the punch that seems to stay stuck - right at the top where you can see it's not smooth. If anyone has a hint as to why this is, or what can be done to fix it, I'm listening.

I'm not sure who enables who(m) with these things. Do Demos figure out what products perfectly fit the candy on hand? Do candy-makers "inspire" punch- and die-makers to make the perfect tools for us? It's a conspiracy, no matter which way you slice it. All I know is I must have extra chocolate on hand for these projects, because some candy will disappear during the process. "Mistakes", you know. ;)

In other news, I got a clue about some of the UFOs on my table. I did this with those folded paper wreaths I made the other day:

I'm not sure if I'll sell these or just give them away. It could also be another project to use up my retired Christmas papers. Hmmm ....

I also realized all was not lost with the embossed snowflake cards. I can't stamp on the embossed surface, but I can stick something to it! So I salvaged my crookedly-stamped sentiments from other pieces of paper by punching them out, layering them with blue and making these:


I am still not in love with them, so I call it quits with the snowflakes already. I know when I'm beat(en).

I hope to actually make some birthday and irreverent cards today in between loads of laundry. Yes, my life is so very glamorous. I also plan to have a turkey + cranberry sandwich for lunch, washed down by a mini pumpkin pie. I love leftovers!

I'll be back later with more schtuff! Thanks for stopping by!