Saturday, February 12, 2011

Cheaper Than Therapy

As most of you know by now, I'm not a chocolate fan. I'm actually one of the few people on this planet that would take Key Lime Pie, or Carrot Cake, or heck - just plain sheet cake over a piece of chocolate cake. I mean, I like it and all, but it's just not my go-to comfort food. Now Circus Peanuts? That's a totally different story.

Because of this genetic defect, making chocolate-themed cards is tough for me because I don't feel the passion. However, since the rest of the world does feel the passion, these things sell like hot-cakes, so (being a good bizness-woman), I make them.

Now this guy is SUCH a cutie-patootie, I had to have him:

And yes, I agree: Chocolate is cheaper than therapy. And if all it takes is chocolate to make you happy, then by all means GO FOR IT! I still maintain I bought this tiny set for the cute doctor.

As an added bonus, I used almost all that remained of that piece of DSP by making 4 of these, and I also disappeared a piece or two of my hoarded Creamy Caramel card stock. (yay, me!)

In other news, today is "moving boxes and finding room for two tables and cutting card stock for kits" day, as tomorrow I have two full classes. I shall be very, very busy, but if I get done early (hahahahahaha!) I hope to find some time to make a few more cards before lights out.

Thanks for stopping by!

Friday, February 11, 2011

Jingle Belles Rock - Week 7

It's time for another Jingle Belles Rock challenge. This week I had a H U G E surprise when I saw the guest artist is none other than the VERY talented Lisa of Paper Grace Designs. She rocks, and she has the fussy gene, and she's promised to help me find my inner fussy gene, and we're gonna have a Skype cross-country real-time-y crafty session one of these days. (That's secretly part of the reason I felt compelled to clean The Captain's Table last night.)

So ANYway, Miss Lisa's challenge is to make a Christmas card with NO RED, so the name of the challenge is "No RED, she said". So clever. So. very. clever.

In my world, you don't see a lot of red, and I happen to be a big fan of non-traditional colors for ANY holiday, so this was FUN. Oh, yes, "no red" - no problem. Fortunately, I was still allowed to use green. Green, as most of you know, rocks MY world.

So without further ado, I present ... my card:

Look familiar? I made one sorta like it last December, and I've cleaned out my hard drive, or I'd link you. The patterned paper is from one of my many remaining Basic Grey Figgy Pudding packs. The 12x12 stuff. Sigh. The stamp is Hero Arts, as is the sentiment - I risked it all and used an SU marker to ink only the two words on the sentiment. Risk? It's a clear stamp, and I never know if those will take dye inks. I got lucky this time!

Note: The "merry christmas" words are at the bottom of the sentiment, so the top of the stamp and block hit the pearls. Next time stamp first, then add the pearls.

Speaking of which, I embossed the wreath with some old old old old old SU EP from back when we sold it in stacks of 4. This is the Olive color. I tried some Stampendous green, but it was the wrong green for this paper. The pearls ... are not red. They are from a pastel pack I have from Recollections (moment of silence...). You can still find some Recollections stuff at Mike's, by the way.

The green layer under the Figgy Pudding paper is Artichoke, and the card base is Sahara Sand. The ribbon ... I cut two slits in the card with my craft knife and tied it through the wreath. It's not going anywhere.

So there you have it - my card for JBR #7 - No Red, she said. If you haven't played yet, time's a-wastin'! You have until Wednesday to post your card each week. Come on over and join us - we're having a blast!

Thanks for stopping by!

Wednesday, February 9, 2011

A Card, A Mess, and Another Card

Tonight something terrible happened. The Captain's Table reached critical mass. It actually happened two nights ago, but I am just now able to speak of it. Last night on the way home from work, I stopped at Target to get (1) a lamp to replace the one on my headboard that has died, and (2) baskets or SOMEthing to help me organize the crap crafty parts on The Captain's Table.

You crafty types may not be too alarmed by the reveal I will do in a moment, but for any non-crafty types out there: this is our world. It is not pretty, but boy is it FUN! Well, until it reaches critical mass, or someone loses an eye.

But before we get to that, let me show you card #4 of 4 for this weekend's Stamp Camps:

It's from an SU kit. IT IS! I decided I'd use a kit card and show The Ladies how stinkin' EASY this is. The card comes with that border and swirly bit already on it. All you do is add the flowers and a sentiment. The flowers are included, the sentiment is not, but there is a two-stamp sentiment set right next to the card kit in the catalog, so you just get both and you are home free. The kit comes with 8 cards and envelopes, and 24 of those ribbon flowers.

The colors are Baja Breeze and Old Olive, so if you want to further embellish the card it's easy to do with all the SU matchy-matchy items. I chose to just leave it as is, and I stamped the sentiment in Soft Suede. Why Soft Suede? Because Old Olive didn't work too well. Look:

If you want your sentiment to blend in with the swirly thing, go right ahead - Old Olive is perfect. I wanted it to stand out a little more, so I went with Soft Suede. (Did you notice how I took that boo-boo card and used it as a lesson of what NOT to do?)

Okay, are you ready for The Captain's Table reveal? Here we go!

Before:

Yes, things were actually hanging over the edge. This was really bad.

On the right:

This is a heap of a mix of sketch printouts, UFOs, and left-over DSP and card stock. There used to be a heap of ribbon behind it, but I took care of that last night.

Center back:

This is a gold mine of everything I need and use all the time, plus a lot of stuff I don't. It's just a really convenient spot to toss things. Or pile things up, in this case.

Center front:

We saw this the other night. Still not sticky, but yeah, it's time.

Left side:

A stack of clear stamps in various stages of use. And my corner rounder (see - still out).

Left back:

This is my box of still-homeless supplies. I still have no idea what to do with them. One day this box will get its own blog post. You can also see a box of tape and my heat gun.

Then it happened. I cleaned. Here is my After:

Not too dramatic, but boy, what a difference! Let's take a closer look.

Right side:

From back to front:

That 3-drawer thing is what I picked up at the store last night. The bottom drawer holds the scrap ribbon pile. The middle drawer holds true UFOs - die-cut pieces that didn't make it to a card, layered pieces that didn't make it to a card, etc. The top drawer holds some stray buttons, a few rub-ons left over from a BG kit, etc.

And yes, that is a stack of papers on top of the new 3-drawer thing. It's all that remains of the heap of papers and I do plan to use them first. No. matter. what.

In front of the drawer thing are two piles. Small piles. On the right are 1/4 pieces of card stock, mostly neutrals. On the left are true projects-in-progress and a few card fronts that could maybe be salvaged and made into full cards.

In front-front is a pile of 1/2 pieces of card stock, mostly white pre-scored pieces. I have them within reach now.

Center:

From right to left:

Standing up next to the drawer unit are the notes I include with my Etsy orders, a color wheel, a card from Libby, and the technique book I made in a Claudine Hellmuth class.

To the left of my tape dispenser are a few stamps I have out that I haven't used yet and I WANT to use them before I put them away.

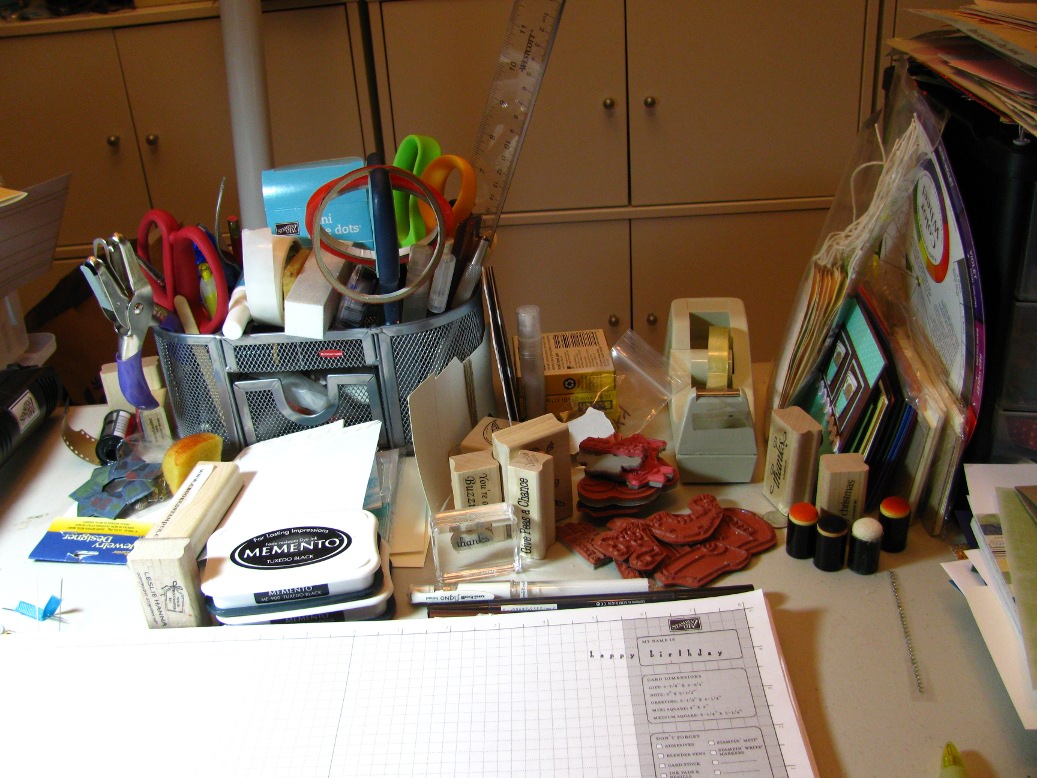
My black and brown Memento inks are front and center where they belong, along with my black and brown Memento markers and my white gel pen.

The left side:

Not too much difference here, but it IS better. I turned that mystery box sideways so there's more room for the heat gun. And yes, that corner rounder is still out.

I was SO excited by this cleaning accomplishment that I had to stamp. This is Tiff's Sunday Sketch #6:

She says to be inspired by the sketch, and we can change it up if we want to. This is a good thing since all I remembered was the swirly part and not the sentiment placement part. I might just have to make another one later, but for now, this is my take on her sketch:

See? I thought I'd do the swirl and make it grass. I stamped every stinking one of those trees crooked, too. And I stamped the fawn over the grass so he has no feet. I could say he is floating in a cloud, or I could fix that, or I could start over again.

Anyway, that was my evening, and I think I might need to go to bed now. All that cleaning. Sigh.

For my next trick, I might {gasp} clean the cutting stations - paper cutter, Big Shot, Scor-Pal, etc. Well, I might.

Thanks for stopping by!

Sunday, February 6, 2011

Pennant Birthdays

When I was a young thing, I liked Math. A lot. I took advanced Math classes and after-school math classes, and yes, I was a nerd. So even though, much to the embarrassment of my now-grown children, I can no longer add three numbers without a calculator, I still do NOTICE numbers. And patterns. And interesting things like just now when I went to create this post, I had 1,111 posts. Yes, this one is 1,112, but I didn't notice the number until it was cool, and 1,110 is not cool, where 1,111 is cool. Whatever.

Tonight I had plans to rescue a piece of paper from the UFO pile and make birthday cards. Yes, tonight. Why, was there something going on tonight I should know about? Football on TV? Really? Hmmm, oh, well.

So yeah, I was in the craft room and dug a piece of 12x12 paper out of the UFO pile. This piece of paper had four distinct 6x6 sections. Two were little rows of lines that reminded me of candles, and the other two were solid colors - one purple and one pink. I smelled "birthday".

You can kinda see the papers in this totally poor shot of the stamp set I used:

I wanted to use that pennant stamp, so I stamped it many times on both the pink and the purple pieces until I had enough pennants for two "happy birthday"s in each color. Did you now there are 13 letters in "happy birthday"?

After I stamped the letters in each pennant, I started to cut them out, and GAH! It was a fussy-cutting nightmare. What I am about to show you is real. Please do not adjust your monitor. My purpose in life is to expose the ugly, soft, messy underbelly that is the crafting table.

Here is a set of pink pennants cut out with the pieces still attached to each other:


And this is a close-up of the fussy-cutting:

This was the first of four sets to cut. I got lazy and did the rest of them like this:

Side note about that messy crafting spot ... I do change my grid paper, but usually only under two conditions:
(1) It is sticky with adhesive or has paint or pigment ink on it. That will destroy any card placed on top of it, so it has to go.
(2) It is so stamped over I can no longer see the grid lines.
Other than that, why waste good paper? I save the sheets from my Stamp Camps and use them in here. They look much better before I start working with them. This one is weeks old, but still not ready to toss. The end.

Wanna see what I did with all those GAH little pieces? Here you go:


Yeah, I need to adjust those pink pennants a little, but other than that, I think they came out just fine.

Remember that Math I mentioned earlier? Remember I said I stamped enough pennants for four cards? Remember how I said this piece of paper had 2 pieces with these lines on them? Why yes, I have two sets of pennants left over, all cut out and nowhere to go. Sigh.

In other news, I won an award! I did! One of my tweeps, @IamthePeachy1, posted her Super Blog Bowl Sunday MVP awards, and I got a mention in the Crafty section. Isn't it grand? -->

You should totally check out her Wednesday "Joke From My Daddy" posts. Hysterical, as is the rest of her blog.

And please check out my Crafty Pay It Forward post from earlier today. It should be fun!

Thanks for stopping by!

Crafty Pay It Forward

One of my tweeps asked if I'd like to participate in a Pay It Forward thing that's going around in BlogLand, so I said YES! (You can visit her blog by clicking here, then select BLOG from her menu.)

Here's the deal:

I promise to make a handcrafted item in 2011 & mail to the FIRST 5 people who comment that they would like to join in, only asking in return that you post this on your blog and offer 5 people something you make by hand and mail to them this year.

Sounds easy enough. The bestest part is I get THE WHOLE YEAR to make something. That's, like, forever, right? In my world it is. You watch, it will be Dec 30th and I'll be scrambling. :/

So if you'd like to play, just comment and let me know!

I hope to be back later with something crafty to show you. Right now I'm shopping for irreverence at Viva Las Vegas Stamps. :)

Thanks for stopping by!

Saturday, February 5, 2011

Not A Quitter

Hi. Me, again. Lookie what I just made:

It's based on this sketch from Limelight Papercrafts:

This is Sketch 66: Red Embellishments, but I wasn't entering their contest, so it's okay I didn't use any red. Plus, I forgot.

Let's look at that baby again:


1. I used a Melon Mambo layer in a fervent attempt to use up more of that very large stack of it I have.
2. I don't like chocolate - I really could live quite happily for the rest of my life without ever eating it again - but most everyone else on the planet likes chocolate, so I caved and bought this set.
3. I had the cupcake punch, but didn't NEED the stamp set. I was just going to punch out pretty papers, but then I wouldn't have those cool lines on the cupcake paper. So I got the set.
4. I have seen several methods to align your stamps on the acrylic block so they punch out properly, but the easiest I've found is to punch the whole thing from a piece of colored (not white or vanilla) card stock and put it under your acrylic block to use as a template. I eyeballed the stamp placement from above, then went back and flipped the template over onto the placed stamps to make sure it was lined up.
4a. I'll do a post with pictures, maybe tomorrow.
5. #4 showed me I should not attempt to align the candle stamp along with the cupcake parts. I stamped the candle separately and punched them out. If you need more than one of them, it's just easier that way, anyway.
5a. The candle and flame are very tiny and futzy. Be warned. But they ARE cute.
6. I was going to add some sprinkles on the icing with my white gel pen, but I forgot. :(
7. I colored all the stamps with markers. I did.
8. The dotted paper is from a SAB selection. Get it. It's yummy and bright.
9. No ribbon gave its life in the making of this card.

Sigh. I think I might be done. Yes, I am definitely done, for this evening, anyway.

Thanks for stopping by!

Sketchy (last) Sunday TG005

I'm squeaking under the wire, here, with Tiff's Sketchy Sunday challenge from last Sunday:

I finally got to it because I have no projects made for my Stamp Camps next weekend, and I thought this one would be a fun layout to showcase the new SU Springtime Vintage DSP from the Occasions Mini Catalog. There's green & blue in the papers - hello! Here's what I made:

I know the picture is way crooked, and I'm sorry, but I really didn't feel like getting up to take another one. But what about those papers, huh?! The two narrow strips are opposite sides of the same paper. I also broke out my new (to me) Blossom Party die (from the big IB&C) to cut the papers for the flower, then I added a small Rosette, available in the Occasions mini. The sentiment is from Just Believe, and is stamped with Not Quite Navy ink.

I'm pretty happy with how it turned out. I'm not happy about having to prep these kits for next weekend. To save paper, I cut small pieces for the flowers and ran them all through the Big Shot at one time. It's gonna be a loooong night next Saturday. ;/

Off to stamp some more. Thanks for stopping by!

Friday, February 4, 2011

Aliens?

Yes, I know it's crooked. You expected less?

While hunting for my camel stamp the other night, I re-discovered this sentiment, and, well, it needed to meet ink. Here's what I made with it:

I laughed so hard when I saw it, and I cannot believe I haven't used it yet! The alien/monsta is from MFT; the paper is Basic Grey Hopscotch; the brads are from a past SU Mini*; and the sentiment? I'm really bad about these. I think it's from Viva Las Vegas Stamps. I keep all my un-mounted stamps together, and they aren't marked with a copyright anywhere. (Life's tough all over.)

By the way, Viva Las Vegas Stamps is having their annual Super Bowl Sale, and since this is SB 45, you'll get 45% off your stamp order this weekend. When you're finished shopping, just View Cart and enter SuperStamp as your Coupon Code. Applies to all your Rubber, Grab Bags and Miracle Tape purchases! Sale does not apply to Bargain Basement or Other Goodies. I get a lot of my irreverent sentiments there. Caution: There is a risque section, so step carefully.

I have paper cut for 3 more of these, and then I'll move on to cards for next weekend's Stamp Camps. So far I have zero made. ;/

Thanks for stopping by!

* Those brads. Yes, I know the paper is sticking up. I failed to adequately secure it, and I was too lazy to take another picture. I'll take care of it tomorrow. Sigh.

Jingle Belles Rock - Week 6

Week 6 for The Jingle Belles! Whoot! This week's challenge is Baby, It's Cold Outside, in which we are challenged to use "scarves, mittens, hats, ear muffs ... or some fuzzy warm felt (or perhaps all of the above if you are so inclined)."

Here's mine:

Okay, I simply must tell you how very, very proud I am that this card came out exactly like I had it in my noggin. Scarves, mittens, hats, ear muffs, felt ... I thought I'd take one of my cute Kim Hughes Christmas Critters* and put ear muffs on him! But when I pulled out the largely un-mounted set and spied the moose, I knew what had to be done.

I stamped two moose, and whilst cutting them out, I ... almost decapitated one of them. Thinking back to my Stamp Camp with the Woodland Creatures card and the almost-decapitated deer, I added a scarf to hide the almost-wound. I also got out my Fun Flock and flocked up his antlers until they were good and fuzzy! Then, for extra credit bonus points, did you notice the paper has a row of mittens?!?!?

AAAAAAAAAAAAAAAAND, this paper was still sitting at my feet, still not put away, and I used about 1/3 of it (baby steps). AND, the polka dotted piece is the flip side of the base DSP that was left post-trimming, so I am using remnants people, and not leaving any evidence behind! Double-whoot! AND, the Cherry Cobbler layers are cut from a piece of card stock I'd used as a mock-up for a box we made in November, so it is gone from the Healplet. Man, at this rate, I won't have ANY paper left by Spring.**

So there you have it - my entry for this week's challenge. Now if you'll exqueeze me, I have a VERY irreverent stamp that needs to meet some paper.

Thanks for stopping by!

* Not the name of the set, but I forget the name of the set, but it IS from Kim Hughes. And people, this set is old. Real old. It is not die-cut, so I had to find my rubber-cutting scissors.
** No paper left by Spring? HAHAHAHAHHAHAHAHAHAHAHHAHAHHA, I crack myself up. We have SABLE, people, SABLE. (Look it up in the Secret Decoder Ring in my left side-bar.)

Thursday, February 3, 2011

Happy Hump Day!

Happy Hump Day! I KNOW today is Thursday, but YESTERDAY was Wednesday, and Wednesday is Hump Day, and I thought up this card yesterday, so Happy Hump Day! Pftftf.


I have had this camel stamp for a few years and I don't think I've ever used it. Actually, I have several camel stamps I've never used. Why do I have them? What's your point?

The papers I used are from a pack of travel-themed papers I bought and have never used. I bought them only because they were (are) blue & green, one of my favoritest color combinations. The vertical strip is embossed (came that way, don't be too impressed) and shiny, and I generated the sentiment on my computer - the font is a 2peas font.

So THAT took me hours to make. Hmph.

In other news, I moved 7 chairs out of my kitchen so I could cook dinner tonight, and as I started to take things out of the fridge, I noticed this on the counter:

GROSS! Well, it was a small glass bowl with bacon juice from Sunday, but I don't think bacon juice evaporates. What *I* think is the cat figured out a way to use the stacked chairs to get up onto the counter and have a little schnack. Look - more evidence:

I see tongue prints. The little sneak.

I made 40-clove garlic chicken, and it was soooooo good. I added some wine, and when I took the bottle out of the fridge (a bottle of wine will last me months, people) I remembered this little stopper I'd used:

(hee hee) I got it in Florida one year. It makes me laugh.

Not much else going on here. This coming weekend I get to make up all 4 of the 4 projects for NEXT weekend's Stamp Camps, so I should have some crafty stuff to share with you.

Thanks for stopping by!