
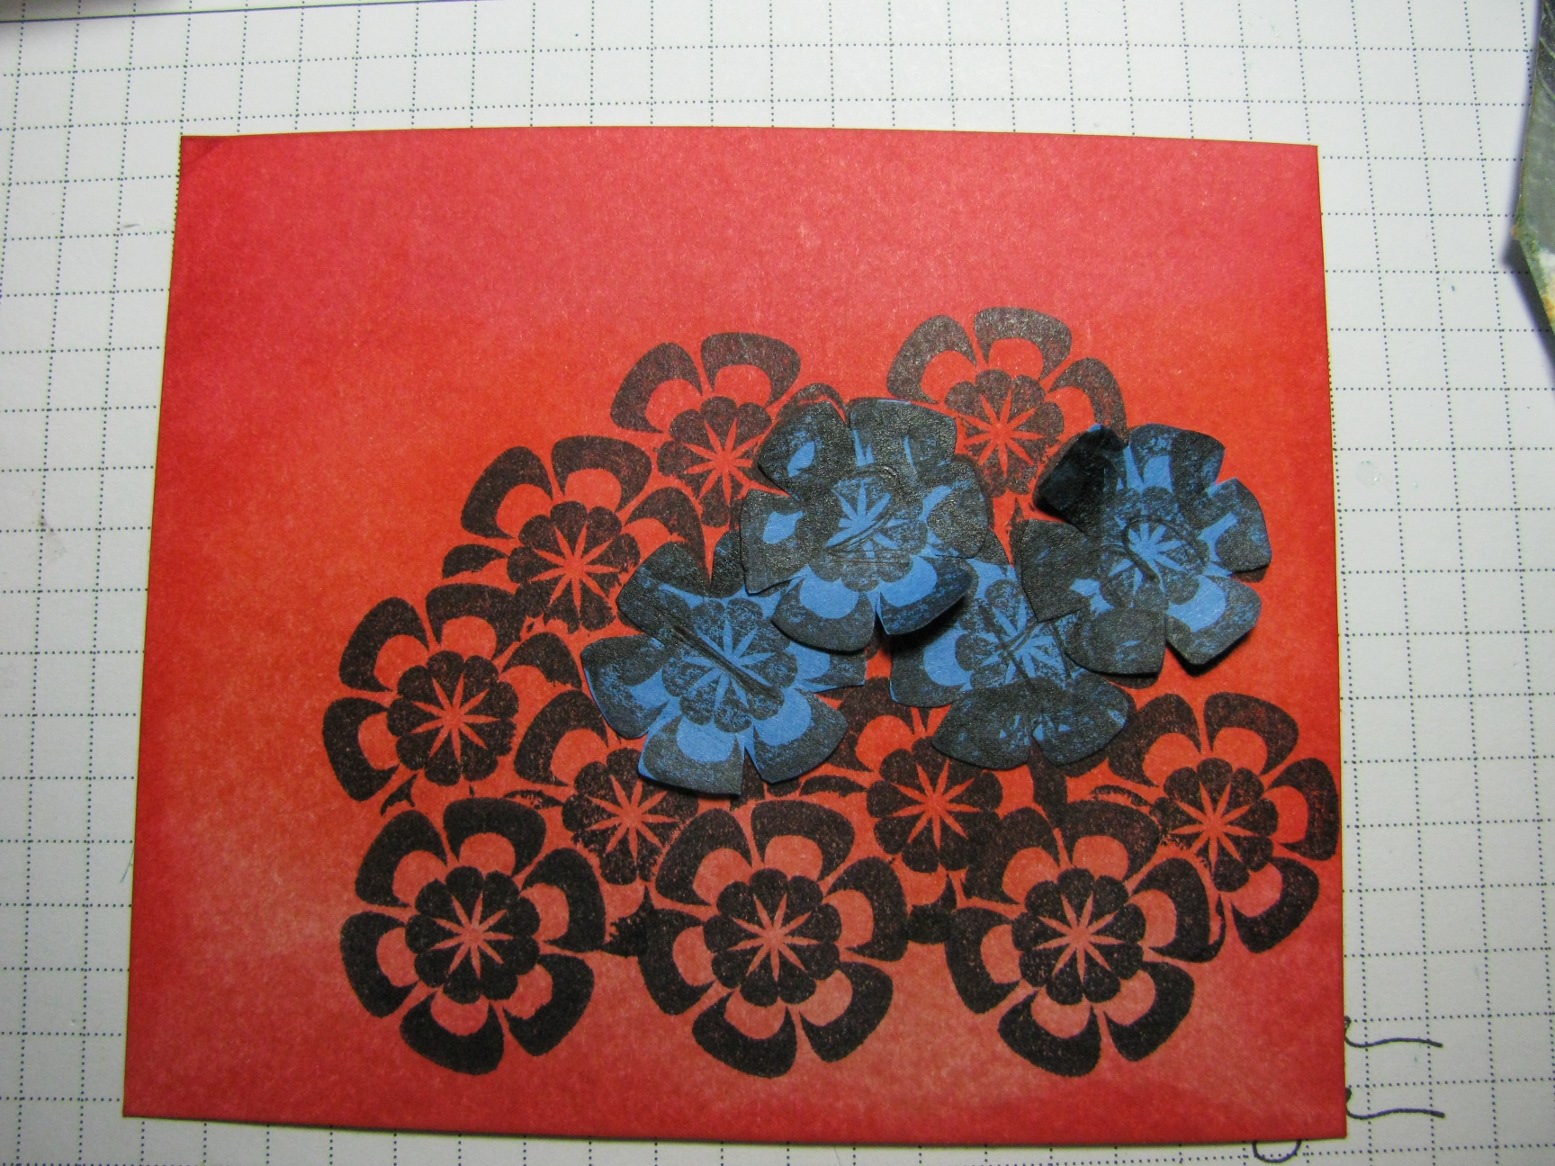
So, I decided to do another masked card, then show you - step by step - how crazy-easy this is. First, my card:

I followed this Sweet Sunday Sketch, largely because it had a rectangle:


Sentiment. Why did I choose this one? Because it was skinny. The fact that it's irreverent is just a bonus. :)
Oh, the button. It was very red, and I thought it was too much with the colored flower piece, so I punched a 3/4" circle from the same What's Up paper I'd used for the background and stuck it into the center of the button. During the threading of the twine, you may have heard me mutter "what was I thinking". In the end, I like how it came out, though.
Okay, ready for some step-by-step photos of the masking? If not, say bye! Otherwise, let us begin.
First, I stamped the flower four times onto a post-it:

Next I cut out my masks and colored my background:


Moving on.
Next I stamped the first row of flowers:


... and you have your second row. The top row was stamped over the masks, so that part didn't hit your card stock. This will give the illusion that the top row of flowers is behind the first row. You'll see that once I start moving the masks around.
Now, do you see how you need to mask the top flowers in order to stamp any more? I moved the bottom mask up and added mask #4:

then I started stamping the third row of flowers:

In order to stamp any more on the right, I needed to move a mask back over the bottom right flower:

Then I just moved the masks up and kept going:


Seriously, this took all of 5 minutes to do once I'd started stamping. It really is that easy. Now, if you were doing a street scene or something with several different images, I'd suggest you sketch that out first so you have a clue and then take your time, but with a repeated image like this, 5 minutes. 10 minutes if you're nervous.
And, not to be forgotten, our used-and-abused masks:

Then it was just a matter of figuring out the rest of the card (here it is again):
So there you have it. And if you are still here, THANK YOU! Please let me know if you've never tried masking before and this tutorial encouraged you to give it a try. I'd like to hear what you think. No, really, I would!
Thanks for stopping by!
Thanks for the tutorial, it does look pretty easy but I am lousy at cutting out things. I think I have done it successfully once or twice. I think your card is wonderful and the paper in the center of the button was a great idea. I will tuck that one away for later.
ReplyDeletegreat tutotrial!!! I have always loved this technique...it really is easy but always looks sooo difficult!
ReplyDeleteI've done it, but I think it might qualify as a mainly forgotten technique - certainly stamping multiples to make a group! I love the snarky sentiment...it's up there with my 'it's 5 o'clock somewhere' motto :)
ReplyDeleteL, you rocked this! Thanks for sharing the step-by-step. I haven't masked in a L O N G time. Your photos came out great and your close up pic is terrific. Fab ideas in one post: vellum for a layer (you are so smart!), pearls vs. gel pen, and partially covering the button.
ReplyDeleteYour tutorial was Most Helpful. Thank U so very much.
ReplyDeleteHave never done the masking technique, but seeing how easy it is I just may give it a try.
Thank U once again for taking the time showing us the step by step instructions.
ColleenB.
love it. especially the pearls! I'm always scared to mask, but it definitely ups a card's "ooh la la"-factor IMO.
ReplyDeletelove the BG paper too. damned wantmonster.
thank you for the tutorial, it is very detailed. It does seem very easy when you explain it step by step. However, I wouldn't NEVER get a nerve... NEVER!
ReplyDelete:-)
Love the effect of the masking and that's a great idea marking your distress pads that way. :-)
ReplyDeleteThis is AWESOME-SAUCE!!! What a beautimous card, Leslie! You are on a roll! Love the masking. You make it look sooooo easy. You are a pro. :)
ReplyDelete